Safely removing your fuel filter is paramount, requiring careful attention to depressurizing the system and handling flammable fuel. This guide provides essential, step-by-step instructions to quickly and securely replace your fuel filter, minimizing risk and ensuring proper vehicle operation. Learn the precise techniques for an efficient and successful DIY maintenance task.
Learn how to remove fuel filter quickly and safely
Hey there, fellow DIYer! Ever wondered about tackling some car maintenance yourself? Learning how to remove a fuel filter might seem a bit daunting at first, but honestly, it’s a pretty manageable job if you approach it with the right knowledge and a bit of caution. Think of me as your buddy, guiding you through it. I’ve done this a few times, and I’m here to share what I’ve learned so you can do it safely and efficiently, without any nasty surprises.
It’s all about preparation and taking things one step at a time. The goal here isn’t just to get the job done, but to get it done right and, most importantly, safely. Fuel systems need respect because, well, fuel is flammable! So, let’s dive into how you can confidently remove your fuel filter.
So, how exactly do you remove a fuel filter safely and efficiently?
Okay, let’s get into the nitty-gritty of how to remove a fuel filter. This isn’t a race; it’s a careful procedure. Before you even touch a wrench, safety is your absolute priority. Trust me, a little preparation goes a long way.
First, the Safety Gear and Prep:
- Safety Glasses and Gloves: Fuel can splash, and it’s not good for your eyes or skin. Always wear protection.
- Fire Extinguisher: Keep one handy. It’s better to have it and not need it.
- Ventilation: Work in a well-ventilated area, preferably outdoors. Fuel fumes are no joke.
- Relieve Fuel Pressure: This is critical! Modern cars have pressurized fuel systems. To do this, you might need to locate the fuel pump fuse or relay (check your owner’s manual), pull it out, and then try to start the car. It’ll crank a bit and then die as the pressure drops. This step prevents a fuel geyser when you disconnect lines. Once it dies, put the fuse/relay back.
- Disconnect Battery: Always disconnect the negative battery terminal. This prevents any accidental sparks.
- Gather Your Tools: You’ll typically need wrenches (often metric), a drain pan for spilled fuel, rags, and possibly special fuel line disconnect tools (especially for newer vehicles with quick-disconnect fittings). Knowing your car’s make and model will help you find the right tools.
Locating and Removing the Fuel Filter:
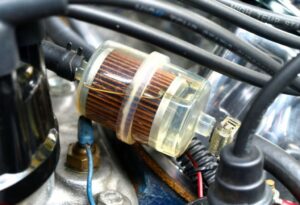
The location of your fuel filter can vary. It might be under the car near the fuel tank, along the frame rail, or even in the engine bay. Some cars even have it integrated into the fuel pump inside the tank, which makes it a much bigger job – but let’s assume yours is externally mounted for this guide.
- Raise and Secure Your Vehicle: If the filter is underneath, use a jack and jack stands. Never rely solely on a jack! Safety first, always.
- Position Your Drain Pan: Place it directly under the filter. Expect some fuel to dribble out, even after relieving pressure. I remember the first time I tried to remove a fuel filter; I underestimated the residual fuel and made a small mess. Learn from my experience – a bigger pan and plenty of rags are your friends!
- Loosen the Clamps/Fittings:
- For filters with hose clamps, use a screwdriver or nut driver to loosen them.
- For threaded fittings, use two wrenches – one to hold the filter steady and another to turn the fitting nut. This prevents twisting and damaging the fuel lines.
- For quick-disconnect fittings, you’ll need the special fuel line disconnect tool. Slide it onto the line, push it in to release the internal clips, and then pull the line off.
- Disconnect the Fuel Lines: Carefully pull the lines off the filter. Have those rags ready! There will likely be a small amount of fuel.
- Remove the Filter: Once both lines are off, you can usually unbolt or unclip the filter from its mounting bracket.
A Few Important Tips:
- Pay close attention to the direction of flow when you remove the fuel filter. Many filters have an arrow indicating the fuel flow. Your new filter will need to go in the same direction.
- Inspect the O-rings and crush washers. These small seals are super important for preventing leaks. If they’re old or damaged, replace them when installing the new filter.
- Don’t force anything. If a line or fitting is stuck, try a penetrating lubricant, but be patient.
Taking your time with each step is truly the key to safely and effectively remove a fuel filter. It’s a rewarding feeling to know you’ve done it yourself!
So there you have it! Removing a fuel filter is definitely a job you can tackle in your driveway with a bit of patience and the right approach. Remember, always prioritize safety, double-check your work, and don’t hesitate to consult your car’s manual for specific details. You’ve got this!