To properly check spark plug wires, always begin with a thorough visual inspection for any signs of damage like cracks, burns, or corrosion, ensuring all connections are secure. The most definitive method involves using a multimeter to measure each wire’s electrical resistance; compare your readings against the manufacturer’s specified range to identify internal breaks or excessive wear. This ensures optimal spark delivery, preventing costly engine misfires and maintaining performance.
Properly How Do You Check Spark Plug Wires Guide
Ever found your car feeling a bit sluggish, maybe a rough idle or that dreaded misfire? Often, the unsung heroes of your engine, the spark plug wires, might be whispering for attention. So, how do you check spark plug wires to see if they’re the culprits? Well, it’s simpler than you might think, and definitely a DIY task you can tackle. Generally, you’ll be doing a quick visual check, then a more precise electrical resistance test with a multimeter, and sometimes, if you’re feeling a bit old-school, a careful spark test.
I remember a time when my old pickup started sputtering, and I thought the worst. Turns out, it was just a tired spark plug wire. Learning how to check spark plug wires yourself not only saves you a trip to the mechanic but also gives you a real sense of accomplishment. Let’s walk through it, just like I would explain it to a friend.
How do you check spark plug wires effectively at home?
Checking your spark plug wires is a great way to troubleshoot common engine issues like misfires, poor fuel economy, or a rough running engine. Here’s a detailed look at how I go about it:
1. Visual Inspection: The “Eye Test”
This is always my first step, and honestly, it catches a lot of problems. Think of it like giving your wires a good once-over. Make sure your engine is off and cool – safety first, always!
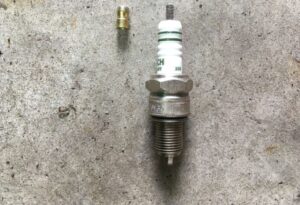
- Look for Damage: Carefully examine each wire from the distributor cap (or ignition coil pack) down to the spark plug. Are there any cracks, frayed insulation, melted spots, or chew marks from critters? I once found a wire that looked perfectly fine until I bent it slightly, and a big crack appeared right near the spark plug boot. That’s a definite red flag.
- Check for Burns: Sometimes, wires can touch hot engine components and melt or get burned. Any discoloration or hardened spots mean the wire’s insulation is compromised.
- Examine the Boots: The rubber boots at both ends of the wire protect the connections. Pull them gently. Do they feel brittle, cracked, or loose? Loose boots can let moisture and dirt in, causing issues. A good boot should feel pliable and fit snugly.
- Look for Corrosion: Peek inside the boots if you can. Any green, white, or fuzzy buildup on the terminals? Corrosion adds resistance, which is bad news for spark delivery.
2. Electrical Resistance Test with a Multimeter: The “Precision Check”
This is the most reliable way to check if your spark plug wires are doing their job. You’ll need a multimeter set to the “ohms” (Ω) setting. This test measures the electrical resistance within the wire.
Here’s my step-by-step approach:
- Disconnect the Wires: Remove one wire at a time from both ends – the spark plug and the distributor cap/coil pack. Always pull on the boot, not the wire itself, to avoid damaging the internal conductor.
- Set Your Multimeter: Turn your multimeter to the ohms setting. If it has different ranges (e.g., 20k, 200k), start with a higher range and adjust down if needed.
- Test Each Wire: Touch one probe of the multimeter to the metal terminal at one end of the wire and the other probe to the metal terminal at the opposite end.
- Interpret the Readings: What you’re looking for is a consistent resistance across all wires. Generally, spark plug wires should have a resistance of around 5,000 to 15,000 ohms per foot of length. The longer wires will naturally have higher resistance.
- Look for Consistency: This is key! If most of your wires read around 8,000 ohms, but one reads 50,000 ohms or, worse, “OL” (open circuit, meaning infinite resistance), you’ve found a faulty wire. My dad always taught me that consistency is crucial; big differences mean trouble.
- Test All Wires: Don’t just test the one you suspect. Test them all to get a complete picture.
Practical Tip: Test your wires when they are cold. Heat can sometimes temporarily alter resistance readings.
3. Spark Test: The “Old-School Method” (Use with Extreme Caution!)
This method involves observing the spark itself and should only be done if you are comfortable and understand the risks. You’re dealing with high voltage here, so be extremely careful and ensure no fuel vapors are present!
- What You’ll Need: Insulated pliers or a dedicated spark plug wire puller.
- How to Do It: With the engine running (or cranking, if you have a helper), carefully pull one spark plug wire off its spark plug using insulated pliers. Hold the metal terminal of the boot about 1/4 to 1/2 inch away from a good ground source (like a metal engine component).
- Observe the Spark: A healthy spark should be bright blue and consistent. A weak, orange, or intermittent spark indicates a problem with the wire (or possibly the coil).
Personal Anecdote: I’ve used this in a pinch when I suspected an intermittent misfire that wasn’t showing up on the multimeter. It can be effective, but I cannot stress enough the importance of safety. Make sure you know what you’re doing!
Once you find a bad wire, it’s usually best practice to replace the entire set. Wires tend to age similarly, and if one is failing, others might not be far behind. Plus, having a fresh set ensures consistent performance across all cylinders.
Checking your spark plug wires doesn’t have to be a daunting task. By following these simple steps – visual inspection, resistance testing, and carefully, if needed, a spark test – you can confidently diagnose and fix issues, getting your car running smoothly again. It’s a satisfying feeling to pinpoint a problem and know you’ve extended the life and performance of your vehicle!