Learning how to accurately check your spark plug gap is vital for optimal engine performance and fuel efficiency. An incorrect gap causes misfires, reduced power, and decreased fuel economy, making the use of a feeler or wire gauge essential to ensure a precise, consistent spark. This simple maintenance prevents costly issues and maximizes your engine’s potential.
Hey there, fellow car enthusiast! Ever wondered about those tiny little components that keep your engine purring smoothly? I’m talking about spark plugs. Specifically, have you ever thought about how to check spark plug gap? It might sound like a small detail, but trust me, getting that gap just right is a game-changer for your engine’s performance, fuel economy, and overall health.
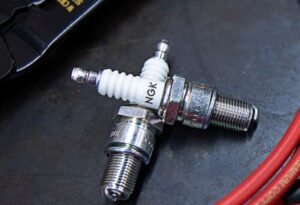
Checking the spark plug gap isn’t as intimidating as it sounds. In simple terms, it’s about making sure the tiny space between the central electrode and the ground electrode on your spark plug matches your vehicle manufacturer’s specific recommendation. This ensures a consistent, strong spark, which is vital for efficient fuel combustion. Think of it as tuning an instrument – a little adjustment can make all the difference in the symphony of your engine.
How do I check the spark plug gap to ensure optimal engine performance, and what tools and steps are involved?
Alright, let’s dive into the nitty-gritty of how to check spark plug gap. This isn’t just a technical task; it’s about giving your car the attention it deserves. From my own garage experiences, I can tell you that a properly gapped spark plug can transform a rough idle into a smooth hum and even save you a bit at the gas pump.
Why is this important?
Imagine your engine as a finely tuned machine. The spark plug is what ignites the air-fuel mixture. If the gap is too wide, the spark might be too weak or even fail to jump, leading to misfires, reduced power, and poor fuel economy. Too narrow, and the spark might be too small, causing incomplete combustion and carbon buildup. Both scenarios mean your engine isn’t running its best. So, knowing how to check spark plug gap is really about unlocking your engine’s full potential.
Tools you’ll need:
- Spark Plug Gap Tool (Feeler Gauge or Coin-Style Tool): My go-to is often the coin-style tool, but a wire-type feeler gauge is fantastic for precision, especially on specific spark plug types. You can usually find these at any auto parts store for just a few dollars.
- Your Vehicle’s Owner’s Manual: This is crucial! It will tell you the exact recommended spark plug gap for your specific engine. Don’t guess – guesswork leads to trouble. If you don’t have the manual, a quick online search for “spark plug gap [your car year, make, model]” usually does the trick.
- New Spark Plugs (if replacing): If you’re checking old plugs, great. If you’re installing new ones, you’ll still need to check them, as they aren’t always pre-gapped perfectly from the factory.
- Gloves: To keep your hands clean and protect them.
Step-by-step guide on how to check spark plug gap:
- Find the Correct Gap Specification:
This is step one, and it’s non-negotiable. Open your owner’s manual or do that quick online search. Jot down the precise gap measurement. For instance, my old sedan needed 0.044 inches. Knowing this number is key to successfully checking the spark plug gap.
- Inspect the Spark Plug:
If you’re checking an old plug, gently remove it from the engine (make sure the engine is cool!). Look at the tip – the central electrode (the metal rod in the middle) and the ground electrode (the bent metal arm). Make sure there’s no visible damage, excessive wear, or heavy carbon buildup. If it looks really rough, it might be time for a replacement anyway.
- Use Your Gapping Tool:
This is where you actually learn how to check spark plug gap.
With a wire-type feeler gauge: Select the wire that matches your desired gap specification. Gently slide it between the central electrode and the ground electrode. It should slide in with a slight, consistent drag. It shouldn’t be loose, nor should you have to force it in.
With a coin-style tool: Find the edge of the tool that matches your spec. Carefully insert the edge between the electrodes and slide it until it just fits with a slight drag. There are usually measurements marked along the edge.
- Adjust if Necessary (Carefully!):
This is the delicate part.
If the gap is too narrow: Use the gapping tool’s adjustment slot (usually on the coin-style tool) or a small, flat-bladed screwdriver to *gently* pry the ground electrode away from the central electrode. Do this in small increments and re-check frequently. Don’t bend it too much at once.
If the gap is too wide: Gently tap the ground electrode against a hard, flat, non-marring surface (like a clean workbench). Again, small taps, re-check, and repeat until the gap is correct. Never touch the central electrode! It’s fragile and can easily be damaged, ruining the spark plug.
- Double-Check:
Once you think you have it, check the spark plug gap again with your tool to confirm. A consistent drag is what you’re aiming for.
- Reinstall or Install:
If you’re reinstalling, make sure to tighten to the manufacturer’s torque specifications (also in your owner’s manual). Don’t overtighten!
A personal tip: When I’m working with new spark plugs, I always check the gap right out of the box. I once assumed they were perfect and had a slight misfire until I pulled them back out and found one was off by a hair. It taught me a valuable lesson: always verify, even with brand-new parts!
So there you have it! Learning how to check spark plug gap is a fundamental skill for any car owner. It’s a simple process that can yield significant improvements in how your vehicle runs. A little time and a basic tool are all it takes to ensure your engine is getting that perfect spark every single time.