Installing a mass air flow (MAF) sensor is an important step after cleaning or replacing the old unit. A properly installed MAF sensor allows the engine control module (ECM) to measure incoming air accurately, helping maintain the correct air-fuel mixture for smooth performance, better fuel economy, and reliable engine operation. Even a small installation mistake, such as installing the sensor backward or leaving the electrical connector loose, can lead to poor acceleration, rough idling, or a check engine light.
The good news is that installing a MAF sensor is a beginner-friendly DIY job that usually takes 15 to 30 minutes on most vehicles. With a few basic hand tools and the correct replacement sensor, you can complete the installation yourself without professional mechanical experience. However, following the proper installation procedure is essential to avoid damaging the sensor or creating intake air leaks.
In this guide, you’ll learn how to install a MAF sensor step by step, including the tools you’ll need, how to position the sensor correctly, reconnect the electrical connector, and verify that the installation was successful. By the end of this article, you’ll know how to install a MAF sensor safely and confidently while avoiding the common mistakes that can affect engine performance.
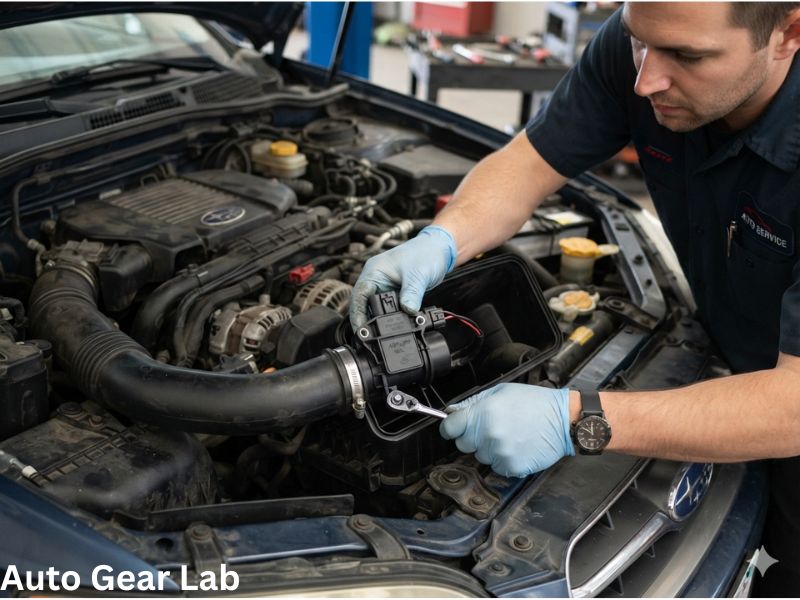
Tools and Materials You’ll Need
Before installing a MAF sensor, gather all the necessary tools and materials. Having everything ready before you start will make the installation process faster and help ensure the sensor is installed correctly the first time. Most vehicles require only a few basic hand tools, making this a simple DIY project for beginners.
Basic Tools
Depending on your vehicle, you may need:
- Torx bit set (T15, T20, or T25 are the most common)
- Security Torx bit (for tamper-resistant screws, if applicable)
- Phillips or flat-head screwdriver
- Ratchet and socket set (if the intake duct needs to be removed)
- Needle-nose pliers (optional)
- Flashlight or work light
Materials
Prepare the following before beginning the installation:
- New or cleaned MAF sensor
- Replacement O-ring or gasket (if applicable)
- Vehicle owner’s manual or repair manual (optional but helpful)
Safety Equipment
Although installing a MAF sensor is a low-risk repair, it’s still a good idea to wear:
- Safety glasses
- Mechanic’s gloves or nitrile gloves
- A clean microfiber cloth or lint-free shop towel
Verify the MAF Sensor Before Installation
Before installing the sensor, compare it with the original to ensure it’s the correct part.
Check that it has:
- The correct part number
- The same housing design
- Matching mounting holes
- The same electrical connector
- The correct airflow direction arrow
If you’re installing a replacement sensor, choosing an OEM or a high-quality aftermarket unit can help ensure accurate airflow readings and long-term reliability.
Tip: Keep the new MAF sensor in its protective packaging until you’re ready to install it. This helps prevent dust, moisture, or accidental damage to the delicate sensing element.
Before You Install the MAF Sensor
Taking a few minutes to prepare before installing the MAF sensor can help ensure a smooth installation and prevent problems after the engine is started. A clean mounting surface, the correct replacement sensor, and a quick inspection of the intake system can make a significant difference in the sensor’s performance.
Let the Engine Cool
If the engine has been running, allow it to cool before beginning the installation. Working around hot intake components can increase the risk of burns and make plastic parts more difficult to handle.
Disconnect the Battery (If Recommended)
Many vehicles allow you to install a MAF sensor without disconnecting the battery. However, some manufacturers recommend disconnecting the negative (-) battery terminal before working on electrical components.
Doing so can help:
- Prevent accidental short circuits
- Protect sensitive electronics
- Reduce the risk of triggering electrical faults
If you disconnected the battery while removing the old sensor, leave it disconnected until the installation is complete.
Clean and Inspect the Mounting Area
Before inserting the sensor, inspect the mounting location carefully.
Check for:
- Dirt or dust inside the opening
- Old gasket material
- Oil contamination
- Cracks in the intake housing
- Damaged mounting threads
If necessary, wipe the mounting surface with a clean, lint-free cloth. Do not allow debris to fall into the air intake system.
Inspect the O-Ring or Seal
If your MAF sensor uses an O-ring, examine it before installation.
Make sure it is:
- Properly seated
- Free from cracks or tears
- Not flattened or brittle
A damaged O-ring can create an air leak that affects airflow readings and engine performance. Replace it if it shows any signs of wear.
Verify the Replacement Sensor
Before installing the sensor, compare it one last time with the original.
Confirm that:
- The connector matches.
- The mounting holes align.
- The housing size is identical.
- The airflow direction arrow is in the same position.
Taking a minute to verify compatibility now can prevent having to remove the sensor again later.
Handle the Sensor Carefully
A MAF sensor contains delicate electronic components that can be damaged by improper handling.
Always:
- Hold the sensor by its plastic housing.
- Keep your fingers away from the sensing element.
- Place the sensor on a clean surface if you need to set it down.
With these preparations complete, you’re ready to position the MAF sensor correctly and begin the installation process.
Step 1: Position the MAF Sensor Correctly
Proper positioning is one of the most important parts of installing a MAF sensor. Even if the sensor fits perfectly, installing it in the wrong direction or forcing it into place can lead to incorrect airflow readings, poor engine performance, and a check engine light.
Identify the Airflow Direction
Before inserting the sensor, locate the airflow direction arrow on the MAF sensor housing.
This arrow indicates the direction that air flows through the intake system and should always point toward the engine (from the air filter toward the throttle body).
Installing the sensor backward is one of the most common installation mistakes and can cause symptoms such as:
- Rough idle
- Poor acceleration
- Reduced fuel economy
- Check Engine Light
- Incorrect airflow readings
If you don’t see an arrow, compare the new sensor with the original or consult your vehicle’s service manual.
Align the Sensor with the Mounting Opening
Hold the MAF sensor by its plastic housing and carefully align it with the mounting hole.
Before inserting it:
- Ensure the mounting holes line up.
- Verify the O-ring is seated correctly.
- Check that no wires or hoses are obstructing the installation.
Proper alignment allows the sensor to slide into place without excessive force.
Insert the Sensor Carefully
Slowly push the MAF sensor into the intake housing until it sits flush against the mounting surface.
While inserting it:
- Apply steady, even pressure.
- Keep the sensor straight.
- Avoid twisting it unnecessarily.
- Never force it into place.
If the sensor doesn’t slide in smoothly, remove it and inspect the mounting area for dirt, a misaligned O-ring, or another obstruction.
Confirm the Sensor Is Fully Seated
Once installed, inspect the sensor before securing it.
Make sure:
- The sensor sits evenly against the mounting surface.
- There are no visible gaps.
- The airflow arrow is pointing toward the engine.
- The mounting holes are perfectly aligned.
Proper positioning at this stage ensures the sensor can be secured correctly in the next step and helps prevent air leaks or inaccurate airflow measurements.
Step 2: Secure the MAF Sensor
Once the MAF sensor is correctly positioned, the next step is to secure it to the intake housing. Properly tightening the mounting screws keeps the sensor firmly in place and helps maintain an airtight seal. At the same time, it’s important not to overtighten the fasteners, as the sensor housing is typically made of plastic.
Install the Mounting Screws by Hand
Begin by inserting the retaining screws or bolts by hand.
Starting the threads manually helps:
- Prevent cross-threading
- Ensure the screws are aligned correctly
- Make installation easier
If a screw doesn’t thread in smoothly, remove it and realign it instead of forcing it.
Tighten the Screws Evenly
Once both screws are started, tighten them gradually.
If your MAF sensor uses two mounting screws:
- Alternate between the screws.
- Tighten each one a little at a time.
- Keep the pressure even so the sensor seats properly.
This helps distribute pressure evenly across the mounting surface and reduces the chance of damaging the sensor or O-ring.
Avoid Overtightening
The retaining screws only need to be snug enough to hold the sensor securely.
Applying excessive force can:
- Crack the plastic sensor housing
- Strip the mounting threads
- Damage the intake housing
- Compress or deform the O-ring
If your vehicle manufacturer specifies a torque value, use a torque wrench and follow the recommended specification.
Perform a Quick Inspection
Before moving on, verify that:
- The sensor sits flush against the mounting surface.
- Both screws are fully tightened.
- The sensor doesn’t move when gently touched.
- The O-ring isn’t pinched or visible outside the mounting area.
Once the sensor is firmly secured, you’re ready to reconnect the electrical connector and restore communication between the MAF sensor and the engine control module.
Step 3: Reconnect the Electrical Connector
After securing the MAF sensor, reconnect the electrical connector. This connection allows the sensor to send real-time airflow data to the engine control module (ECM). If the connector isn’t fully seated or locked, the engine may not receive accurate information, which can result in poor performance or a check engine light.
Align the Connector
Before plugging it in, inspect both the connector and the sensor terminals.
Make sure:
- The connector is facing the correct direction.
- The terminals are clean and undamaged.
- There is no dirt, moisture, or corrosion inside the connector.
Never force the connector into place. If it doesn’t align easily, remove it and check for obstructions.
Push Until It Clicks
Line up the connector with the sensor and push it straight in until you hear or feel a click.
That click indicates the locking tab has engaged and the connector is securely attached.
After connecting it, gently pull on the connector body to confirm it won’t come loose.
Check the Locking Tab
Many vehicles use a locking tab or secondary safety clip to prevent the connector from disconnecting due to engine vibration.
Before continuing, verify that:
- The locking tab is fully engaged.
- Any secondary safety clip is in its locked position.
- The connector sits flush against the sensor.
A loose connector can cause intermittent sensor readings and trigger diagnostic trouble codes.
Inspect the Wiring Harness
Take a moment to inspect the wiring around the MAF sensor.
Ensure that:
- The wiring harness isn’t twisted.
- No wires are pinched between components.
- The harness is routed away from hot or moving engine parts.
- Any retaining clips or brackets are reattached.
Proper wire routing helps prevent future electrical problems caused by heat, vibration, or rubbing against nearby components.
With the electrical connector securely attached, the MAF sensor is now fully connected. The next step is to reinstall any intake components that were removed and perform a final inspection before starting the engine.
Step 4: Reinstall the Intake Components
If you removed any intake parts to access the MAF sensor, reinstall them before starting the engine. The air intake system must be properly sealed to ensure the new or cleaned MAF sensor can measure airflow accurately. Even a small air leak can affect engine performance and trigger a check engine light.
Reinstall the Air Intake Tube
Position the air intake tube back onto the air filter box and throttle body (or turbo inlet, depending on your vehicle).
As you reinstall it:
- Make sure the tube is fully seated at both ends.
- Align it in its original position.
- Ensure it isn’t twisted or under tension.
An improperly installed intake tube can allow unmetered air to enter the engine.
Tighten the Hose Clamps
Once the intake tube is in place, tighten all hose clamps securely.
Check that:
- Each clamp is centered over the connection.
- The clamps are snug but not overtightened.
- The intake tube doesn’t move when gently pulled.
Loose hose clamps are a common cause of intake air leaks after a MAF sensor installation.
Reconnect Any Hoses or Sensors
If you disconnected any components during the installation, reconnect them now.
These may include:
- Breather hoses
- Vacuum lines
- Intake air temperature (IAT) sensor connector
- PCV hoses
- Other intake-related electrical connectors
Double-check that every hose and connector is securely attached before moving on.
Reinstall the Engine Cover (If Removed)
If your vehicle has a plastic engine cover, place it back onto its mounting points and secure it according to the manufacturer’s instructions.
Make sure the cover doesn’t press against the MAF sensor wiring or interfere with any intake components.
Perform a Quick Visual Check
Before reconnecting the battery or starting the engine, inspect the entire intake system one more time.
Verify that:
- The intake tube is installed correctly.
- All hose clamps are tight.
- Every connector is plugged in.
- No hoses are disconnected.
- No tools, screws, or shop towels remain in the engine bay.
A careful inspection at this stage helps ensure the installation is complete and reduces the chance of troubleshooting avoidable issues after the engine is started.
Step 5: Reconnect the Battery (If Disconnected)
If you disconnected the negative battery terminal before installing the MAF sensor, reconnect it now. Restoring battery power allows the engine control module (ECM) to communicate with the newly installed sensor and prepares the vehicle for its initial startup.
Reconnect the Negative Battery Terminal
Place the negative battery cable back onto the battery terminal and tighten the terminal clamp securely using the appropriate wrench or socket.
Make sure:
- The cable is fully seated on the battery post.
- The terminal clamp is tight and doesn’t move.
- No tools or metal objects are touching the battery terminals.
Avoid overtightening the clamp, as this can damage the battery terminal.
Check the Battery Connection
After reconnecting the battery, give the cable a gentle tug to ensure it’s firmly attached.
A loose battery connection can cause:
- Starting problems
- Electrical system warnings
- Intermittent power loss
- Unstable sensor communication
If everything feels secure, you’re ready for the final inspection.
Perform a Final Visual Inspection
Before starting the engine, take one last look around the engine bay.
Confirm that:
- The MAF sensor is installed in the correct airflow direction.
- The mounting screws are tightened securely.
- The electrical connector is fully locked.
- The intake tube is properly installed.
- All hose clamps are tight.
- Vacuum hoses and other connectors are reattached.
- No tools, hardware, or shop towels have been left in the engine bay.
Prepare for the Initial Startup
Once you’ve confirmed everything is installed correctly, close the hood and prepare to start the engine.
During the initial startup, pay close attention to:
- Engine idle quality
- Dashboard warning lights
- Unusual noises
- Signs of an intake air leak
If everything appears normal, you’re ready to verify that the new MAF sensor is operating correctly with a short test and inspection.
Step 6: Start the Engine and Verify the Installation
The final step is to confirm that the MAF sensor has been installed correctly and is functioning as expected. A successful installation should restore accurate airflow readings without causing warning lights or drivability issues.
Start the Engine
Start the engine and let it idle for two to three minutes.
During this time, observe whether:
- The engine starts normally.
- Idle speed is smooth and stable.
- There are no unusual vibrations or noises.
- The engine responds normally to light throttle input.
If you disconnected the battery, the ECM may take a short time to relearn idle and fuel trim values. Slight changes in idle speed during the first few minutes can be normal.
Check for Air Leaks
With the engine running, inspect the air intake system around the MAF sensor.
Look and listen for:
- Hissing sounds
- Loose intake hoses
- Improperly seated intake duct
- Air escaping around the sensor
If you notice an air leak, turn off the engine and correct the issue before driving the vehicle.
Verify the Electrical Connection
Make sure the MAF sensor connector remains fully seated after the engine starts.
A loose connector may cause:
- Rough idle
- Engine hesitation
- Poor acceleration
- Check Engine Light
- Diagnostic trouble codes
If necessary, switch off the engine and reconnect the connector until it locks securely.
Watch the Check Engine Light
The Check Engine Light should remain off if the installation was completed correctly and no other faults are present.
If the light stays on:
- Confirm the sensor is installed in the correct airflow direction.
- Verify the electrical connector is secure.
- Inspect the intake system for leaks.
- Scan the vehicle with an OBD-II scanner to check for stored diagnostic trouble codes.
In some vehicles, previously stored codes may need to be cleared manually.
Take a Short Test Drive
Once the engine is idling normally, take the vehicle for a 10–15 minute test drive.
During the drive, pay attention to:
- Smooth acceleration
- Normal throttle response
- Stable idle when stopping
- Consistent engine performance
- No warning lights appearing on the dashboard
If the vehicle performs normally, the installation was successful.
Perform One Final Inspection
After the test drive, open the hood one last time and inspect the installation.
Check that:
- The MAF sensor is still securely mounted.
- The electrical connector is locked in place.
- Intake hoses haven’t loosened.
- Hose clamps remain tight.
- There are no signs of air leaks or loose components.
If everything checks out, your MAF sensor installation is complete. The engine should now receive accurate airflow data, helping maintain proper fuel delivery, smoother performance, and optimal fuel efficiency.
Common Installation Mistakes to Avoid
Installing a MAF sensor is a straightforward job, but a few simple mistakes can lead to poor engine performance, inaccurate airflow readings, or a recurring check engine light. Paying attention to these common errors can help ensure your installation is successful the first time.
Installing the Sensor in the Wrong Direction
Every MAF sensor is designed to measure airflow in one direction. Most sensors have an airflow arrow on the housing that should point toward the engine.
Installing the sensor backward can result in:
- Rough idle
- Hesitation during acceleration
- Reduced fuel economy
- Check Engine Light
- Incorrect airflow readings
Always verify the airflow direction before tightening the mounting screws.
Touching the Sensing Element
The sensing wire or sensing film inside the MAF sensor is extremely delicate.
Avoid:
- Touching it with your fingers
- Cleaning it with a cloth
- Hitting it against other components
- Dropping the sensor
Always handle the sensor by its plastic housing to prevent damage.
Using the Wrong MAF Sensor
Not all MAF sensors are interchangeable. Installing the wrong part can cause inaccurate readings and engine performance issues, even if it physically fits.
Before installation, verify:
- The part number
- Electrical connector type
- Housing design
- Mounting hole locations
- Airflow direction
Choosing an OEM or a high-quality aftermarket sensor helps ensure reliable performance.
Overtightening the Mounting Screws
The retaining screws only need to be tightened enough to secure the sensor.
Overtightening can:
- Crack the plastic housing
- Strip the mounting threads
- Damage the intake housing
- Distort the O-ring seal
If a torque specification is available, follow the manufacturer’s recommendation.
Pinching or Reusing a Damaged O-Ring
A worn or improperly installed O-ring can allow unmetered air to enter the intake system.
Before installation:
- Inspect the O-ring carefully.
- Replace it if it’s cracked or flattened.
- Ensure it sits evenly in its groove.
A proper seal is essential for accurate airflow measurements.
Leaving the Electrical Connector Loose
After reconnecting the wiring harness, make sure the connector clicks firmly into place.
A loose connector may cause:
- Intermittent sensor signals
- Engine hesitation
- Check Engine Light
- Diagnostic trouble codes
Give the connector a gentle pull to confirm it’s locked securely.
Forgetting to Tighten the Intake Hose Clamps
If the intake duct was removed, don’t forget to tighten all hose clamps before starting the engine.
Loose clamps can create intake air leaks that mimic the symptoms of a faulty MAF sensor.
Skipping the Final Inspection
Before closing the hood, perform one last inspection.
Confirm that:
- The MAF sensor is fully seated.
- The mounting screws are secure.
- The electrical connector is locked.
- Intake hoses are properly installed.
- Hose clamps are tight.
- No tools or hardware remain in the engine bay.
Spending a few extra minutes checking your work can prevent unnecessary troubleshooting and help ensure the new MAF sensor operates correctly from the first start.
What If the New MAF Sensor Doesn’t Work?
If your engine still runs poorly or the Check Engine Light stays on after installing a new MAF sensor, don’t assume the replacement sensor is defective. In many cases, the problem is caused by an installation issue or another fault in the intake or engine management system.
Before replacing the sensor again, perform the following checks.
Check the Electrical Connector
A loose or improperly connected electrical connector is one of the most common causes of problems after installation.
Verify that:
- The connector is fully seated.
- The locking tab has clicked into place.
- There are no bent or damaged pins.
- The wiring harness isn’t loose or damaged.
If necessary, disconnect the connector and reconnect it securely.
Verify the Airflow Direction
Most MAF sensors have an airflow arrow that must point toward the engine.
If the sensor is installed backward, it may cause:
- Rough idle
- Poor acceleration
- Incorrect airflow readings
- Check Engine Light
If you’re unsure, compare the installation with the original sensor or refer to your vehicle’s service manual.
Confirm the Replacement Sensor Is Correct
Even sensors that look nearly identical may not be compatible with your vehicle.
Double-check that the replacement sensor matches:
- Your vehicle’s year, make, model, and engine
- The original part number
- The electrical connector
- The housing design
If the wrong sensor was installed, replacing it with the correct part may resolve the issue.
Inspect the Intake System for Air Leaks
A properly functioning MAF sensor cannot provide accurate readings if unmetered air enters the intake system.
Inspect for:
- Loose intake hose clamps
- Cracked intake tubes
- Damaged O-ring
- Disconnected vacuum hoses
- Improperly seated intake duct
Repairing an air leak may restore normal engine performance without replacing additional parts.
Scan for Diagnostic Trouble Codes
If the Check Engine Light remains on, connect an OBD-II scanner and check for stored trouble codes.
Codes related to the MAF sensor may indicate:
- An installation issue
- Wiring or connector problems
- Intake air leaks
- Another engine management fault
Reading the diagnostic codes can help identify the actual cause instead of replacing parts unnecessarily.
Consider Other Possible Causes
If the MAF sensor has been installed correctly and no intake leaks are found, another component may be responsible for the symptoms.
Possible causes include:
- Dirty throttle body
- Clogged air filter
- Faulty intake air temperature (IAT) sensor
- Vacuum leak
- Damaged wiring harness
- Engine control module (ECM) issues
If you’ve completed all the above checks and the problem persists, further diagnosis may be required to identify the underlying issue.
Frequently Asked Questions
Can I install a MAF sensor myself?
Yes. Installing a MAF sensor is a beginner-friendly DIY repair on most vehicles. With the correct replacement sensor and a few basic hand tools, most people can complete the job in 15 to 30 minutes.
Do I need to disconnect the battery before installing a MAF sensor?
Not always. Many vehicles allow you to install a MAF sensor without disconnecting the battery. However, some manufacturers recommend disconnecting the negative battery terminal to prevent accidental electrical issues while working.
How long does it take to install a MAF sensor?
For most cars, SUVs, and light trucks, installing a MAF sensor takes about 15–30 minutes. Vehicles with limited engine bay space or additional intake components may require a little more time.
Can I install a used MAF sensor?
Yes, but only if it’s known to be in good working condition and compatible with your vehicle. A new OEM or high-quality aftermarket MAF sensor is generally the more reliable choice for long-term performance.
Do I need to reset the ECU after installing a MAF sensor?
In many cases, no. The engine control module (ECM) can adapt to the new sensor after several drive cycles. However, if the Check Engine Light remains on or fault codes are stored, you may need to clear the codes with an OBD-II scanner or follow the manufacturer’s reset procedure.
Can I drive my car immediately after installing a MAF sensor?
Yes. Once you’ve confirmed that the sensor is installed correctly, the electrical connector is secure, and there are no intake air leaks, you can drive the vehicle. A short test drive is recommended to verify proper engine performance.
Should I lubricate the O-ring before installation?
Some manufacturers recommend applying a light coat of clean engine oil or silicone-based lubricant to the O-ring, while others recommend installing it dry. Always follow the instructions provided with the replacement sensor or your vehicle’s service manual.
Why is my Check Engine Light still on after installing a new MAF sensor?
The Check Engine Light may stay on if:
- The connector isn’t fully seated.
- The sensor is installed backward.
- The replacement sensor is incorrect.
- There is an intake air leak.
- A diagnostic trouble code hasn’t been cleared.
- Another engine component is causing the problem.
Scanning the vehicle with an OBD-II scanner is the best way to determine the exact cause.
Conclusion
Installing a MAF sensor is a simple DIY repair that can usually be completed in less than 30 minutes with basic tools. By positioning the sensor in the correct airflow direction, securing it properly, reconnecting the electrical connector, and checking the intake system for leaks, you can help ensure accurate airflow readings and reliable engine performance.
After the installation, always start the engine, inspect for warning lights or air leaks, and take a short test drive to confirm everything is working as expected. If the engine runs smoothly and no new trouble codes appear, you’ve successfully installed your MAF sensor and restored an essential part of your vehicle’s air intake system.