Yes, absolutely you can change your own spark plugs! This DIY guide empowers beginners, breaking down the process into simple, manageable steps. You’ll learn the necessary tools, safety precautions, and how to confidently complete this routine maintenance, saving money and gaining valuable car knowledge.
Ever wondered, “Can I change my own spark plugs?” It’s a question many new DIYers ponder, and I totally get it! The idea of getting under the hood can feel daunting, like you need a mechanic’s degree just to look at the engine. But here’s the honest truth, straight from my own garage: yes, absolutely, you can change your own spark plugs!
I remember my first time, a nervous wreck with a greasy manual and a borrowed wrench. But honestly, it turned out to be one of the most satisfying car maintenance tasks I’ve ever tackled. It’s a fantastic entry point into understanding your car better, saving you some cash, and giving you a real sense of accomplishment. Let’s dive into how you can do it too!
Can I Change My Own Spark Plugs?
Okay, let’s break this down. The short answer is a resounding yes, you absolutely can change your own spark plugs! It’s a very common DIY maintenance job, and with the right tools, a bit of patience, and a good guide, you’ll be surprised how manageable it is. Think of it less as brain surgery and more like assembling IKEA furniture – follow the steps, and you’ll get there!
Why Bother Changing Your Own Spark Plugs?
First off, why even do this? Spark plugs are crucial for your engine. They ignite the air-fuel mixture, making your car go. Over time, they wear out, leading to:
- Rough idling
- Engine misfires
- Reduced fuel economy
- Difficulty starting your car
Changing them yourself saves you a significant amount on labor costs. Plus, there’s nothing quite like the satisfaction of a smoother-running engine that you fixed yourself!
What You’ll Need (My Tool Kit Essentials):
Before you start, gather your gear. This makes the whole process smoother. Here’s what I typically use:
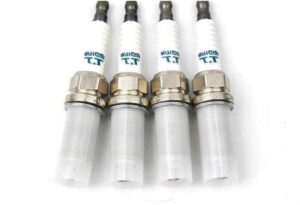
- New Spark Plugs: Make sure they’re the correct type and gap for your specific vehicle. Check your car’s manual!
- Spark Plug Socket: These are specially designed to grip the plug and protect the ceramic. You’ll likely need a 5/8″ or 13/16″ socket, usually with a rubber insert.
- Ratchet and Extensions: For leverage and reaching those tricky spots.
- Torque Wrench: This is a big one! Don’t skip it. It ensures you tighten the new plugs to the correct specification, preventing damage to your engine or the new plugs. My first time, I just “guessed” – big mistake! Always use a torque wrench.
- Spark Plug Gap Gauge: Some plugs come pre-gapped, but always double-check.
- Anti-Seize Compound: A small dab on the threads helps prevent the new plugs from seizing in the engine block, making future changes easier.
- Dielectric Grease: For the spark plug boot ends. It helps prevent moisture intrusion and makes removal easier next time.
- Gloves: Protect your hands.
- Flashlight or Headlamp: Engines are dark places!
- Compressed Air or a Shop Vac: To clean around the old plugs before removal, preventing debris from falling into the cylinders.
My Step-by-Step Guide (How I Do It):
Here’s the basic process I follow:
- Safety First: Make sure your engine is completely cool. Working on a hot engine is dangerous and can damage the cylinder head threads. Disconnect the negative terminal of your battery just to be extra safe, especially if you’re new to this.
- Locate and Identify: Find your spark plugs. They’re usually under ignition coils or thick wires. Sometimes you might need to remove an engine cover.
- Clean Around the Plugs: Use compressed air or a shop vac to clear any dirt or debris from around the spark plug wells. This is crucial to prevent crud from falling into the combustion chamber when you remove the old plug.
- Remove Ignition Coils/Wires (One by One!): This is my golden rule. Never remove all the coils/wires at once! It’s super easy to mix up the firing order. Remove one coil or wire, then remove and replace that specific spark plug before moving to the next. This keeps everything in order. When removing coils, gently twist and pull.
- Remove the Old Spark Plug: Attach your spark plug socket to your extension and ratchet. Carefully lower it onto the plug. Turn counter-clockwise to loosen. If it feels really tight, don’t just muscle it. Sometimes a little penetrating oil and patience can help. You want to avoid stripping the threads.
- Inspect the Old Plug: Take a look at it! The color and condition can tell you a lot about your engine’s health (e.g., black and sooty means it’s running rich).
- Prepare the New Plug: Double-check the gap with your gap gauge, even if it says “pre-gapped.” A tiny amount of anti-seize on the plug threads (avoiding the electrode!) and a little dielectric grease inside the spark plug boot (the end that connects to the coil/wire) are good practices.
- Install the New Spark Plug: This is where patience pays off. Start by hand-threading the new plug into the engine. This helps prevent cross-threading, which is a very expensive mistake! Once it’s finger-tight, use your torque wrench to tighten it to the manufacturer’s specifications. Don’t overtighten!
- Reattach Coil/Wire: Push the ignition coil or wire firmly back onto the new spark plug until it clicks into place.
- Repeat: Move on to the next spark plug, always one at a time, until they’re all replaced.
- Reconnect Battery: If you disconnected it, reconnect the negative terminal.
- Test Drive: Start your car and listen for any unusual sounds. Take it for a short drive. You should immediately feel a difference, often a smoother idle and better acceleration.
When to Call a Pro:
While I encourage DIY, it’s also smart to know your limits. If a spark plug feels extremely seized and won’t budge, if you feel like you’re stripping threads, or if you’re just genuinely uncomfortable after reviewing the steps, don’t push it. It’s always better to call a trusted mechanic than cause more expensive damage.
So, can you change your own spark plugs? Absolutely! It’s an empowering, budget-friendly task that builds your confidence under the hood. Take your time, get the right tools, and enjoy the satisfaction of a job well done. Happy wrenching!