Mastering spark plug gapping is crucial for peak engine performance, fuel efficiency, and smooth operation. This vital maintenance task, easily accomplished with the right tools like a feeler gauge, ensures optimal combustion by setting the precise distance between the plug’s electrodes. Learn to accurately measure and carefully adjust the gap to keep your engine running efficiently.
Master How to Adjust a Spark Plug Gap Like a Pro
Hey there, fellow car enthusiast! Ever wondered about those tiny little components that make your engine roar to life? I’m talking about spark plugs. They’re small, but mighty! Knowing how to adjust a spark plug gap isn’t just a neat trick; it’s a fundamental skill that can dramatically improve your vehicle’s performance and fuel economy. It might sound a bit technical, but trust me, it’s something you can absolutely master right from your own garage. It’s all about ensuring that perfect little spark every time, and I’m excited to share my go-to process with you.
Getting that spark plug gap just right means your engine breathes easier, burns fuel more efficiently, and generally feels happier. It’s truly empowering to know you’re giving your car precisely what it needs. Think of it like tuning a guitar; a perfectly tuned instrument just sounds better, right? The same goes for your engine when you correctly adjust a spark plug gap.
So, how exactly do you adjust a spark plug gap to ensure your engine runs like a dream?
Learning how to adjust a spark plug gap is easier than you think, and honestly, it’s one of those DIY tasks that gives you a real sense of accomplishment. Here’s how I approach it, step by step, drawing from my own experiences.
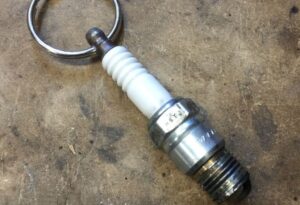
First off, let’s talk about why this tiny gap matters. It’s the space between the center electrode and the ground electrode (the little metal hook) on your spark plug. This gap is where the spark jumps. If it’s too wide, the spark might not happen consistently, leading to misfires. Too narrow, and the spark might be weak or smothered, also causing performance issues. Both scenarios can reduce power, waste fuel, and even stress your engine components.
Tools You’ll Need:
- A spark plug gap tool (either a coin-style or wire feeler gauge) – I prefer the wire style for accuracy.
- Your new spark plugs (never adjust old, worn ones!).
- Your vehicle’s owner’s manual or a reliable service manual.
- A dab of anti-seize lubricant (optional, but highly recommended for easier future removal).
- A torque wrench (optional, but great for proper installation).
My Step-by-Step Guide to Gapping Spark Plugs:
Step 1: Get the Right Specs
This is the most crucial first step. You absolutely need to know your specific vehicle’s recommended spark plug gap setting. This information is always in your owner’s manual or on an emissions sticker under the hood. I learned this the hard way once, trying to guess the gap, and my engine ran rough. Always, always check your owner’s manual!
Step 2: Unbox and Inspect
Take your brand-new spark plugs out of their boxes. Give them a quick visual inspection for any damage. Sometimes, even new plugs can be slightly off their target gap straight from the factory. This surprised me when I first started; I just assumed new meant perfect, but that’s not always the case!
Step 3: Measure the Current Gap
Gently slide your spark plug gap tool (the wire gauge is excellent here) between the center electrode and the ground electrode. The wire that just barely fits without forcing it tells you the current gap. It should offer slight resistance, not be loose, and definitely not require pushing hard.
Step 4: Adjusting – The Gentle Touch
This is where the finesse comes in.
- To Widen the Gap: If your gap is too narrow, use the little notch on your gapping tool to very carefully pry up the ground electrode. Move it in tiny increments. Think gentle persuasion, not brute force. You don’t want to bend it too far, or it could weaken the metal.
- To Narrow the Gap: If it’s too wide, you’ll need to gently tap the ground electrode against a hard, clean surface (like a wooden block or the edge of a workbench). Again, do this in tiny, controlled taps. Be careful not to hit the fragile center electrode, especially on iridium plugs. I almost bent a precious iridium tip once trying to adjust it quickly!
Remember, only bend the ground electrode. Never touch the center electrode.
Step 5: Re-measure and Verify
After each small adjustment, re-measure the gap. Keep adjusting and re-measuring until you hit that sweet spot – the exact gap recommended for your vehicle. This step is crucial; don’t skip it! Patience here pays off in engine performance.
Step 6: Installation Prep (Optional but Recommended)
Before installing your perfectly gapped plugs, put a tiny dab of anti-seize lubricant on the threads (not on the tip!). A little anti-seize on the threads can save you headaches down the road, making future removal much easier. Then, install them, ideally using a torque wrench to tighten them to the manufacturer’s specifications. This prevents overtightening, which can damage the engine head.
And there you have it! Knowing how to adjust a spark plug gap is a truly valuable skill for any car owner. It empowers you to perform basic maintenance and understand your engine a little better. You’ll likely notice a smoother idle, better acceleration, and even improved fuel efficiency. It’s a small adjustment that yields big results!