Regularly changing your lawn mower’s fuel filter is crucial for maintaining optimal engine performance and preventing costly issues. This ultimate guide demystifies the process, offering clear, step-by-step instructions to empower any homeowner to confidently perform this essential DIY maintenance. Keep your mower running smoothly and efficiently all season long by mastering this simple yet vital task!
Your Ultimate Guide How to Change Lawn Mower Fuel Filter
Ever had your trusty lawn mower sputter and cough like it’s trying to tell you something? Or maybe it just won’t start at all, even though you just filled it with fresh gas? Well, my friend, chances are you might have a clogged lawn mower fuel filter. Don’t sweat it though! Changing a lawn mower fuel filter is a super straightforward DIY task that anyone can tackle. It’s truly one of those maintenance jobs that feels intimidating at first, but once you’ve done it, you’ll wonder why you ever paid someone else.
Think of it like this: your car has an oil filter, right? Your lawn mower has a fuel filter, and it needs love too! It keeps all the gunk and debris from reaching your engine, ensuring smooth operation. When that filter gets choked up, your engine struggles for fuel. I remember my old push mower acting up, and a quick fuel filter swap brought it back to life, purring like new. It’s a quick fix that saves you time, money, and a lot of frustration!
So, how do I actually change my lawn mower fuel filter?
Changing your lawn mower fuel filter is a very achievable task, even if you’re not a seasoned mechanic. It really just takes a few common tools and a little confidence. Here’s how I go about it, step-by-step, sharing a few tips I’ve picked up along the way:
First things first, safety is key! Before you touch anything, always, always disconnect the spark plug wire. This prevents the engine from accidentally starting while you’re working on it. Trust me, you don’t want any surprises there. Also, grab some safety glasses; a little splash of fuel is no fun for your eyes.
Next, gather your supplies. You’ll need a new lawn mower fuel filter (make sure it’s the right one for your mower model!), a pair of pliers (needle-nose or slip-joint work well), a screwdriver (sometimes for hose clamps), a clean rag, and a small container to catch any spilled fuel. I always keep a few small, empty plastic bottles on hand for this.
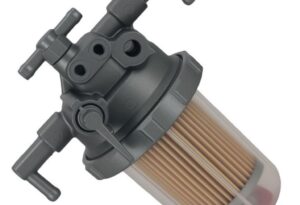
Now, let’s find that old fuel filter. On most lawn mowers, the fuel filter is an inline filter, meaning it’s located somewhere along the fuel line between the fuel tank and the carburetor. It often looks like a small plastic cylinder, sometimes clear, sometimes solid, with a hose connected to each end. Sometimes it’s tucked away under the fuel tank, so you might need to peek around a bit. I find that getting a good look at the fuel tank and following the line coming out of it usually leads me right to it.
Once you’ve spotted it, here’s the process:
- Stop the Fuel Flow: If your mower has a fuel shut-off valve (a little lever usually near the tank), turn it to the “off” position. If it doesn’t, or if you’re feeling extra cautious like I usually am, you can use a pair of fuel line clamps (or even vice grips with some padding) to pinch the fuel lines on both sides of the filter. This prevents a big spill when you disconnect it. I learned this the hard way once, and fuel went everywhere!
- Disconnect the Lines: You’ll see small clamps holding the fuel lines onto the filter. These are usually spring clamps you can squeeze with pliers, or screw-type clamps that need a screwdriver. Slide these clamps away from the filter, down the fuel line a bit. Then, gently twist and pull the fuel lines off each end of the old filter. Be ready with your rag and catch container, as a little bit of fuel will inevitably leak out. This is totally normal.
- Remove the Old Filter: Once the lines are off, simply remove the old lawn mower fuel filter. Take a moment to look at it. You might be surprised at how dirty and clogged it is inside! That gunk was preventing your engine from getting clean fuel.
- Install the New Filter: This is a crucial step! Most new fuel filters have an arrow on them. This arrow indicates the direction of fuel flow – it should point away from the fuel tank and towards the engine/carburetor. Installing it backward is a common mistake and your mower won’t run! Slide the new filter into place, making sure the arrow is pointing the right way.
- Reconnect the Lines and Clamps: Push the fuel lines firmly onto each end of the new filter. Then, slide those clamps back into their original positions, securing the lines tightly. Give them a gentle tug to make sure they’re snug.
- Check for Leaks and Finish Up: Remove any fuel line clamps you used, and if you had a fuel shut-off valve, open it back up. Reconnect your spark plug wire. Before you try to start it, give everything a good visual check for any fuel leaks. Wipe up any spills. Now, start your mower. It might take a few extra cranks to get fuel flowing through the new filter, but it should fire right up and run much smoother!
There you have it! You’ve successfully changed your lawn mower fuel filter. It’s a rewarding feeling, isn’t it?
See? I told you it wasn’t so bad! Swapping out your lawn mower fuel filter is a simple, empowering piece of DIY maintenance that can save you from a lot of headaches and keep your lawn mower running like a champ. Next time your mower acts up, you’ll know exactly what to do. Happy mowing!