Regularly checking your spark plug leads is crucial for maintaining optimal engine performance and preventing costly misfires. This DIY guide empowers you to easily inspect leads for visible damage and accurately test their resistance with a multimeter, ensuring your engine runs smoothly and efficiently.
How to DIY Tips How to Check Spark Plug Leads For Better Performance
Why This Matters / Understanding the Problem
Hey there! Have you ever noticed your car feeling a little off? Maybe it’s not starting quite right, or the engine feels like it’s stumbling? It’s a common and super frustrating experience. Your car might feel sluggish, or you might even be losing out on gas mileage.
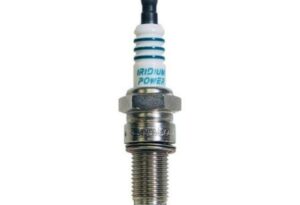
Often, these issues can point to problems with your ignition system. Specifically, we’re talking about your spark plug leads, also known as spark plug wires. These little guys are crucial. They deliver the high-voltage spark from your ignition coil to the spark plugs, igniting the fuel in your engine.
When these leads wear out, they can’t do their job efficiently. This can cause misfires, rough idling, or even put extra strain on other engine components. Learning some DIY Tips How to Check Spark Plug Leads For Better Performance can really save you a headache and some money.
Don’t worry, checking them isn’t as scary as it sounds. It’s a fantastic skill to add to your DIY arsenal. Plus, it can make a big difference in how smoothly your car runs!
What You Need
Before we dive in, let’s gather our tools. You probably have most of these lying around. Remember, safety always comes first!
- Safety Glasses: Protect your eyes from dirt or debris.
- Work Gloves: Keep your hands clean and protected.
- Multimeter (with Ohmmeter function): This is key for electrical testing.
- Spark Plug Boot Puller (optional, but helpful): Prevents damage to the leads.
- Dielectric Grease: Great for protecting new connections.
- Clean Rag: For wiping things down.
- Owner’s Manual: To find your car’s specific resistance specs.
Having these items ready will make the whole process much smoother. It’s all about making sure you have the right gear for successful DIY Tips How to Check Spark Plug Leads For Better Performance.
Step-by-Step Guide to DIY Tips How to Check Spark Plug Leads For Better Performance
Alright, let’s get down to business! Following these steps will help you effectively check your spark plug leads. This guide will give you great DIY Tips How to Check Spark Plug Leads For Better Performance and help you feel more confident about your car’s health.
Step 1: Safety First, Always!
Seriously, this is the most important step. Make sure your car’s engine is completely cool. Never work on a hot engine. Then, disconnect the negative terminal of your car battery. This prevents any accidental electrical shocks or short circuits. Safety is non-negotiable when dealing with any car maintenance.
Step 2: Visual Inspection – The First Clue
Carefully examine each spark plug lead. Look for visible signs of damage. Are there any cracks, tears, or fraying in the insulation? Do you see any burn marks, especially near the boots or where they might touch hot engine parts? Sometimes, critters like to chew on wires, so look for those signs too. Pay close attention to the boots themselves; they can become brittle and crack over time. This initial visual check is a quick way to spot obvious problems.
Step 3: Wiggle Test – Feeling for Weakness
Gently tug and wiggle each lead where it connects to the spark plug and the ignition coil (or distributor). The connections should feel secure. If a boot feels loose or comes off easily, it might not be making good contact. A loose connection can cause misfires. Remember to always grab the boot, not the wire itself, to avoid damaging the conductor inside.
Step 4: Testing Resistance with a Multimeter
Now, for the electrical part! Set your multimeter to the ohms (Ω) setting. This measures electrical resistance. You’ll need to remove each spark plug lead, one at a time, to test it. This helps you avoid mixing them up. I like to lay them out in order on a clean rag.
To test a lead, place one probe of the multimeter into the metal terminal at one end of the lead. Place the other probe into the metal terminal at the opposite end. Your multimeter will show a reading in ohms. It’s really quite simple once you get the hang of it.
Step 5: Comparing Resistance to Specifications
This is where your owner’s manual comes in handy. Most car manufacturers provide specifications for the resistance of their spark plug leads. Generally, you’ll see readings in the thousands of ohms (kΩ). For example, a lead might have a specification of 5,000 to 15,000 ohms per foot. Longer leads will naturally have higher resistance.
If a lead’s resistance is significantly higher than the manufacturer’s spec, or if it reads “OL” (open circuit), it’s faulty and needs replacing. A lead with zero or extremely low resistance might also indicate an internal short. Consistency is key here; all leads of similar length should have similar readings.
Step 6: Addressing Issues and Reassembly
If you find any damaged leads or those with out-of-spec resistance, it’s time to replace them. It’s often best to replace all the leads as a set, especially if they are old. This ensures consistent performance across all cylinders. When installing new leads, apply a small amount of dielectric grease to the inside of the boots. This helps seal out moisture and prevents corrosion, ensuring a good connection.
Make sure each new lead clicks securely into place on both the spark plug and the coil/distributor. Double-check that you’ve connected them to the correct cylinders. Reconnect your car battery’s negative terminal. Then, start your engine and listen for any changes in performance. You’ve just performed some excellent DIY Tips How to Check Spark Plug Leads For Better Performance!
Pro Tips & Common Mistakes to Avoid
Pro Tip: Label Your Leads! Before removing any leads, consider labeling them with tape and a marker (e.g., Cylinder 1, 2, 3, 4). This helps tremendously when you’re reinstalling them, preventing misfires due to incorrect firing order.
Don’t Pull the Wire: Always grip the boot firmly when removing spark plug leads. Pulling on the wire itself can separate it from the terminal inside the boot, effectively ruining the lead and making your careful DIY Tips How to Check Spark Plug Leads For Better Performance counterproductive.
Check All Leads: It might be tempting to just check the one you suspect is bad. However, if one lead is failing, others might not be far behind. A full inspection gives you a complete picture of your ignition system’s health.
Consider OEM Quality: While aftermarket leads can be cheaper, some might not offer the same longevity or exact resistance specifications as original equipment manufacturer (OEM) parts. For crucial components like these, investing in quality often pays off in the long run.
I remember one time, I was so focused on the resistance test that I almost forgot to visually inspect the leads. Turns out, one had a tiny chew mark from a rodent that the multimeter wouldn’t have caught right away. Always combine your methods!
FAQs About DIY Tips How to Check Spark Plug Leads For Better Performance
Q1: How often should I check my spark plug leads?
It’s generally a good idea to check them every 30,000 to 50,000 miles, or whenever you replace your spark plugs. You should also check them if you notice any symptoms of engine trouble like misfires or rough idling.
Q2: What are the main signs of bad spark plug leads?
Common signs include a rough-running engine, misfires (which can cause a check engine light), reduced fuel economy, sluggish acceleration, or visible arching from the leads in the dark. These are all clues that your DIY Tips How to Check Spark Plug Leads For Better Performance efforts are needed.
Q3: Can I check them without a multimeter?
You can do a visual inspection and the wiggle test without a multimeter. However, for a definitive diagnosis of internal resistance problems, a multimeter is essential. It gives you concrete data to make an informed decision.
Q4: What if only one spark plug lead is bad? Do I replace just that one?
While you can replace just one, it’s often recommended to replace the entire set, especially if they are all of similar age. This ensures even performance across all cylinders and can prevent future issues from other aging leads.
Q5: Is it okay to use aftermarket spark plug leads?
Yes, good quality aftermarket leads are fine. Just make sure they meet or exceed your car’s manufacturer specifications for resistance and insulation. Researching brands and reading reviews can help you choose wisely.
Q6: Can bad spark plug leads damage other engine parts?
Yes, prolonged misfires due to bad leads can put stress on other ignition components, catalytic converters, and even lead to unburnt fuel damaging sensors. Addressing the issue quickly is important for your engine’s overall health.
Q7: What is dielectric grease for?
Dielectric grease is an electrical insulator that helps to seal out moisture and prevent corrosion at electrical connections. It doesn’t conduct electricity, but it ensures a tight, protective seal and makes boots easier to remove in the future.
Final Thoughts
See? Checking your spark plug leads isn’t nearly as intimidating as it might seem. With a few simple tools and a bit of patience, you can accurately diagnose potential issues. Performing these DIY Tips How to Check Spark Plug Leads For Better Performance can significantly improve your car’s reliability and save you money on mechanics.
You’ll gain a deeper understanding of your vehicle and the satisfaction of tackling a problem yourself. So, the next time your car feels a bit sluggish, remember these steps. You’ve got this!
“`