Restore your car’s engine performance and fuel efficiency quickly by tackling common spark plug issues yourself. This essential DIY guide empowers car owners to confidently diagnose problems, safely remove worn plugs, and correctly install properly-gapped new ones, ensuring a smoother ride and saving significant mechanic costs.
DIY How To Fix Spark Plugs Quick Guide For Car Owners
Ever had your car feel a bit “off”? Maybe it’s chugging, the engine light came on, or it’s just not as peppy as it used to be. My friend, you might be dealing with an issue related to your spark plugs. Now, when we talk about how to fix spark plugs, what we usually mean is replacing them or, at the very least, checking and adjusting them. It’s a common DIY repair that can save you a good chunk of change and honestly, it’s pretty satisfying to do yourself!
Don’t let the idea of working on your engine intimidate you. Changing spark plugs is one of those foundational car maintenance tasks that, with a little guidance, almost anyone can tackle. Let’s dive in and get your car running smoothly again!
So, what’s the real deal with how to fix spark plugs and get my car running smoothly again?
Alright, let’s be honest. When you ask “how to fix spark plugs,” you’re almost always asking “how to replace spark plugs.” While you *can* sometimes clean them in a pinch, it’s usually a temporary fix. For lasting performance and to truly fix spark plugs issues, replacement is the way to go. I learned this the hard way myself, trying to get an extra few months out of an old set!
First, how do you know your spark plugs are failing? Common symptoms include your engine misfiring (that little stumble or jerk), rough idling, reduced fuel economy, slow acceleration, or even the dreaded “check engine” light. If you notice these, it’s time to investigate. An OBD-II scanner can often tell you exactly which cylinder is misfiring, which really helps narrow down the problem when you go to fix spark plugs.
Here’s what you’ll need to gather before you start:
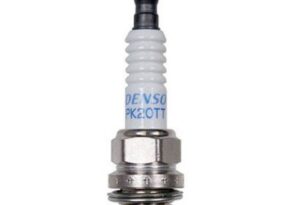
- New Spark Plugs: Make sure they’re the correct type for your specific vehicle. Check your owner’s manual!
- Spark Plug Socket: Usually 5/8″ or 13/16″, magnetic ones are a lifesaver.
- Ratchet & Extension: To reach those plugs.
- Torque Wrench: Crucial to prevent overtightening, which can cause serious damage. Don’t skip this!
- Spark Plug Gap Gauge: To ensure the new plugs are gapped correctly.
- Dielectric Grease: For the spark plug boots.
- Anti-Seize Lubricant: For the plug threads, especially in aluminum heads.
- Gloves, Safety Glasses, Shop Rags.
Now, for the step-by-step process of how to fix spark plugs (by replacing them):
- Safety First: Make sure your engine is cool – seriously, wait a few hours after driving. Disconnect the negative terminal of your car battery to prevent accidental sparks.
- Locate Your Plugs: They’re typically on top of the engine, sometimes hidden under a plastic cover or coil packs. My old sedan had them right on top, but my SUV’s were a bit trickier to get to.
- Remove Coil Packs/Wires: Gently pull off the ignition coil connectors or spark plug wires. Label them if you need to, so you don’t mix them up! A little twist often helps the wires come off cleanly.
- Clean Around the Plugs: Before you remove the old plug, blow away any dirt or debris around its base. You don’t want anything falling into the cylinder when the plug comes out.
- Remove the Old Plug: Attach your spark plug socket to your extension and ratchet. Carefully lower it onto the plug and turn counter-clockwise to loosen. If it’s really stuck, try a little penetrating oil, but be patient and don’t force it.
- Inspect the Old Plug: The condition of your old plug tells a story. A healthy plug is tan or grayish-brown. Black, sooty plugs mean a rich mixture; oily plugs indicate engine issues; and white, blistered plugs suggest overheating. This insight helps you fix spark plugs issues in the future too!
- Prepare the New Plug: Check the gap using your gauge against your car’s specifications. Adjust it gently if needed. Apply a tiny dab of anti-seize to the threads and a thin layer of dielectric grease inside the spark plug boot (the part that connects to the coil/wire).
- Install the New Plug: Crucial Tip: Thread the new plug in by hand first. I even use a short piece of rubber hose pushed onto the plug to start it, so there’s no chance of cross-threading. Once it’s finger-tight, use your torque wrench to tighten it to your car’s exact specifications. This prevents overtightening (which can strip threads) and undertightening (which can cause misfires). My buddy stripped a head once, and it was an expensive lesson!
- Reconnect: Reattach the coil pack or spark plug wire securely. Make sure you feel a click or a firm connection.
- Repeat for All Plugs: It’s usually best to do one plug at a time from start to finish. This way, you avoid mixing up wires or coils.
Once all the new plugs are in, reconnect your battery, start the car, and listen. It should purr like a kitten! You’ve successfully managed to fix spark plugs issues and restored your engine’s performance.
See? It’s not so scary after all! Taking the time to properly diagnose and replace your spark plugs is a rewarding DIY task that truly makes a difference in your car’s performance and fuel efficiency. It’s a great way to save money and gain a deeper understanding of your vehicle. You’ll feel a real sense of accomplishment knowing you’ve given your car a new lease on life. Happy driving!