Mastering the removal of a stubbornly tight oil filter without damage is crucial for any DIY mechanic. This guide unveils the right tools and techniques—from strap wrenches to the careful screwdriver method—to effectively loosen even the most recalcitrant filters. Equip yourself with these safe, proven strategies to complete your oil change smoothly, preventing costly engine damage and frustration.
Master How to Remove Tight Oil Filter Without Damage
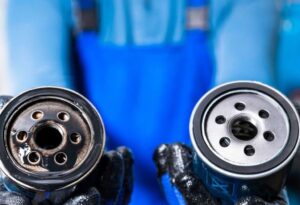
Hey there, fellow DIYer! Ever faced that frustrating moment when your oil filter just won’t budge? We’ve all been there. It’s one of those rites of passage for anyone who works on their own car – trying to remove a tight oil filter that feels welded on. Don’t despair, though! With the right approach and a bit of know-how, you can get that stubborn filter off without causing any damage or a massive mess. Today, I’m sharing tried-and-true methods and personal tips. You’ll master this common challenge.
Imagine this: you’re just a few turns away from a successful oil change. But then, the old filter is stuck solid. Nothing worse! This isn’t just about strength. It’s about smart technique. You also need to know which tools to use. Let’s dive into how to effectively remove a tight oil filter. We’ll keep both your car and your sanity intact.
How can I safely and effectively remove a tight oil filter without causing damage?
Oh, this is a classic scenario, and trust me, I’ve lived through it more times than I care to admit! The key to successfully removing a tight oil filter lies in preparation. You need to choose the right tool. Then, apply technique over brute force. Here’s a comprehensive guide based on my own garage experiences:
First things first, safety and preparation are paramount. Make sure your engine is cool. Trying to remove a hot filter is a recipe for burns and a slippery mess. Always wear safety glasses and gloves. Have your drain pan ready underneath. Even the best methods can result in a little spill. If you’re working under the car, always use jack stands. Never just a jack!
Now, let’s talk about why filters get so tight. Often, they were overtightened during the last installation. This is a common mistake, trust me! Or, the rubber gasket has simply adhered to the engine block over time due to heat cycles. Knowing this helps you approach the problem.
Tools and Techniques (from least to most aggressive):
- The Cap/Socket Style Oil Filter Wrench: This is always my first go-to. It fits snugly over the end of the filter. This provides excellent grip. If your filter isn’t too badly stuck, this combined with a ratchet and extension gives you fantastic leverage. I remember one time, my filter felt impossible. But a quick tap on the end of the ratchet with my palm, not a hammer, often breaks the initial seal.
- The Strap Wrench or Chain Wrench: If the cap wrench slips (maybe the filter is rounded or too greasy), these are your next best friends. A strap wrench uses a durable strap that cinches around the filter. This provides grip. A chain wrench works similarly with a metal chain. The trick here is to ensure they’re as tight as possible around the filter base. Stay close to the engine. This prevents crushing the filter body. I prefer strap wrenches for their non-marring nature. But a chain wrench offers more aggressive grip if needed.
- Oil Filter Pliers (Adjustable Pliers with a Curve): These look like giant channel locks with curved jaws. They grip the filter body. They can sometimes deform the filter. But if applied correctly near the base, they often provide enough leverage to loosen it. I’ve used these successfully on stubborn filters. You need to apply even pressure to avoid crushing the filter and making things worse.
- The Screwdriver/Punch Method (Absolute Last Resort!): I’ve been there, staring at a filter that just won’t budge. No other tool was in sight. This method involves driving a large screwdriver or punch all the way through the filter body. Then, you use it as a lever to turn the filter. Warning: This is incredibly messy. It destroys the filter (obviously). It can be dangerous if the screwdriver slips. It also often makes a huge mess. I only recommend this if you have absolutely exhausted all other options. Be prepared for the clean-up. My buddy once tried this and only managed to rip the filter casing. The base was still stuck – a nightmare scenario! Learn from his mistake. Use it only as a final, desperate measure.
Pro Tips from My Garage:
- Tap, Don’t Slam: Sometimes a few gentle taps with a rubber mallet on the filter wrench (or directly on the filter if using pliers) can break the gasket’s seal.
- Direction Matters: Always turn counter-clockwise (lefty-loosey) to remove a tight oil filter. It sounds obvious. But in a tight spot, sometimes you can get disoriented!
- Increase Leverage: A longer ratchet handle or a cheater pipe over your wrench handle can significantly increase your leverage. You won’t need excessive force.
- Clean Up Spills Immediately: Oil is slippery. It can create a hazard.
- For the New Filter: Always apply a thin film of fresh oil to the rubber gasket of the *new* filter before installing it. This prevents it from sticking next time. It also helps create a good seal. Then, hand-tighten only. Usually about 3/4 to one full turn after the gasket makes contact. Or, follow your car’s manual. This is critical to avoid making the same mistake that caused your current headache!
Remember, patience is a virtue when you’re trying to remove a tight oil filter effectively. Don’t rush or get frustrated. Take a breather if it’s not working. With the right tool and a methodical approach, you’ll have that old filter off and your new one on in no time. You’ll feel like a true master of your own garage!