Replacing spark plug wires is a surprisingly simple DIY task that can dramatically improve your engine’s performance and fuel efficiency. This article offers a clear, step-by-step guide, empowering you to confidently swap out old, faulty wires. Learn this essential skill to save money, prevent misfires, and enjoy a smoother, more reliable ride.
How to Learn How to Replace Spark Plug Wires The Simple DIY Way
Why This Matters / Understanding the Problem
Hey there, ever hopped into your car, turned the key, and noticed something just felt… off? Maybe your engine sounds a bit rough, or it feels like it’s hesitating when you accelerate? You’re not alone! These are classic signs that your spark plug wires might be telling you it’s time for an upgrade.
Think of spark plug wires as tiny, but super important, highways for electricity. They carry a crucial spark from your ignition coil to your spark plugs, igniting the fuel-air mixture in your engine. Over time, with all that heat, vibration, and general wear and tear, these wires can degrade. They might crack, fray, or just lose their ability to deliver that strong, consistent spark.
When this happens, your engine can start to misfire, run rough, or even cause your “check engine” light to pop on. It can lead to poor fuel economy and a less pleasant driving experience. The good news? Learning how to replace spark plug wires the simple DIY way is totally achievable, even if you’re not a seasoned mechanic. It’s a great skill to pick up, saves you a chunk of change, and gives you a real sense of accomplishment!
If you’re looking to learn how to replace spark plug wires the simple DIY way and get your ride running smoothly again, you’ve definitely come to the right place. I’m excited to share my experiences and guide you through each step.
What You Need
Before we dive in, let’s gather our tools. You’ll be surprised how little you actually need for this job. Having everything ready before you start makes the process much smoother. Trust me, I’ve had to stop mid-project to hunt for a forgotten wrench!
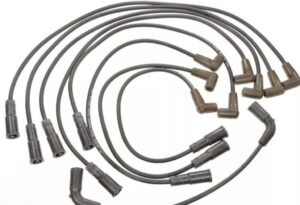
- New Spark Plug Wire Set: Make sure it’s the correct set for your specific car’s make, model, and year. This is crucial!
- Spark Plug Wire Puller Pliers (optional but recommended): These make removing the old wires easier without damaging them or your hands.
- Dielectric Grease: A small packet or tube. This helps prevent moisture and makes future removal easier.
- Basic Wrench Set (or socket wrench): Might be needed to disconnect the battery terminal.
- Gloves: To protect your hands from grease and heat.
- Safety Glasses: Always a good idea when working under the hood.
- Rag or Shop Towels: For cleanup.
- Marker or Numbered Tags (optional): For labeling wires if your engine layout is tricky.
Gathering these items is the first step to learn how to replace spark plug wires the simple DIY way. Once you have your kit assembled, we’re ready to roll!
Step-by-Step Guide to Learn How to Replace Spark Plug Wires The Simple DIY Way
Alright, let’s get our hands a little dirty! Remember, we’re going to take this one step at a time, just like I would if I were showing you in person.
Step 1: Safety First! Prep Your Vehicle
This is the most important step! Always prioritize your safety. First, ensure your car is parked on a level surface with the parking brake engaged. Next, open the hood and allow the engine to cool down completely if it’s been running. Seriously, those engine parts can get blazing hot!
Finally, disconnect the negative battery terminal. This prevents any accidental electrical shocks while you’re working. Just loosen the nut on the negative (-) terminal with your wrench and remove the cable. Tuck it away from the battery post.
Personal Insight: I once started working on an engine that was still warm – big mistake! A slight brush against a hot manifold can ruin your day. Patience is key here.
Step 2: Map Out Your Wires (One at a Time!)
This step is absolutely critical to avoid misfiring later. Spark plug wires connect specific cylinders to specific points on your ignition coil or distributor. Getting them mixed up means your engine won’t run correctly, if at all.
The golden rule for anyone trying to learn how to replace spark plug wires the simple DIY way is: replace one wire at a time. Locate the spark plug boot on one cylinder. Follow that wire back to where it connects to the ignition coil or distributor.
If your engine has a clear layout, you might not need to label. But for complex engines, consider using numbered tags or even taking a quick photo with your phone before you remove anything. This helps you remember the exact routing and connection points.
Step 3: Remove the Old Wire
Now that you’ve picked your first wire, let’s remove it. Grab the spark plug boot (the rubber part) firmly, as close to the spark plug as possible. Twist and pull gently. Never pull on the wire itself, as this can damage the internal conductor or pull the boot off completely, leaving part of it stuck on the spark plug.
If it’s stubborn, this is where those spark plug wire puller pliers come in handy. Once the boot is off the spark plug, follow the wire back and disconnect it from the coil pack or distributor in the same way – by pulling on the boot, not the wire.
Step 4: Install the New Wire
Take your new spark plug wire. First, apply a tiny dab of dielectric grease inside both ends of the new wire boots. This grease helps seal out moisture, prevents corrosion, and makes it easier to remove the wires next time. It also helps the spark connect better.
Carefully push one end of the new wire onto the spark plug until you feel and hear a positive click or pop. It should feel secure. Then, route the new wire exactly how the old one was routed. This helps prevent rubbing and keeps things tidy under the hood.
Connect the other end of the new wire to its corresponding post on the ignition coil or distributor. Again, push firmly until it clicks into place. You should feel a good connection.
Repeat Steps 3 and 4 for each remaining wire, always replacing them one by one. This method helps tremendously when you’re trying to learn how to replace spark plug wires the simple DIY way, ensuring you don’t mess up the firing order.
Step 5: Double-Check and Test
Once all the new wires are in place, take a moment to double-check everything. Make sure each wire is securely connected at both ends and routed correctly. Ensure no tools are left in the engine bay.
Reconnect the negative battery terminal, tightening the nut securely. Close the hood, hop in, and start your car. Listen closely! It should purr smoothly, without any misfires or roughness. If your “check engine” light was on due to bad wires, it might turn off after a few drive cycles, or you might need to clear the code with an OBD-II scanner.
Take your car for a short test drive. Pay attention to how it feels. You should notice a smoother idle, better acceleration, and overall improved engine performance. Success!
Pro Tips & Common Mistakes to Avoid
When you embark on a task like learning to replace spark plug wires, a little extra insight can make all the difference. Here are a few things I’ve learned along the way:
Pro Tip: Always One Wire at a Time! I cannot stress this enough. It’s the number one rule to prevent headaches. If you pull all the wires at once, you’ll spend hours trying to figure out the correct firing order, which varies greatly by vehicle.
Common Mistake: Pulling on the Wire Itself. Resisting the urge to yank on the wire is hard, especially if a boot is stuck. But pulling the wire can separate the conductor from the terminal inside the boot, rendering your new (or old) wire useless. Always grab the boot!
Pro Tip: Use Dielectric Grease. Seriously, don’t skip this step. It’s inexpensive but mighty. It protects connections from moisture and makes the wires easier to remove next time you need to access the spark plugs.
Warning: Hot Engine Hazards. As mentioned, let the engine cool down. Not only for your skin’s sake, but hot plastic and rubber parts are more prone to breaking. A cool engine makes everything safer and easier to handle.
Pro Tip: Inspect Your Old Wires. When you pull off an old wire, take a look at the condition of the boot and the wire itself. Are there cracks? Is there corrosion? This can give you clues about other potential issues, or just confirm your diagnosis. This is part of becoming proficient when you learn how to replace spark plug wires the simple DIY way.
FAQs About Learn How to Replace Spark Plug Wires The Simple DIY Way
It’s natural to have questions, especially when you’re working on your car. Here are some common ones people ask when they learn how to replace spark plug wires the simple DIY way:
Q1: How often should spark plug wires be replaced?
A: This can vary, but generally, spark plug wires are recommended to be replaced every 30,000 to 100,000 miles, or about every 3-5 years. It largely depends on your driving conditions and the quality of the wires. It’s often a good idea to replace them when you replace your spark plugs.
Q2: What are the main signs of bad spark plug wires?
A: Look out for a rough idle, engine misfires (you might feel a slight shudder), reduced acceleration, poor fuel economy, or even the “check engine” light illuminating. Sometimes, you might even see visible cracks or fraying on the wires themselves.
Q3: Can I replace just one bad spark plug wire?
A: While technically possible, it’s generally recommended to replace the entire set of wires. If one wire is failing due to age or wear, the others are likely not far behind. Replacing the whole set ensures consistent performance across all cylinders.
Q4: Is it hard to replace spark plug wires?
A: For most vehicles, it’s actually a very straightforward DIY task. The most challenging part is often simply accessing the wires, especially on some modern engines where components are tightly packed. But following the “one wire at a time” rule makes it much simpler.
Q5: Do I need special tools to replace spark plug wires?
A: Not really! A basic wrench for the battery terminal and optional spark plug wire puller pliers are the most specialized tools you might need. Otherwise, just your hands and perhaps some dielectric grease.
Q6: What exactly does dielectric grease do?
A: Dielectric grease is a non-conductive, silicone-based grease that helps seal out moisture and prevent corrosion at electrical connections. It doesn’t enhance electrical conductivity but ensures the connection stays clean and strong over time, and makes future removal easier.
Q7: Will new spark plug wires improve my gas mileage?
A: If your old wires were faulty and causing misfires, then yes, replacing them with new ones can absolutely improve your fuel efficiency. When your engine isn’t getting a consistent spark, it’s not burning fuel efficiently, which directly impacts your mileage.
Final Thoughts
Well, there you have it! You’ve just walked through the entire process of how to replace spark plug wires the simple DIY way. I hope you found this guide helpful and felt like we were just chatting over a cup of coffee.
Don’t underestimate the satisfaction of doing your own car maintenance. Not only do you save money, but you also gain a deeper understanding of your vehicle and build incredible confidence. It might seem daunting at first, but with a little patience and the right steps, you absolutely can do this!
So, go ahead, grab those tools, and give your car the attention it deserves. I’m confident that with this guide, you’ll successfully learn how to replace spark plug wires the simple DIY way and enjoy a much smoother, more reliable ride.
Happy wrenching!
“`