Master testing spark plugs with a multimeter to quickly diagnose engine performance issues and prevent costly repairs. By setting your multimeter to the ohms range and probing specific points, you can accurately measure internal resistance and continuity, identifying faulty plugs. This essential skill empowers you to ensure optimal ignition and maintain engine health.
Ever had your car stutter, hesitate, or just feel a bit “off” lately? That moment of dread when you realize your once-smooth ride is now acting like it’s got a mind of its own? Trust me, we’ve all been there. It’s frustrating, often costly, and always inconvenient. While there could be many culprits under the hood, a very common and often overlooked one is your trusty spark plugs.
These small but mighty components are the unsung heroes of your engine, igniting the air-fuel mixture that powers your vehicle. When they start to falter, your engine’s performance takes a nosedive. But here’s the good news: you don’t always need a pricey mechanic to diagnose the issue. With a simple tool called a multimeter and a little know-how, you can perform a crucial diagnostic test right in your garage. This guide will walk you through precisely how to test a spark plug with a multimeter, empowering you to pinpoint problems and potentially save a hefty repair bill.
Learning how to test a spark plug with a multimeter is a valuable skill for any car owner or DIY enthusiast. It’s a straightforward process that offers clear insights into the health of your ignition system. So, grab your tools, and let’s demystify spark plug testing together!
Key Takeaways
- Prioritize Safety: Disconnect wires and power before any testing.
- Initial Visual Scan: Check for cracks, carbon, or electrode wear first.
- Multimeter Setup: Set your multimeter to the ohms (Ω) resistance scale.
- Resistance Measurement: Place probes on the terminal and center electrode tip.
- Healthy Reading: Expect 3,000-5,000 ohms for a good spark plug.
- Faulty Indications: Infinite or very low resistance means a bad plug.
- Consult Manuals: Always verify specific resistance ranges for your vehicle.
📑 Table of Contents
- Why Bother Testing Your Spark Plugs?
- Gathering Your Gear: What You’ll Need
- Understanding Spark Plug Anatomy and How a Multimeter Works
- The Step-by-Step Guide: How To Test A Spark Plug With A Multimeter
- Interpreting Your Multimeter Readings (And What to Do Next)
- Tips for Success and Common Pitfalls to Avoid
Why Bother Testing Your Spark Plugs?
Before we dive into the nitty-gritty of how to test a spark plug with a multimeter, let’s talk about why this simple test is so important. Your spark plugs are critical for your engine’s proper function, and when they start to go bad, they can cause a cascade of problems.
Common Symptoms of Failing Spark Plugs
- Engine Misfires or Rough Idling: This is one of the most noticeable signs. If your engine feels like it’s stumbling or shaking, especially when idling, a failing spark plug could be the cause.
- Reduced Fuel Economy: A worn spark plug can lead to incomplete combustion, meaning your engine has to work harder and use more fuel to produce the same power. Suddenly noticing more trips to the gas station? Your spark plugs might be the reason.
- Difficulty Starting: If your engine cranks but struggles to turn over, a weak or absent spark could be preventing proper ignition.
- Lack of Acceleration/Power: When you press the gas pedal, does your car feel sluggish? Bad spark plugs can rob your engine of its power, making acceleration feel less responsive.
- Check Engine Light: In modern vehicles, a failing spark plug can often trigger your “Check Engine” light, indicating an issue with the ignition system.
The Cost of Neglect
Ignoring these symptoms won’t make them go away. In fact, driving with failing spark plugs can lead to more severe and expensive problems down the line. Unburnt fuel can damage your catalytic converter (a very costly repair!), and continued misfires can put undue stress on other engine components. Learning how to test a spark plug with a multimeter allows you to catch these issues early, preventing minor problems from escalating into major headaches.
Gathering Your Gear: What You’ll Need
You don’t need a huge arsenal of tools to check your spark plugs, but having the right ones will make the job much easier and safer. The star of our show, of course, is the multimeter.
The Star of the Show: Your Multimeter
A multimeter is an electronic measuring instrument that combines several measurement functions in one unit. For spark plug testing, you’ll primarily be using its ohmmeter function to measure resistance.
- Digital Multimeter (DMM): I highly recommend a digital multimeter. They are generally easier to read, more precise, and less prone to error than analog models. Look for one with an “auto-ranging” feature if possible, as it automatically selects the correct range for your measurement.
- Leads and Probes: Ensure your multimeter has good, insulated test leads with sharp, pointed probes.
Essential Safety & Auxiliary Tools
Safety is paramount whenever you’re working on your vehicle’s engine. Don’t skip these items!
- Safety Glasses: Always protect your eyes from debris or accidental splashes.
- Gloves: Protect your hands from grime, heat, and sharp edges.
- Spark Plug Socket Wrench and Extension: You’ll need the correct size spark plug socket (usually 5/8″ or 13/16″), which often has a rubber insert to grip the plug. An extension will help you reach plugs deep in the engine bay.
- Ratchet: To operate the spark plug socket.
- Spark Plug Wire Puller (optional but recommended): Helps remove spark plug wires without damaging them.
- Compressed Air or a Brush: To clean around the spark plug well before removal.
- New Spark Plugs (if needed): It’s always a good idea to have replacements on hand, just in case your test reveals a faulty plug.
Understanding Spark Plug Anatomy and How a Multimeter Works
Before you begin to learn how to test a spark plug with a multimeter, a basic understanding of what you’re testing and how your tool functions will make the process much clearer.
A Quick Look at Your Spark Plug’s Insides
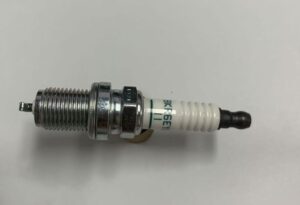
A spark plug might look simple from the outside, but it’s engineered with precision. Inside, there’s a central electrode, usually made of a special alloy, surrounded by an insulator (typically ceramic). This central electrode is connected to a terminal at the top, which receives voltage from the ignition coil. At the other end, the central electrode extends slightly beyond the insulator and forms a gap with a side electrode (or ground electrode) that’s welded to the metal shell of the plug. The electrical resistance we’ll be measuring with our multimeter comes from a resistor located within the spark plug’s core, designed to suppress radio frequency interference.
Multimeter Basics for Spark Plug Testing
For our purposes, we’ll primarily be using the “ohms” (Ω) setting on your multimeter. Ohms are the unit of electrical resistance. When we test a spark plug, we’re measuring the resistance of that internal resistor.
- Resistance (Ω): This setting measures how much a material resists the flow of electricity. A healthy spark plug will have a specific resistance range.
- Continuity: Some multimeters have a continuity setting (often indicated by a speaker icon or a diode symbol). This setting emits a beep if there’s a complete electrical path (very low resistance) between the two probes. While less precise than the resistance test, it can quickly tell you if the plug’s internal circuit is completely open (infinite resistance) or completely shorted (zero resistance).
When you set your multimeter to ohms, it sends a small electrical current through the component being tested and measures the voltage drop across it to calculate resistance. This is exactly what we need to do to understand how to test a spark plug with a multimeter effectively.
The Step-by-Step Guide: How To Test A Spark Plug With A Multimeter
Now for the main event! Here’s a detailed, step-by-step guide on how to test a spark plug with a multimeter. Follow these instructions carefully for accurate results.
Safety First: Preparing for the Test
Before touching anything, ensure your vehicle is completely off and the engine is cool. Working on a hot engine can lead to burns. Wear your safety glasses and gloves.
- Locate Spark Plugs: Spark plugs are usually found on the top or side of the engine block, often beneath the ignition coils or spark plug wires.
- Clean Around the Plugs: Use compressed air or a brush to clear any debris from around the spark plug wells. This prevents dirt from falling into the combustion chamber when you remove the plug.
- Remove Spark Plug Wires/Coils: Carefully disconnect the spark plug wires or ignition coils. If using wires, pull only on the boot, not the wire itself, to avoid damage. Label them if necessary to ensure they go back in the correct order.
- Remove Spark Plug: Use your spark plug socket and ratchet to carefully unscrew the spark plug. Turn counter-clockwise. Once loose, gently pull it straight out. Inspect the removed plug visually for any obvious damage (cracked insulator, heavy fouling, melted electrode).
The Resistance Test (Primary Method)
This is the most common and accurate method when learning how to test a spark plug with a multimeter.
- Set Your Multimeter: Turn your multimeter’s dial to the “ohms” (Ω) setting. Start with a range like 20kΩ (20,000 ohms) if your meter isn’t auto-ranging.
- Place Probes:
- Take one of your multimeter’s probes (it doesn’t matter which color for resistance) and touch it to the metal terminal at the top of the spark plug (where the spark plug wire or coil connects).
- Take the other probe and touch it to the metal tip of the center electrode at the bottom of the spark plug. Make sure the probes are making good contact and aren’t touching any other part of the spark plug, especially the porcelain insulator or the ground electrode.
- Read the Measurement: Look at your multimeter’s display. It should show a resistance value in ohms (Ω) or kilohms (kΩ).
- Compare to Specifications: A healthy spark plug typically has a resistance between 3,000 to 7,500 ohms (3kΩ to 7.5kΩ). Some manufacturers specify ranges up to 10,000 ohms (10kΩ). Always check your vehicle’s service manual or the spark plug manufacturer’s specifications for the precise recommended range for your specific plug.
The Continuity Test (Secondary Check)
While less precise, a continuity test can quickly identify a completely “dead” plug.
- Set Multimeter: Turn your multimeter to the continuity setting (often indicated by a speaker icon).
- Place Probes: Touch one probe to the top terminal and the other to the center electrode tip, just like in the resistance test.
- Listen for a Beep: If the multimeter beeps, it indicates there’s a continuous electrical path, meaning the internal resistor isn’t completely open. No beep suggests an open circuit, which means the plug is definitely bad.
Interpreting Your Multimeter Readings (And What to Do Next)
Understanding the numbers your multimeter displays is key to knowing the health of your spark plug. This section will guide you through interpreting the results of how to test a spark plug with a multimeter.
What Do Those Ohms Mean?
Generally, spark plug manufacturers aim for a specific resistance to ensure proper spark delivery and radio interference suppression. Here’s a quick guide:
| Resistance Reading (Ohms) | Interpretation | Action |
|---|---|---|
| 0 Ω or “OL” (Open Line) / Infinite | Faulty (shorted or open circuit) | Replace the spark plug immediately. |
| Below 3,000 Ω (3kΩ) | Too low (resistance breaking down) | Replace the spark plug. |
| 3,000 – 7,500 Ω (3kΩ – 7.5kΩ) | Good (typical healthy range) | Spark plug is likely fine, reinstall. |
| Above 10,000 Ω (10kΩ) | Too high (internal resistor degrading) | Replace the spark plug. |
Important Note: Always consult your specific spark plug or vehicle manufacturer’s recommendations. These ranges can vary slightly between brands and vehicle types.
When a Spark Plug Fails the Test
If your spark plug falls outside the recommended resistance range (too low, too high, or shows no continuity), it’s time for a replacement. A faulty spark plug cannot deliver a strong, consistent spark, leading to all the performance issues we discussed earlier. It’s often best to replace all spark plugs at the same time, even if only one tests bad, as they tend to wear out at similar rates. This ensures consistent performance across all cylinders.
Beyond the Multimeter: Other Spark Plug Health Checks
While learning how to test a spark plug with a multimeter is excellent, it’s also wise to combine it with a visual inspection:
- Electrode Wear: Check the center and ground electrodes for excessive wear or erosion. Sharp edges are good; rounded, burnt edges indicate wear.
- Fouling:
- Carbon Fouling (dry, black soot): Suggests a rich fuel mixture or oil burning.
- Oil Fouling (wet, black, oily): Indicates oil leaking into the combustion chamber.
- Ash Fouling (light brown, crusty deposits): Can be from oil additives.
- Blistering/Melting: Could indicate pre-ignition or engine overheating.
- Cracked Insulator: Any cracks in the porcelain insulator can cause the spark to leak, leading to misfires.
Combining your multimeter readings with a thorough visual inspection gives you the most comprehensive picture of your spark plug’s health.
Tips for Success and Common Pitfalls to Avoid
You’re now equipped with the knowledge of how to test a spark plug with a multimeter. To make sure your testing goes smoothly, here are some final tips and common mistakes to steer clear of.
Pro Tips for Accurate Readings
- Ensure Good Contact: Make sure your multimeter probes are making solid contact with the metal parts of the spark plug. Any loose connection can give you an inaccurate reading.
- Test Multiple Times: If you’re unsure, take a few readings on the same plug. Consistency indicates reliability.
- Compare Plugs: If you’ve removed multiple spark plugs, compare their resistance values. They should be relatively close to each other. A significant deviation in one plug’s reading compared to the others is a strong indicator of a problem.
- Clean Your Spark Plugs (Before Testing, if Needed): While visual inspection for fouling is important, if a spark plug is heavily fouled, it might impact the resistance reading. A light cleaning might be useful, but remember, if it’s heavily fouled, it’s likely already due for replacement.
- Consult the Manual: I can’t stress this enough – your vehicle’s service manual or the spark plug manufacturer’s website is your best friend for exact resistance specifications.
Don’t Make These Mistakes!
- Testing a Hot Engine: Never, ever work on a hot engine. Not only is it a burn hazard, but rapid temperature changes can damage components. Let the engine cool down completely.
- Pulling on Spark Plug Wires: Always pull on the boot, not the wire itself, to avoid damaging the internal conductor of the wire. Damaged wires will lead to misfires, even with new spark plugs.
- Cross-Threading Spark Plugs: When reinstalling, always start the spark plug by hand to ensure it’s not cross-threading. If it feels difficult to turn, stop immediately and restart. Cross-threading can severely damage the engine block.
- Over-Tightening Spark Plugs: Spark plugs have specific torque specifications. Over-tightening can damage the plug, the cylinder head threads, or the engine itself. Use a torque wrench if you have one.
- Ignoring Other Symptoms: While learning how to test a spark plug with a multimeter is a great diagnostic step, remember that spark plugs aren’t always the sole cause of engine issues. If new plugs don’t solve your problem, you might need to investigate other components like ignition coils, fuel injectors, or oxygen sensors.
By following these guidelines, you’ll not only master how to test a spark plug with a multimeter but also ensure a safer and more effective troubleshooting experience.
Congratulations! You’ve just learned how to test a spark plug with a multimeter, a vital skill for anyone looking to understand and maintain their vehicle. This simple diagnostic test can save you time, money, and a lot of frustration by helping you identify faulty spark plugs before they lead to more significant engine problems.
Remember, regular maintenance and proactive testing are key to keeping your vehicle running smoothly and efficiently. Don’t be intimidated by what seems like complex car repairs; with the right tools and a clear guide, many diagnostic tasks are well within your reach. So, the next time your engine starts acting up, you’ll know exactly how to test a spark plug with a multimeter and tackle the problem head-on. Happy driving!
Frequently Asked Questions
How do I prepare to test a spark plug with a multimeter?
Before testing, ensure your spark plug is clean and free of heavy carbon deposits, as these can interfere with accurate readings. Next, set your multimeter to the ohms (Ω) resistance setting, typically in the 20kΩ or 20,000Ω range, to accurately measure the spark plug’s internal resistance.
What multimeter settings should I use, and what readings indicate a good spark plug?
You should set your multimeter to the ohms (Ω) resistance scale, usually selecting a range like 20kΩ (20,000 ohms). A healthy spark plug typically exhibits a resistance reading between 3,000 and 7,000 ohms (3kΩ to 7kΩ), indicating its internal resistor is functioning correctly.
What does a high or infinite resistance reading mean when I test a spark plug with a multimeter?
A very high or “OL” (Open Line/Infinite) reading on your multimeter when testing a spark plug indicates an internal break or a completely faulty resistor. This means the spark plug cannot properly conduct electricity and is defective, requiring replacement.
Why is it important to test a spark plug with a multimeter?
Testing a spark plug with a multimeter is crucial for checking its internal resistance, which directly impacts its ability to fire correctly. This test helps identify internal wear or damage that isn’t visible externally, preventing misfires and ensuring optimal engine performance.
Where do I place the multimeter probes to accurately test a spark plug for resistance?
To accurately test a spark plug, place one multimeter probe on the metal terminal cap at the top of the spark plug. Then, place the other probe on the central electrode tip at the very bottom of the spark plug, where the spark usually jumps. This setup measures the resistance across the internal resistor.
What is the typical ideal resistance range for a healthy spark plug when tested with a multimeter?
For most conventional spark plugs, the ideal resistance range when tested with a multimeter typically falls between 3,000 and 7,000 ohms (3kΩ to 7kΩ). Readings significantly outside this range, either too low or too high, usually indicate a faulty or excessively worn spark plug.