To diagnose engine misfires, testing spark plug wires with a multimeter for proper resistance is crucial. This simple DIY method quickly identifies faulty wires by comparing their readings against manufacturer specifications, ensuring optimal engine performance and avoiding costly repairs. It’s an effective way to pinpoint a common problem.
Fix Misfires How to Test Spark Plug Wires With a Multimeter
Ever had your car feel sluggish, like it’s trying to run a marathon with one shoe untied? That sputtering, rough idle, or sudden loss of power is often a frustrating misfire. And guess what? Often, the unsung heroes—or villains—are your spark plug wires. Before you start guessing and replacing parts willy-nilly, a simple tool can help pinpoint the problem: your trusty multimeter. Knowing how to test these wires can save you time, money, and a lot of head-scratching.
It might sound intimidating, but testing your spark plug wires with a multimeter is a straightforward DIY task that anyone can tackle with a little guidance. Think of it as a health check for your ignition system, making sure that crucial spark gets from the coil to the spark plug without any detours or weak signals. Let’s dive in and see how easy it truly is.
So, how exactly do you test spark plug wires with a multimeter, and what should I look for?
Testing your spark plug wires is all about checking their electrical resistance. When a wire goes bad, its internal resistance goes way up, or it might even break completely, creating an “open” circuit. This means the spark can’t get through efficiently, or at all, causing those dreaded misfires.
Here’s how to do it, step-by-step, along with some tips I’ve picked up over the years:
First, gather your tools:
- Your multimeter (set to ohms, Ω).
- Insulated pliers (optional, but handy).
- A clean rag.
- Your car’s owner’s manual (for resistance specifications, if available).
Now, let’s get testing:
- Safety First, Always: Make sure your engine is completely off and cool. You don’t want to be touching hot engine parts or dealing with live electrical currents. Disconnect the negative terminal of your car battery for extra peace of mind.
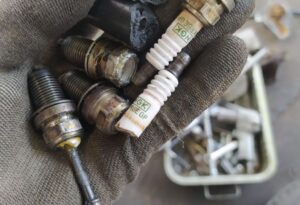
- Identify and Isolate: Locate your spark plug wires. They’re the thick, usually colored cables running from the distributor cap (or coil packs) to each spark plug. Only test one wire at a time! This prevents you from mixing them up, which could lead to a whole new set of problems. Trust me, I once swapped two by accident and it was a real headache to figure out.
- Disconnect the Wire: Gently, but firmly, twist and pull the boot off the spark plug at one end, and then disconnect it from the coil or distributor on the other end. Pull on the boot, not the wire itself, to avoid damaging the internal conductor.
- Set Your Multimeter: Turn your multimeter dial to the ohms (Ω) setting. You’ll likely want to start with a range like 20k ohms or 20,000 ohms. If you get an “OL” (over limit) reading, you might need to adjust the range higher, or it could indicate a truly bad wire.
- Connect the Leads: Touch one probe from your multimeter to the metal terminal inside one end of the spark plug wire. Touch the other probe to the metal terminal inside the other end of the same wire. Make sure you have good contact.
- Read the Resistance: Your multimeter display will show a resistance reading in ohms. What you’re looking for is a relatively low and consistent number.
- Check the Specs: This is where your owner’s manual comes in handy. Most manufacturers provide a specific resistance range per foot of wire. As a general rule of thumb, many wires should fall somewhere between 3,000 to 10,000 ohms per foot. Longer wires will naturally have higher resistance. If your manual doesn’t specify, you can usually assume wires under 2 feet should be below 15,000 ohms total. If your reading is “OL” or significantly higher than these ranges, that wire is likely toast.
- Perform a “Flex Test” (My Pro Tip): While the multimeter is connected, gently bend and flex the spark plug wire along its length. If the reading on your multimeter fluctuates wildly, jumps to “OL,” or becomes inconsistent, you’ve found an intermittent break in the wire that might only show up when the engine vibrates. This trick has saved me from chasing my tail on stubborn misfires more than once!
- Visual Inspection: Don’t forget to look at the wire itself. Are there any cracks, tears, burns, or frayed insulation? Sometimes, a wire can look bad even if the resistance is “okay,” meaning it could be arcing to ground.
- Repeat for All Wires: Go through this process for every single spark plug wire on your engine.
If you find one bad wire, it’s often a good idea to replace the entire set of spark plug wires. They tend to wear out at similar rates, and replacing just one might mean you’ll be back under the hood soon to replace another. Plus, a fresh set often improves overall ignition performance.
There you have it! Testing your spark plug wires with a multimeter is a straightforward diagnostic step that can pinpoint a common cause of misfires. With a little patience and your handy multimeter, you can confidently check your wires and get your car running smoothly again. It’s a great skill to have in your DIY mechanic toolkit, helping you save money and understand your vehicle better.