Testing spark plugs with a multimeter is a simple, effective method to diagnose engine issues and ensure optimal performance. By carefully checking the internal resistance and continuity of each plug, you can quickly identify faulty components that cause misfires. This crucial diagnostic step helps maintain engine health and prevent costly repairs by pinpointing defective spark plugs with precision.
Simple Steps How to Test Spark Plugs with Multimeter
Hey there! Have you ever had your car feel a little off? Maybe it’s sputtering, or just not as peppy as usual? It can be frustrating, right? A common culprit for these issues could be your spark plugs. Good news is, you can often figure out if a spark plug is failing right in your own garage. Yes, you really can test spark plugs with a multimeter!
It might sound a bit technical, but trust me, it’s a pretty simple DIY task once you know the steps. Using a basic multimeter, you can check the internal resistance of your spark plugs. This helps you spot a bad one before it causes bigger problems. Let’s dive in and get your engine running smoothly again!
So, how exactly do I test spark plugs with a multimeter to see if they’re still good?
You’ve asked a fantastic question! Getting hands-on with your car can feel daunting, but testing spark plugs is a great place to start. I’ve done this countless times myself, and it’s always satisfying to pinpoint an issue. Here’s how you can do it:
1. Safety First, Always!
- Before you do anything, make sure your car’s engine is cool. A hot engine can burn you.
- Disconnect the negative terminal of your car battery. This stops any accidental sparks.
- Wear safety gloves. Your hands will thank you!
2. Gather Your Tools
You won’t need much. Just grab your trusty multimeter, a spark plug wrench (sometimes called a spark plug socket), and maybe some compressed air to clean around the plugs.
3. Remove the Spark Plug
- Carefully pull off the spark plug wire or coil pack connected to the spark plug.
- Use your spark plug wrench to loosen and remove the spark plug. It often takes a little bit of force.
- Once it’s out, put it aside on a clean cloth. Repeat this for each plug you want to test, keeping track of which one came from where.
4. Give It a Quick Visual Check
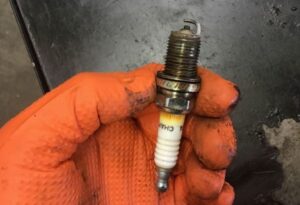
Before the multimeter even comes out, take a good look at the spark plug. This is a common-sense step I always do. Are there any cracks in the ceramic? Is the tip worn down or covered in thick, black carbon? Sometimes, a visual check tells you everything you need to know. A really worn or fouled plug is usually bad news.
5. Set Up Your Multimeter
- Turn your multimeter dial to the Ohms (Ω) setting. This measures electrical resistance.
- If your multimeter has different ranges (like 200, 2k, 20k), pick a range that goes up to at least 20,000 ohms (20kΩ). Most resistor-type spark plugs will have resistance in the thousands of ohms.
6. Test the Spark Plug Resistance
This is the main event! Here’s how to test spark plugs with a multimeter:
- Take one probe from your multimeter and touch it to the metal terminal at the top of the spark plug (where the spark plug wire connects).
- Take the other probe and touch it to the metal ground electrode at the bottom of the spark plug. This is the curved metal piece that bridges the gap.
- Look at the reading on your multimeter screen.
What Do the Readings Mean?
- Ideal Range: For most modern resistor spark plugs, you’re looking for a reading between 3,000 to 7,000 Ohms (3kΩ to 7kΩ). This tells you the internal resistor is doing its job. Think of it like a good score on a test!
- Too High or “OL” (Over Limit): If you see a very high number, or ‘OL’ (meaning open circuit), it suggests the internal resistor is broken or there’s a complete break inside the plug. This plug is bad. I remember once, my old truck was really struggling, and one plug showed OL – swapped it, and boom, smooth sailing!
- Too Low or Close to Zero: A reading of zero or very low ohms (under 1000Ω) can mean the resistor is shorted out. This plug is also bad.
- No Reading/Fluctuating: If the reading is erratic or doesn’t settle, it could indicate an intermittent fault. Replace it.
7. Compare Your Plugs
After testing each spark plug, compare the readings. If three plugs read around 5,000 ohms and one reads ‘OL’ or 100 ohms, you’ve found your faulty spark plug! This comparison often helps confirm your findings.
8. Reinstall or Replace
If a spark plug tests bad, it’s time for a replacement. Always gap new spark plugs to your car’s specifications before installing them. Screw them in by hand first to avoid cross-threading, then use your wrench for a final snug fit (check your car manual for torque specs!). Reconnect the spark plug wires or coil packs and the battery terminal.
While a multimeter test is great for checking internal resistance, it won’t tell you everything about spark quality under compression. But it’s a fantastic first step and often enough to diagnose many common issues!
And there you have it! Learning how to test spark plugs with a multimeter is a valuable skill for any DIY car enthusiast. It saves you time, money, and helps you understand your vehicle better. Don’t be afraid to give it a try – you’ll be surprised how empowering it feels to fix something yourself. Happy wrenching!