To optimize spark plug performance and prevent misfires, apply dielectric grease solely inside the spark plug boot and onto the ceramic insulator. Crucially, never put it on the spark plug threads or electrode, as this will hinder electrical conductivity. This simple application creates a vital seal against moisture and prevents voltage leaks, ensuring a strong, consistent spark.
Where to Put Dielectric Grease on Spark Plugs Right Way
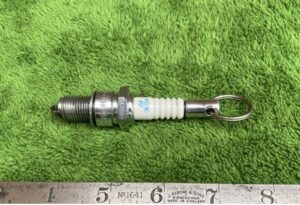
Hey there, fellow car enthusiast! Ever wondered about that little tube of dielectric grease and where it actually goes when you’re changing your spark plugs? It’s a common question, and getting it right can save you a headache down the road. Let’s cut straight to it: the magic spot for dielectric grease on spark plugs isn’t on the threads or the tip, but rather inside the spark plug boot, where it hugs the ceramic insulator of the plug.
Think of it as adding a protective shield to that crucial electrical connection. We’re aiming to keep moisture out, prevent corrosion, and make sure everything comes apart easily next time. It’s a small step, but a mighty one for maintaining a healthy ignition system!
So, where exactly should I put dielectric grease on spark plugs for the best results?
Alright, let’s get specific and make sure you’re doing it the “right way.” First off, let’s clear up what not to do. You absolutely do not want to put dielectric grease on spark plugs‘ threads or on the metal tip (the electrode) that actually sparks. Doing so can mess with the grounding or the electrical path, which is the last thing you want!
The real home for this handy grease is a thin layer inside the spark plug boot. This is the rubber or silicone cap that connects your spark plug wire (or coil-on-plug unit) to the top of the spark plug itself. Why here? Well, the boot is designed to protect the connection between the wire and the spark plug’s ceramic body. Dielectric grease acts as an electrical insulator and a moisture barrier. It helps prevent voltage leaks and keeps corrosive elements like water and road salt from getting into that connection.
Here’s how I usually tackle it, based on years of tinkering in my own garage:
- Clean First: Before you even think about grease, make sure both the inside of the spark plug boot and the ceramic part of the new spark plug are clean and dry. Any old gunk or moisture already there will just get sealed in.
- Less is More: This is key! You only need a tiny amount. I usually squeeze out a pea-sized dab onto my finger (wear gloves!) or a clean applicator.
- Apply Inside the Boot: Gently spread that small amount of dielectric grease around the inner surface of the spark plug boot. You want a thin, even coating where the boot will slide over the ceramic insulator of the spark plug. The goal isn’t to fill the boot, just to coat the contact surface.
- Connect and Twist: When you push the boot onto the spark plug, give it a little twist as you go. This helps spread the grease evenly and ensures a good seal and connection. You’ll feel it seat properly.
I remember one time I was replacing the spark plug wires on an older truck, and some of the boots were really stuck. It took forever to pull them off, and a few even tore! That’s when my mechanic friend reminded me about the simple magic of dielectric grease. He said, “Think of it as lubrication for the future you.” And he was right! Not only does it protect the electrical connection from arcing and corrosion, but it also makes the next spark plug change so much easier because the boots won’t seize onto the ceramic.
Using dielectric grease on spark plugs in this way ensures a stronger, more stable electrical connection, preventing misfires caused by moisture intrusion or poor contact. It really is a simple, inexpensive step that offers significant benefits for your vehicle’s long-term performance and your peace of mind.
So, there you have it! A small dab of dielectric grease in the right place – inside the spark plug boot – goes a long way in protecting your ignition system. It’s about ensuring a clean, stable connection and making future maintenance a breeze. Happy wrenching!