Testing a MAF sensor is the fastest way to find out whether it’s causing your engine problems. If your vehicle has a rough idle, poor acceleration, reduced fuel economy, engine hesitation, or a check engine light, a faulty Mass Air Flow (MAF) sensor could be the reason.
However, replacing the sensor without testing it first can waste both time and money because many of these symptoms can also be caused by vacuum leaks, bad spark plugs, or other engine issues.
The MAF sensor plays a critical role in your engine’s performance by measuring the amount of air entering the intake system. The Engine Control Unit (ECU) uses this information to calculate the correct amount of fuel for efficient combustion. Even a small error in the sensor’s readings can upset the air-fuel mixture, leading to poor drivability, higher fuel consumption, increased emissions, and, in some cases, damage to expensive components like the catalytic converter if the problem is ignored.
The good news is that testing a MAF sensor is easier than many drivers think. Depending on the tools you have, you can inspect it visually, test it with a multimeter, analyze live data with an OBD2 scanner, or perform a few simple checks that don’t require any special equipment. Each method has its own advantages, and using the right one can help you determine whether the sensor is dirty, faulty, or working properly.
In this guide, I’ll show you how to test a MAF sensor using several proven methods, explain when each method is most useful, and help you interpret the results.
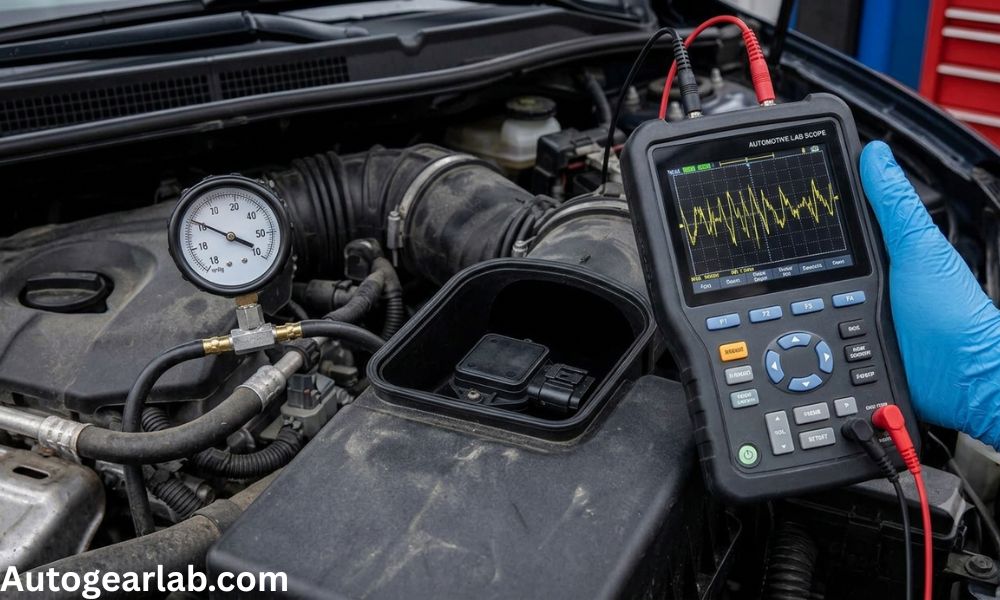
I’ll also cover common testing mistakes, what the results actually mean, and when cleaning or replacing the sensor is the right solution. If you want a step-by-step walkthrough for a specific testing method, you’ll also find links to detailed guides throughout this article.
Read More: What Causes a MAF Sensor to Go Bad?
What Does a MAF Sensor Do?
Before you learn how to test a MAF sensor, it helps to understand what the sensor actually does and why it’s so important to engine performance.
The Mass Air Flow (MAF) sensor is located in the air intake system, usually between the air filter box and the throttle body. Its job is to measure the amount of air entering the engine and send that information to the Engine Control Unit (ECU).
The ECU combines the MAF sensor data with information from other sensors to calculate the correct amount of fuel needed for efficient combustion. This keeps the engine running smoothly while maintaining good fuel economy, low emissions, and responsive acceleration.
When the MAF sensor starts sending inaccurate airflow readings, the ECU can no longer calculate the proper air-fuel mixture. As a result, your vehicle may experience several drivability problems, including:
- Rough idle
- Poor acceleration
- Engine hesitation
- Reduced fuel economy
- Engine misfires
- Hard starting
- Check engine light
Because these symptoms can also be caused by other engine problems, you shouldn’t assume the MAF sensor is faulty based on symptoms alone. That’s exactly why it’s important to test the sensor before deciding whether it needs cleaning or replacement.
In the following sections, I’ll explain several ways to test a MAF sensor, from simple visual inspections to more advanced diagnostic methods using a multimeter or an OBD2 scanner.
Signs Your MAF Sensor Needs Testing
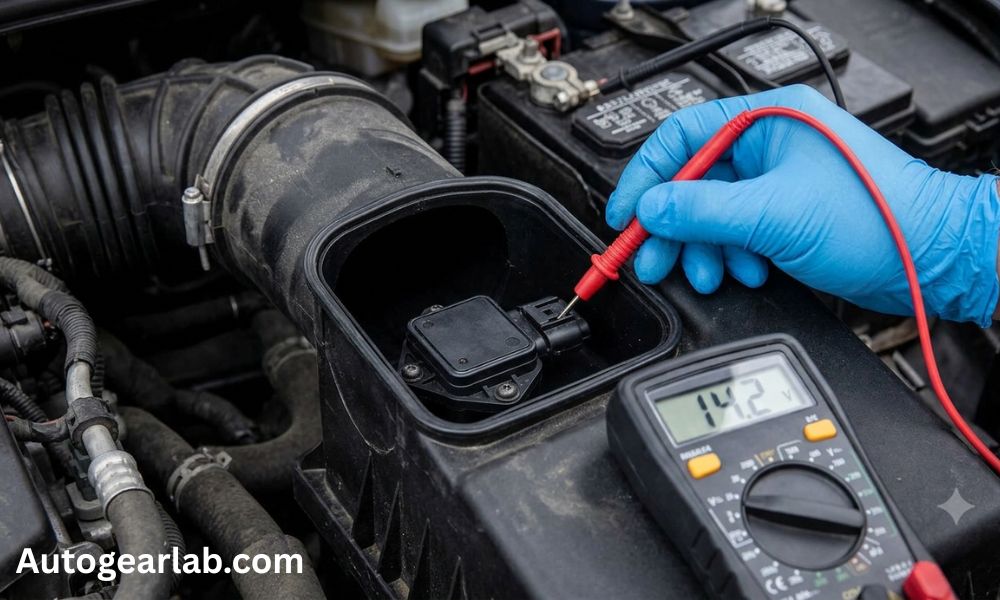
You don’t need to test your MAF sensor as part of routine maintenance. In most cases, you’ll only test it after your vehicle starts showing symptoms that point to an airflow or fuel mixture problem.
While these symptoms don’t automatically mean the MAF sensor is faulty, they do indicate that it’s worth inspecting before replacing any parts.
Check Engine Light
A check engine light is often the first warning sign. The ECU may detect abnormal airflow readings or fuel mixture issues and store diagnostic trouble codes related to the MAF sensor.
Rough Idle
If your engine shakes, vibrates, or the RPM fluctuates while idling, inaccurate airflow readings from the MAF sensor could be affecting the air-fuel mixture.
Poor Acceleration
A faulty MAF sensor can make your vehicle feel sluggish when you press the accelerator because the ECU isn’t delivering the correct amount of fuel.
Engine Hesitation
If the engine hesitates, stumbles, or briefly loses power during acceleration, the MAF sensor may not be reporting airflow accurately.
Reduced Fuel Economy
Incorrect airflow readings often cause the ECU to inject too much fuel, resulting in lower fuel efficiency and more frequent trips to the gas station.
Engine Stalling or Hard Starting
A severely contaminated or failing MAF sensor can make the engine difficult to start or even cause it to stall shortly after starting.
Engine Misfires
When the air-fuel mixture becomes excessively rich or lean, one or more cylinders may misfire. Although other issues can also cause misfires, the MAF sensor should be included in your diagnosis.
If you’re experiencing one or more of these symptoms, the next step is learning how to test a MAF sensor correctly. Starting with a few basic checks can often save you from replacing a sensor that isn’t actually faulty.
Before You Test a MAF Sensor
Taking a few minutes to prepare before testing can help you get more accurate results and avoid damaging the sensor.
Gather the Right Tools
The tools you’ll need depend on the testing method, but having these items available is helpful:
- OBD2 scanner (optional)
- Digital multimeter (optional)
- MAF sensor cleaner
- Safety gloves
- Safety glasses
- Vehicle repair manual (if available)
Don’t worry if you don’t have every tool. Later in this guide, I’ll explain how to test a MAF sensor using methods that require little or no special equipment.
Locate the MAF Sensor
The MAF sensor is usually installed between the air filter housing and the throttle body. Before testing, inspect the area for loose connectors, damaged wiring, cracked intake hoses, or signs of dirt and oil contamination.
Turn Off the Engine
For safety, switch off the engine and remove the key before disconnecting the sensor or inspecting the wiring. If the engine has been running, allow it to cool to avoid burns from hot engine components.
Check the Air Filter
A dirty or damaged air filter can allow dust and debris to contaminate the MAF sensor. If the air filter is excessively dirty, consider replacing it before continuing with your diagnosis.
Now that you’re prepared, let’s look at the different ways to test a MAF sensor, starting with the simplest method that requires no special tools.
Method 1: Perform a Visual Inspection (Overview)
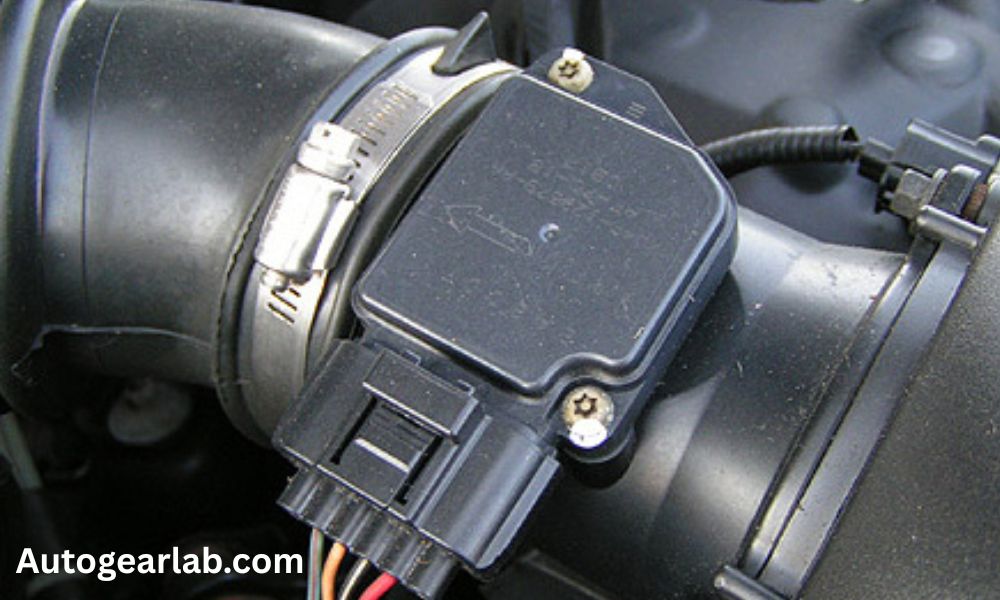
A visual inspection is the quickest and easiest way to begin how to test a MAF sensor. It takes only a few minutes and doesn’t require any special tools. While this method won’t confirm whether the sensor is working electrically, it can reveal obvious problems that affect its performance.
Start by locating the MAF sensor in the air intake tube between the air filter housing and the throttle body. With the engine turned off, inspect the sensor housing, electrical connector, and surrounding intake components.
Look for signs such as:
- Dirt or dust buildup on the sensing element
- Oil contamination from an over-oiled air filter
- Cracked or damaged sensor housing
- Loose or corroded electrical connector
- Damaged wiring
- Cracks or leaks in the air intake tube
If the sensing element is dirty, cleaning it with a dedicated MAF sensor cleaner may restore proper operation. However, avoid touching the sensing wire because it’s extremely delicate and can be damaged easily.
Keep in mind that a MAF sensor can appear perfectly clean and still fail electrically. That’s why a visual inspection should always be the first step—not the only test you perform.
Want detailed instructions? Read our complete guide on What Does a Bad MAF Sensor Look Like? to learn exactly what to inspect and how to identify signs of damage.
Method 2: How to Test a MAF Sensor with a Multimeter (Overview)
Using a digital multimeter is one of the most reliable ways to check whether the MAF sensor is receiving power and producing the correct electrical signals. It’s especially useful if you suspect a wiring issue or an internal sensor failure.
Depending on your vehicle, you may test:
- Battery voltage at the power wire
- Ground circuit continuity
- Signal voltage from the MAF sensor
- Reference voltage (if applicable)
The exact procedure and expected voltage values vary by vehicle make and model, so it’s important to use the correct wiring diagram or service manual.
A multimeter can help confirm whether the sensor has an electrical problem, but interpreting the readings correctly is just as important as taking the measurements.
Need step-by-step instructions? Read our detailed guide on How to Test a MAF Sensor with a Multimeter for wiring diagrams, voltage values, and testing procedures.
Method 3: How to Test a MAF Sensor Without a Multimeter (Overview)
If you don’t have a multimeter, you can still perform several simple checks to determine whether the MAF sensor may be causing your engine problems.
Some of the most common methods include:
- Inspecting the sensor for contamination
- Disconnecting the MAF sensor to compare engine behavior
- Observing idle quality
- Monitoring acceleration during a short test drive
- Cleaning the sensor and checking whether the symptoms improve
Although these methods aren’t as precise as electrical testing, they can provide valuable clues about whether the MAF sensor is functioning properly.
Keep in mind that these checks should be used as part of your overall diagnosis rather than as the only evidence that the sensor has failed.
Want the complete process? Check out our in-depth guide on How to Test a MAF Sensor Without a Multimeter, where each method is explained in detail with troubleshooting tips.
Method 4: How to Test a MAF Sensor with an OBD2 Scanner (Live Data Check)
An OBD2 scanner is one of the most practical tools for evaluating MAF sensor performance in real-time. Instead of guessing based on symptoms, you can observe actual airflow data while the engine is running, which helps you understand how the sensor behaves under different conditions.
Start by connecting the scanner to the vehicle’s OBD2 port and accessing live data. Look for the parameter labeled MAF (grams per second) or g/s. This value represents the amount of air entering the engine.
At idle, most engines typically show a low, stable reading. As you gently increase RPM, the MAF value should rise smoothly and consistently. Any sudden drops, erratic spikes, or unusually low readings may indicate a faulty sensor, restricted airflow, or intake system issues.
It’s also useful to compare readings under different conditions—idle, steady cruising, and light acceleration. A healthy MAF sensor responds in a predictable, gradual pattern that matches engine load.
Keep in mind that “normal” MAF values vary depending on engine size, number of cylinders, and vehicle design. Always refer to manufacturer specifications when available for accurate interpretation.
Want a deeper breakdown? Check our detailed guide on How to Test a MAF Sensor with OBD2 Scanner to learn expected readings, interpretation tips, and real diagnostic examples.
Method 5: How to Test a MAF Sensor by Cleaning and Retesting
In many real-world cases, MAF sensor issues are caused not by permanent failure, but by contamination. Dust, oil vapor, and debris can build up on the sensing element and distort airflow readings. That’s why cleaning and retesting is a practical diagnostic step before replacing the sensor.
Start by removing the MAF sensor carefully from the intake system. Use only a dedicated MAF sensor cleaner—never use carb cleaner, brake cleaner, or any harsh solvent, as these can damage the delicate sensing wire or film.
Spray the cleaner directly onto the sensing element and allow it to air dry completely. Do not touch or wipe the sensor, as even slight contact can cause permanent damage.
Once reinstalled, start the engine and observe its behavior. A properly functioning sensor will often show immediate improvement in idle stability, throttle response, and overall smoothness if contamination was the root cause.
For better confirmation, combine this step with a short test drive and, if possible, OBD2 live data monitoring. If symptoms and airflow readings improve after cleaning, the issue was likely related to buildup rather than sensor failure.
However, if there is no change in performance, it suggests a deeper electrical or internal sensor fault that requires further testing or replacement.
Method 6: How to Test a MAF Sensor by Disconnecting It (Bypass Test)
A quick way to narrow down MAF sensor-related issues is to temporarily disconnect it and observe how the engine behaves. This method doesn’t measure sensor output directly, but it helps identify whether the sensor is influencing drivability problems.
With the engine off, unplug the MAF sensor electrical connector. Then start the engine and let it idle. In many vehicles, the engine control unit will switch to a default fuel strategy based on preset values from other sensors (often called a “limp mode” or fallback mode).
Pay close attention to idle quality, throttle response, and overall smoothness. If the engine runs noticeably better with the MAF sensor disconnected, it may indicate that the sensor is sending incorrect or unstable readings. On the other hand, if performance worsens or remains unchanged, the issue may lie elsewhere in the intake or fuel system.
Take the vehicle for a short, careful test drive only if it runs safely in this condition. Some hesitation or reduced power is normal when the MAF is unplugged, but extreme drivability changes can still provide useful diagnostic clues.
Keep in mind this is not a definitive test. It only helps you compare behavior with and without MAF input, so it should always be followed by more precise testing methods like OBD2 live data or multimeter checks.
Need full troubleshooting flow? Read our complete guide on Symptoms of a Bad MAF Sensor to connect test results with real-world engine behavior.
Method 7: How to Test a MAF Sensor Using a Voltage Signal Check
Another effective way to evaluate MAF sensor performance is by checking its output signal voltage. This method helps confirm whether the sensor is actively producing a response based on airflow changes.
Start by back-probing the MAF sensor signal wire using a digital multimeter while the connector is still plugged in. Set the multimeter to measure DC voltage. Make sure the engine is running and fully warmed up for more accurate readings.
At idle, the signal voltage should remain relatively low and stable. As engine RPM increases, the voltage should rise smoothly in response to increased airflow. A healthy sensor produces a gradual, consistent change rather than sudden jumps or flat readings.
If the voltage stays fixed, fluctuates erratically, or drops unexpectedly during acceleration, it may indicate a failing MAF sensor or wiring issue. However, it’s important to rule out intake leaks or electrical connection problems before concluding the sensor is defective.
Because different vehicles use different MAF designs (frequency-based or voltage-based), expected values can vary significantly. Always refer to the specific service manual when possible.
This test is especially useful when combined with OBD2 live data, as it allows you to cross-check physical sensor output against ECU-reported airflow readings for better diagnostic accuracy.
How to Interpret the Results
After performing different MAF sensor tests, the next step is understanding what the results actually mean. Different symptoms point to different causes, and correct interpretation helps avoid unnecessary replacement.
Sensor OK
If readings are stable on a multimeter, live data shows smooth airflow changes, and fuel trims stay near normal range, the MAF sensor is likely functioning properly. In this case, drivability issues are often caused by another component such as vacuum leaks, spark issues, or fuel delivery problems.
Dirty sensor
If the sensor shows unstable readings but improves after cleaning, contamination is the most likely cause. Airflow readings may be slightly inaccurate due to dirt or oil buildup on the sensing element. Cleaning usually restores normal performance if no internal damage exists.
Wiring issue
If there is no signal, inconsistent voltage, or communication loss in live data, the problem may be electrical. Damaged wires, poor grounding, or loose connectors can prevent the sensor from sending correct signals to the ECU.
Replace sensor
If all wiring checks are good, cleaning has no effect, and live data or voltage output remains incorrect or erratic, the MAF sensor is likely faulty internally. In this case, replacement is usually the only reliable solution.
Common Mistakes When Testing a MAF Sensor
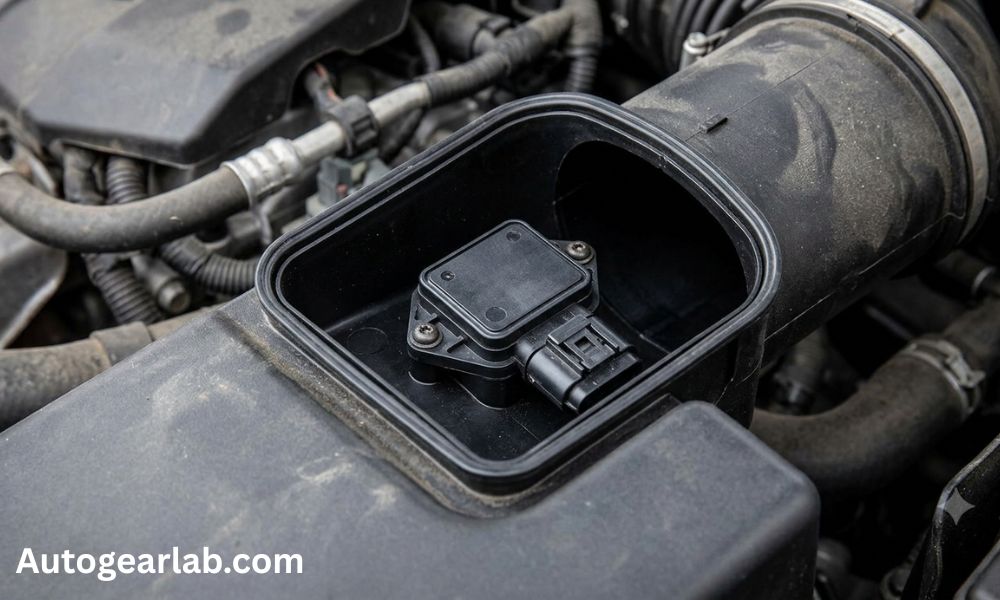
Wrong cleaner
Using brake cleaner, carb cleaner, or other harsh chemicals can permanently damage the sensing element. Only dedicated MAF cleaner should be used.
Touching sensing wire
The sensing element is extremely delicate. Even slight physical contact can alter calibration or break the wire completely.
Skipping live data
Relying only on visual inspection or basic tests can lead to incorrect conclusions. Live data provides real-time engine behavior that is essential for accurate diagnosis.
Ignoring intake leaks
Air leaks after the MAF sensor can mimic a bad sensor. Always check intake hoses, clamps, and vacuum lines before replacing the sensor.
Frequently Asked Questions
Can you test a MAF sensor without removing it?
Yes. Most tests, including OBD2 live data, fuel trim checks, and voltage signal testing, can be performed without removing the sensor.
What’s the easiest way to test a MAF sensor?
The easiest method is a quick OBD2 live data check or a simple disconnect test to observe engine behavior changes.
Can a dirty MAF sensor pass a multimeter test?
Yes. A multimeter may show normal electrical values even if the sensing element is contaminated and giving incorrect airflow readings.
Should you clean or replace a MAF sensor first?
Cleaning should always be the first step unless there is clear electrical failure or physical damage.
How long does it take to test a MAF sensor?
Basic checks can take 10–15 minutes, while full diagnosis using OBD2 and electrical testing may take 30–60 minutes.
Conclusion
A MAF sensor should always be diagnosed systematically rather than replaced based on symptoms alone. Proper testing helps identify whether the issue is contamination, wiring, or true sensor failure.
In most cases, starting with simple inspection and cleaning, then moving toward live data and electrical testing, provides the most accurate diagnosis.
For best results, follow each testing method step-by-step in detail before making a replacement decision.