A faulty mass air flow (MAF) sensor can cause a variety of engine performance problems, including rough idling, poor acceleration, reduced fuel economy, and an illuminated check engine light. Because the MAF sensor measures the amount of air entering the engine, inaccurate readings can disrupt the air-fuel mixture and affect how your vehicle runs. Fortunately, replacing a MAF sensor is a straightforward DIY repair that most vehicle owners can complete with a few basic tools.
In most cases, replacing a MAF sensor takes less than 30 minutes and doesn’t require advanced mechanical experience. The key is to use the correct replacement sensor, handle the delicate sensing element carefully, and install it in the proper orientation to ensure accurate airflow measurements.
In this guide, you’ll learn how to replace a MAF sensor step by step, including the tools you’ll need, how to safely remove the old sensor, install the new one, and verify that everything is working correctly after the replacement.
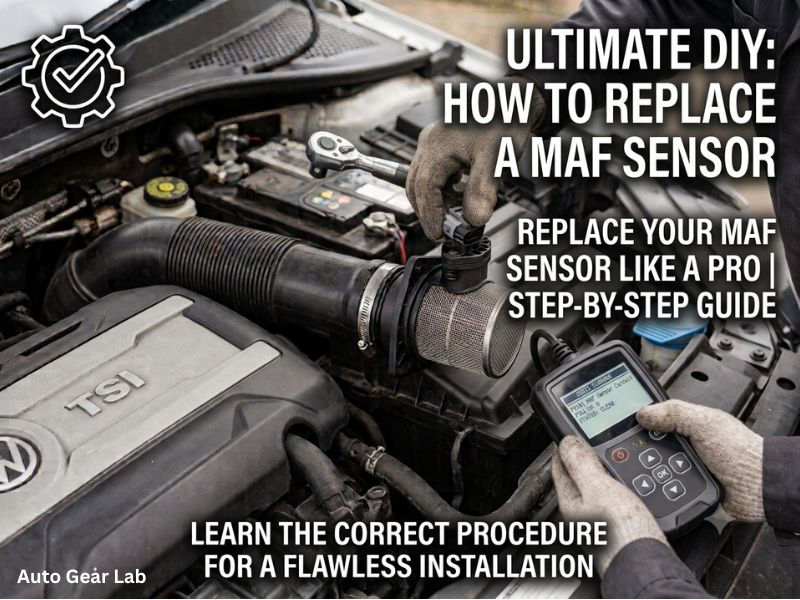
Tools and Materials You’ll Need
Before replacing your MAF sensor, gather all the necessary tools and materials. Having everything ready before you begin will make the replacement process faster and help prevent unnecessary interruptions. While the exact tools may vary depending on your vehicle, most MAF sensor replacements require only a few common hand tools.
Basic Tools
You’ll typically need:
- Replacement MAF sensor (OEM or high-quality aftermarket)
- Torx bit set (T15, T20, or T25 are the most common)
- Security Torx bit (for tamper-resistant screws, if applicable)
- Phillips or flat-head screwdriver
- Ratchet and socket set (if the intake duct needs to be removed)
- Needle-nose pliers (optional)
- Flashlight or work light
Safety Equipment
Protect yourself and the new sensor by using:
- Safety glasses
- Mechanic’s gloves or nitrile gloves
- Clean microfiber cloth or lint-free shop towel
Optional Supplies
Depending on your vehicle and the condition of the old sensor, these items may also be helpful:
- Replacement O-ring or gasket (if not included with the new sensor)
- Dielectric grease for the electrical connector (only if recommended by the vehicle manufacturer)
- Magnetic pickup tool for dropped screws
Choosing the Right Replacement MAF Sensor
Before starting the job, verify that the replacement sensor matches your vehicle’s specifications.
Check that the new sensor has:
- The correct part number
- The same electrical connector
- Matching mounting holes
- The same airflow direction
- A compatible housing design
Whenever possible, choose an OEM (Original Equipment Manufacturer) sensor or a reputable aftermarket brand. A low-quality or incorrect MAF sensor may provide inaccurate airflow readings, leading to poor engine performance or recurring check engine lights.
Tip: Compare the new sensor with the old one before removing the original. Confirming that both sensors are identical can save time and prevent installation issues later in the process.
Before You Begin
Taking a few minutes to prepare before replacing the MAF sensor can help prevent mistakes and make the installation process much smoother. These simple precautions protect both the new sensor and your vehicle’s electrical and intake systems.
Park the Vehicle Safely
Park your vehicle on a flat, level surface and engage the parking brake. If the vehicle has a manual transmission, place it in First Gear or Reverse. For automatic transmissions, shift into Park.
Make sure the engine is turned off before opening the hood.
Allow the Engine to Cool
If you’ve recently driven the vehicle, let the engine cool for at least 15–30 minutes. The MAF sensor is usually located near the engine and intake system, where components can become hot enough to cause burns.
Working on a cool engine also reduces the risk of damaging plastic connectors and intake parts.
Disconnect the Negative Battery Terminal (If Recommended)
Although replacing a MAF sensor doesn’t always require disconnecting the battery, doing so is recommended on many vehicles.
Disconnecting the negative (-) battery terminal can:
- Prevent accidental short circuits
- Reduce the chance of electrical faults
- Protect sensitive electronic components
- Prevent the engine from being started accidentally while you’re working
If you disconnect the battery, keep the negative cable away from the terminal until the installation is complete.
Verify the New Sensor
Before removing the old MAF sensor, compare it with the replacement unit.
Confirm that both sensors have:
- The same electrical connector
- Matching mounting holes
- The correct airflow direction arrow
- An identical housing shape
- The correct O-ring or seal, if applicable
Discovering that the replacement sensor doesn’t fit after the old one has been removed can delay the repair.
Keep the Work Area Clean
Since the MAF sensor is part of the engine’s air intake system, it’s important to prevent dirt or debris from entering the intake.
Before beginning:
- Clean loose dirt around the sensor if necessary.
- Prepare a small container for screws and clips.
- Have a clean lint-free cloth available to cover the intake opening if needed.
Handle the New Sensor Carefully
A new MAF sensor is a precision electronic component. Avoid touching the sensing wire or sensing film, and never place the sensor on a dirty or wet surface.
Always hold the sensor by its plastic housing until it’s ready to be installed.
With these preparations complete, you’re ready to remove the old MAF sensor and install the new one safely and correctly.
Step 1: Locate the MAF Sensor
The first step in replacing a MAF sensor is finding its location. On most vehicles, the MAF sensor is installed in the air intake system, where it measures the amount of air flowing into the engine before it reaches the throttle body.
Find the Air Intake System
Open the hood and locate the air filter box. From there, follow the large plastic air intake tube toward the engine.
In most vehicles, the MAF sensor is mounted:
- Between the air filter box and the throttle body
- On the air intake tube
- Inside or attached to the air intake housing
It is usually easy to identify because it has an electrical connector plugged into it and is secured with screws or integrated into the intake housing.
Check for Obstructions
Some vehicles provide direct access to the MAF sensor, while others may require you to remove an engine cover or loosen part of the intake duct.
Before removing anything, inspect the surrounding area and determine whether additional components need to be moved for better access.
Verify You’ve Found the Correct Sensor
Before disconnecting any connectors or removing screws, confirm that you’ve identified the correct component.
A typical MAF sensor will have:
- A multi-pin electrical connector
- Two retaining screws or mounting bolts
- An airflow direction arrow on the housing
- A position directly downstream of the air filter
If you’re unsure, consult your owner’s manual or a vehicle-specific repair guide.
Tip: Take a photo of the sensor, connector, and surrounding intake components before disassembly. This provides a helpful reference when installing the new MAF sensor later.
Step 2: Disconnect the Electrical Connector
Before removing the old MAF sensor, you’ll need to disconnect its electrical connector. This connector supplies power to the sensor and allows it to send airflow data to the engine control module (ECM). Removing it correctly helps prevent damage to the wiring harness and connector pins.
Locate the Locking Tab
Most MAF sensor connectors are secured with a locking tab or safety clip to prevent accidental disconnection.
Depending on your vehicle, you may need to:
- Press down on the locking tab
- Lift a small release clip
- Slide a secondary safety lock before pressing the tab
Take a moment to inspect the connector so you understand how it releases before applying pressure.
Disconnect the Connector Carefully
Once the locking mechanism is released:
- Hold the connector by its plastic body.
- Press or lift the locking tab as required.
- Pull the connector straight away from the sensor.
The connector should come off with steady pressure. If it doesn’t, double-check that the lock has been fully released.
If the Connector Is Stuck
It’s common for connectors to become difficult to remove after years of exposure to heat, dirt, and moisture.
If the connector won’t unplug:
- Wiggle it gently while holding the release tab.
- Clean away dirt around the connector if necessary.
- Check for a hidden secondary locking clip.
- Avoid using excessive force.
Never pull on the wires or pry the connector with a screwdriver, as this can damage the wiring harness or break the plastic connector.
Inspect the Connector
After disconnecting it, take a quick look inside the connector.
Check for:
- Bent or damaged terminals
- Corrosion
- Dirt or moisture
- Broken locking tabs
If the connector is damaged, replacing the MAF sensor alone may not solve your engine performance issues. The connector or wiring harness may also need repair.
With the electrical connector safely disconnected, you’re ready to remove the old MAF sensor from the intake system.
Step 3: Remove the Old MAF Sensor
With the electrical connector disconnected, you can now remove the old MAF sensor. The exact procedure depends on your vehicle, but most sensors are held in place with two screws or mounted inside a removable housing. Work carefully to avoid damaging the intake system or the sensor if you plan to keep it as a spare.
Remove the Retaining Screws or Fasteners
Using the appropriate tool, loosen and remove the screws securing the MAF sensor.
Depending on your vehicle, these may include:
- Torx screws
- Security Torx screws
- Phillips screws
- Allen screws
- Small bolts
Turn each fastener counterclockwise while applying steady pressure to avoid stripping the screw heads.
Place the removed screws in a small container or magnetic tray so they don’t get lost in the engine bay.
Pull the Sensor Straight Out
After the fasteners have been removed, grip the MAF sensor by its plastic housing and carefully pull it straight out of the mounting hole.
If the sensor doesn’t come out immediately:
- Wiggle it gently from side to side.
- Pull with steady, even pressure.
- Avoid twisting it excessively.
Many sensors are sealed with a rubber O-ring, which can make them feel tight even after the screws have been removed.
Never use a screwdriver or pry bar to force the sensor out, as this can crack the intake housing or damage the mounting surface.
Inspect the Old Sensor
Once the sensor has been removed, examine it for signs of wear or damage.
Look for:
- Heavy dirt or dust buildup
- Oil contamination
- Cracked plastic housing
- Broken sensing wire or sensing film
- Damaged electrical connector pins
- Worn or damaged O-ring
These observations can help confirm whether the sensor was likely causing your engine performance issues.
Inspect the Mounting Area
Before installing the new MAF sensor, check the intake housing where the old sensor was mounted.
Inspect for:
- Dirt or debris inside the opening
- Damaged sealing surface
- Cracked housing
- Loose hardware
- Worn O-ring seat
If necessary, wipe the mounting surface with a clean, lint-free cloth. Avoid allowing dirt or foreign objects to fall into the air intake system.
With the old MAF sensor removed and the mounting area inspected, you’re ready to install the new sensor. Proper installation is just as important as removal, as even a small mistake can affect airflow readings and engine performance.
Step 4: Install the New MAF Sensor
After removing the old MAF sensor and inspecting the mounting area, it’s time to install the replacement. Proper installation is essential, as an incorrectly installed sensor can provide inaccurate airflow readings, trigger a check engine light, or cause poor engine performance.
Compare the Old and New Sensors
Before installing the new sensor, place it next to the old one and compare them carefully.
Verify that both sensors have:
- The same part number or compatible replacement number
- An identical electrical connector
- Matching mounting holes
- The same housing shape and size
- The correct airflow direction
If anything looks different, double-check that you’ve purchased the correct replacement before proceeding.
Inspect the O-Ring or Seal
Many MAF sensors use a rubber O-ring or gasket to create an airtight seal between the sensor and the intake housing.
Before installation:
- Make sure the O-ring is properly seated.
- Replace it if it’s cracked, flattened, or damaged.
- Ensure the mounting surface is clean and free of debris.
A damaged seal can allow unmetered air into the intake system, leading to rough idling and inaccurate airflow readings.
Position the Sensor Correctly
Most MAF sensors have an airflow direction arrow molded into the housing.
Align the arrow so it points toward the engine, following the direction of airflow through the intake system.
Installing the sensor backward can result in incorrect measurements and poor engine performance.
Insert the New Sensor
Carefully guide the sensor into the mounting opening.
As you install it:
- Hold the sensor by its plastic housing.
- Slide it straight into place.
- Avoid forcing or twisting it.
- Ensure it sits flush against the mounting surface.
If the sensor doesn’t fit easily, remove it and check for an incorrectly positioned O-ring or an obstruction in the mounting area.
Tighten the Retaining Screws
Reinstall the retaining screws or bolts by hand to avoid cross-threading.
Once they’re started correctly:
- Tighten them evenly.
- Alternate between screws if there are two.
- Stop once the sensor is firmly secured.
Avoid overtightening, as excessive torque can crack the plastic housing or strip the threads.
Reconnect the Electrical Connector
Align the electrical connector with the sensor and push it in until you hear or feel it click into place.
After reconnecting:
- Gently tug on the connector to ensure it’s locked.
- Verify that no wires are pinched or under tension.
- Confirm that any secondary locking clip is fully engaged.
At this point, the new MAF sensor is securely installed. The final step is to reassemble any components you removed, reconnect the battery if necessary, and verify that the engine is operating normally.
Step 5: Reconnect Everything
With the new MAF sensor securely installed, the next step is to reassemble any components you removed and make sure everything is properly connected. Taking a few extra minutes to double-check your work can help prevent air leaks, electrical issues, and unnecessary troubleshooting later.
Reinstall the Intake Duct
If you removed the air intake tube or any intake components for better access, reinstall them before starting the engine.
Make sure to:
- Position the intake duct correctly.
- Reconnect any breather hoses or vacuum lines that were disconnected.
- Tighten all hose clamps securely.
- Ensure the duct is fully seated at both ends.
A loose intake tube can allow unmetered air into the engine, causing rough idle, poor acceleration, or a check engine light.
Reinstall the Engine Cover (If Removed)
If your vehicle has a decorative engine cover, reinstall it according to the manufacturer’s instructions.
Ensure it sits properly on its mounting points and doesn’t interfere with the MAF sensor connector or intake components.
Reconnect the Battery
If you disconnected the negative battery terminal before beginning the repair, reconnect it now.
After reconnecting:
- Tighten the terminal securely.
- Make sure the cable doesn’t move on the battery post.
- Check that no tools or loose hardware remain near the battery.
Some vehicles may require the engine control module (ECM) to relearn idle or fuel trim values after the battery has been disconnected.
Perform a Final Visual Inspection
Before closing the hood, inspect your work carefully.
Confirm that:
- The new MAF sensor is fully seated.
- The retaining screws are tight.
- The electrical connector is completely locked.
- The intake duct is properly installed.
- All hose clamps are secure.
- No tools, screws, or rags have been left inside the engine bay.
A quick inspection now can save significant troubleshooting time later.
With everything reassembled and secured, you’re ready to start the engine and verify that the new MAF sensor is functioning correctly.
Step 6: Start the Engine and Test
After replacing the MAF sensor and reconnecting all components, the final step is to verify that everything is working correctly. A quick inspection followed by a short test drive can help confirm that the new sensor is providing accurate airflow readings and that the repair was successful.
Start the Engine
Start the engine and let it idle for a few minutes.
During idle, pay attention to:
- Smooth and stable engine speed
- Normal engine sound
- Any unusual vibrations
- Warning lights on the dashboard
It’s normal for the engine to take a few moments to adjust after a new MAF sensor is installed, especially if the battery was disconnected.
Check for Air Leaks
With the engine running, inspect the air intake system around the MAF sensor.
Look and listen for:
- Loose intake hoses
- Hissing sounds that may indicate an air leak
- Misaligned intake duct connections
- A connector that isn’t fully seated
Even a small air leak after the MAF sensor can cause inaccurate airflow readings and affect engine performance.
Watch for the Check Engine Light
If the Check Engine Light was illuminated because of a faulty MAF sensor, it may turn off automatically after the repair and several drive cycles.
If the light remains on:
- Verify that the electrical connector is fully connected.
- Check that the sensor is installed in the correct airflow direction.
- Confirm that the replacement sensor matches your vehicle.
- Scan the vehicle for diagnostic trouble codes using an OBD-II scanner.
A stored code doesn’t always mean the new sensor is faulty—it may simply need to be cleared.
Take a Short Test Drive
Once the engine is idling normally, take the vehicle for a short drive.
Pay attention to whether:
- Acceleration is smooth.
- Throttle response has improved.
- The engine no longer hesitates.
- Idle remains stable after stopping.
- Fuel delivery feels normal.
These are good signs that the new MAF sensor is functioning properly.
Verify the Repair
After the test drive, perform one final inspection under the hood.
Confirm that:
- The MAF sensor is still securely mounted.
- The electrical connector remains locked.
- Intake hoses haven’t shifted.
- There are no unusual noises or air leaks.
If the engine runs smoothly and no warning lights return, the replacement was successful.
However, if symptoms such as rough idling, poor acceleration, or a persistent Check Engine Light continue, the issue may be related to another component, such as a vacuum leak, damaged wiring, a dirty throttle body, or another engine management sensor.
Common Mistakes to Avoid When Replacing a MAF Sensor
Replacing a MAF sensor is a relatively simple repair, but small mistakes can lead to poor engine performance, recurring check engine lights, or even damage to the new sensor. Avoid these common errors to ensure a successful replacement.
Installing the Sensor Backward
Most MAF sensors have an airflow direction arrow on the housing. Installing the sensor in the wrong direction will cause incorrect airflow readings and may result in rough idling, hesitation, or diagnostic trouble codes.
Always verify that the airflow arrow points toward the engine before tightening the mounting screws.
Buying the Wrong Replacement Sensor
Not all MAF sensors are interchangeable, even between different engine sizes of the same vehicle model.
Before installation, confirm that the replacement sensor:
- Matches your vehicle’s year, make, model, and engine.
- Has the correct part number.
- Uses the same electrical connector.
- Fits the original mounting location.
Using the wrong sensor can cause drivability issues and inaccurate airflow measurements.
Touching the Sensing Element
The sensing wire or sensing film inside the MAF sensor is extremely delicate.
Never:
- Touch it with your fingers.
- Wipe it with a cloth.
- Clean it with brushes.
- Drop the sensor onto a hard surface.
Always handle the sensor by its plastic housing.
Overtightening the Mounting Screws
The retaining screws only need to be snug enough to hold the sensor securely.
Applying excessive force can:
- Crack the plastic housing.
- Strip the mounting threads.
- Damage the intake housing.
Tighten the screws evenly without forcing them.
Forgetting to Inspect or Replace the O-Ring
If the MAF sensor uses an O-ring or gasket, inspect it before installation.
A worn or damaged seal can allow unmetered air into the intake system, leading to:
- Rough idle
- Poor fuel economy
- Lean air-fuel mixture
- Check Engine Light
Replace the O-ring if it shows signs of wear.
Leaving the Electrical Connector Loose
After reconnecting the wiring harness, ensure the connector clicks firmly into place.
A loose connector can cause:
- Intermittent sensor readings
- Engine hesitation
- Diagnostic trouble codes
- Check Engine Light
Give the connector a gentle tug to verify that it’s locked.
Skipping the Final Inspection
Many post-repair problems are caused by simple oversights rather than faulty parts.
Before closing the hood, make sure:
- The intake duct is fully seated.
- Hose clamps are tight.
- All tools have been removed from the engine bay.
- No vacuum hoses were left disconnected.
- The MAF sensor is securely mounted.
Assuming Every Engine Problem Is Caused by the MAF Sensor
Replacing the MAF sensor won’t fix every engine performance issue.
If problems continue after installation, the cause may be:
- A vacuum leak
- A clogged air filter
- Damaged wiring
- A faulty intake air temperature (IAT) sensor
- A dirty throttle body
- Another engine management problem
If symptoms persist, scan the vehicle for diagnostic trouble codes and inspect the related intake and electrical components before replacing additional parts unnecessarily.
Frequently Asked Questions
Can I replace a MAF sensor myself?
Yes. Replacing a MAF sensor is a beginner-friendly DIY repair on most vehicles. With basic hand tools and the correct replacement sensor, the job typically takes 15–30 minutes.
How long does it take to replace a MAF sensor?
For most cars, replacing a MAF sensor takes about 15 to 30 minutes. Vehicles with limited access to the air intake system may take slightly longer.
Do I need to disconnect the battery before replacing a MAF sensor?
Not always. Many vehicles allow you to replace the MAF sensor without disconnecting the battery. However, disconnecting the negative battery terminal is recommended by some manufacturers and can help prevent accidental electrical issues.
Do I need to reset the ECU after replacing a MAF sensor?
In many cases, no manual reset is required. The engine control module (ECM) can adapt to the new sensor over several drive cycles. However, if the Check Engine Light remains on or diagnostic trouble codes are stored, you may need to clear the codes with an OBD-II scanner or follow the manufacturer’s reset procedure.
Can I drive my car immediately after replacing the MAF sensor?
Yes. After confirming that the sensor is installed correctly, the electrical connector is secure, and there are no air leaks, you can drive the vehicle. Start with a short test drive to verify that the engine is running normally.
Should I replace the O-ring when replacing the MAF sensor?
If the MAF sensor uses an O-ring, inspect it during replacement. If it’s cracked, flattened, or damaged, replace it to ensure a proper seal and prevent unmetered air from entering the intake system.
How tight should the MAF sensor mounting screws be?
The screws should be tightened just enough to hold the sensor securely against the mounting surface. Overtightening can crack the plastic housing or strip the mounting threads.
Can I use an aftermarket MAF sensor?
Yes, but quality matters. A high-quality aftermarket MAF sensor from a reputable manufacturer can perform well, while low-quality sensors may provide inaccurate airflow readings and cause engine performance problems. Whenever possible, use an OEM sensor or a trusted aftermarket brand.
Conclusion
Replacing a MAF sensor is a simple maintenance task that can restore proper engine performance, improve fuel efficiency, and eliminate problems caused by inaccurate airflow readings. By using the correct replacement sensor, following the proper installation steps, and taking care not to damage the sensing element, you can complete the repair confidently in less than an hour.
After the installation, take a few minutes to inspect the intake system, verify that all connections are secure, and test-drive the vehicle. If the engine runs smoothly and no warning lights appear, your replacement was successful. If problems persist, inspect the intake system for air leaks, damaged wiring, or other engine management issues before replacing additional components.