To use a jump starter box, first verify that it matches your vehicle’s battery voltage and is sufficiently charged. With the vehicle off, connect the red clamp to the positive jump point, connect the black clamp to the manufacturer-approved engine/chassis ground, turn the jump box on if required, make a short starting attempt, then disconnect it after the engine starts.
A “jump starter box” may be a traditional sealed lead-acid portable power unit or a compact lithium jump starter. The overall process is similar, but activation, low-voltage detection, maximum cranking time, and clamp locations can differ, so the instructions for your particular jump box and vehicle always take priority.
What Is a Jump Starter Box?
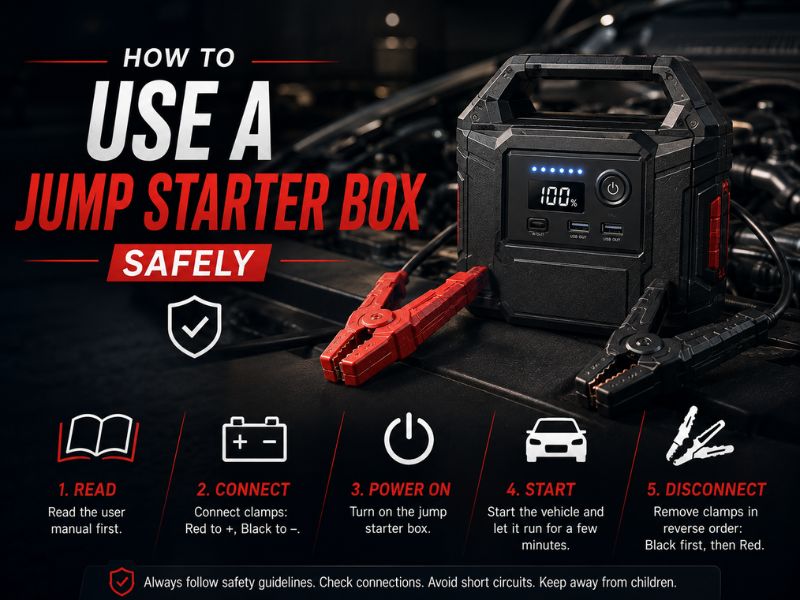
A jump starter box is a portable battery designed to provide the high current needed to crank a vehicle when its normal starting battery is too discharged to do the job.
Unlike traditional jumper cables, it does not require a second vehicle.
Many larger jump boxes use an internal AGM lead-acid battery, while compact modern units commonly use lithium batteries. Some larger boxes also include USB outlets, 12V accessory power, lights, air compressors, or power inverters. Schumacher, for example, currently sells portable jump boxes combining jump-starting capability with 12V power and other emergency functions.
Regardless of the extra features, the basic jump-starting job remains the same: temporarily provide enough electrical support for the vehicle’s starter motor to crank the engine.
Charge the Jump Starter Box Before You Need It
A jump box is only useful when its internal battery has enough charge.
Clore recommends beginning the jump-start process with the unit at or near full charge. A partially discharged jump starter may still turn on and illuminate its display while lacking enough stored energy for a difficult starting event.
Check the charge indicator before connecting the clamps.
If the unit has been sitting unused in your trunk for months, recharge it according to the manufacturer’s maintenance schedule rather than assuming it is still ready.
Also disconnect the jump box from any wall charger before using it for jump-starting unless its manual specifically says otherwise.
Step 1: Verify the Correct Voltage
Before connecting anything, confirm that the jump starter box matches the vehicle’s electrical system.
Most passenger vehicles use 12V starting systems, and many portable jump starters are 12V-only devices. NOCO’s GB40, for example, is designed for 12V lead-acid starting batteries.
Larger commercial jump boxes may support both 12V and 24V systems, which makes correct mode selection especially important.
Never assume a high amp rating compensates for the wrong voltage.
A 3000A 12V booster is still not automatically appropriate for a 24V system.
Match voltage first. Amp capability comes second.
Step 2: Inspect the Vehicle Battery
Do not immediately clamp onto a battery without looking at it.
A battery that is merely discharged is different from one that is physically unsafe.
NOCO specifically warns against attempting to jump-start a damaged or frozen battery.
Stop if you find severe case damage, obvious leakage, significant deformation, or evidence that the battery may be frozen.
Also determine whether your jump starter has battery-chemistry restrictions. Some units are designed specifically for conventional 12V lead-acid batteries, including AGM types, and should not automatically be used with every lithium starting battery.
Step 3: Turn the Vehicle Off
Place the vehicle in Park, apply the parking brake, and turn the ignition off before connecting the jump starter.
Turn off unnecessary electrical loads such as headlights, climate control, heated seats, and audio equipment.
You want the available starting energy directed toward the starter motor, not accessories.
If the jump box has a physical ON/OFF switch, leave it off while making connections unless its own manual specifies a different sequence. Clore’s standard procedure connects the clamps first and energizes the jump starter afterward.
Step 4: Find the Correct Jump-Start Points
The battery terminals are not always where you should connect.
Some modern vehicles locate the battery under a seat, in the trunk, or behind covers while providing dedicated remote jump-start points under the hood.
Clore recommends checking the vehicle owner’s manual for manufacturer-provided alternate starting points before connecting the booster.
If your vehicle specifies a positive jump terminal and a particular chassis ground, use those points.
This is especially important on vehicles with sophisticated battery-monitoring systems or unusual electrical layouts.
Step 5: Connect the Red Clamp First
For a conventional negative-ground vehicle, attach the red positive (+) clamp to the positive battery terminal or designated positive jump terminal.
Clore’s procedure places the positive connection first.
Make sure the clamp has clean, solid metal-to-metal contact.
A clamp resting on corrosion, plastic, or a loose terminal can severely restrict current.
Keep the jump-starter cable away from belts, pulleys, cooling fans, and other moving engine components.
The engine may begin running moments later.
Step 6: Connect the Black Clamp to the Correct Ground
Clore recommends connecting the black negative (-) clamp to a substantial engine or chassis ground away from the battery on a normal negative-ground vehicle. Suitable points include heavy unpainted metal portions of the engine or chassis specified for jump starting.
Avoid fuel lines, carburetors, painted surfaces, thin sheet metal, and moving parts.
Why connect away from the battery?
Lead-acid batteries can release flammable gases, and completing the final connection away from the battery reduces the chance that a connection spark occurs near those gases.
There is some manufacturer variation. Certain smart lithium jump starters, including NOCO models, may permit the negative clamp to be connected to the battery negative terminal or vehicle chassis on appropriate systems.
Therefore, follow the vehicle and jump-box instructions for your exact equipment rather than assuming one connection location applies universally.
Step 7: Check for Connection Warnings
Before energizing the jump starter, check its indicators.
Many modern jump boxes include reverse-polarity protection or an audible warning.
If you accidentally connected red to negative and black to positive, do not attempt to start the vehicle.
Correct the connections first.
NOCO’s smart jump starters use status indicators to show when the unit has detected a valid connection and is ready to provide boost power.
Larger Schumacher jump boxes may include reverse-connection alarms and ON/OFF switches to reduce accidental sparking.
Never bypass an error warning simply because you are in a hurry.
Step 8: Turn the Jump Starter Box On
Once you have confirmed polarity and secure connections, turn the jump box on if its design requires manual activation.
Traditional large jump boxes often have a physical power switch.
Some compact lithium units activate their output electronically after verifying the battery connection.
For example, NOCO indicates that its GB40 is ready to jump-start when the white Boost indicator is illuminated.
The activation sequence is model-specific, so do not assume that every jump starter should be turned on before the clamps are connected.
Step 9: Try to Start the Engine
Attempt to start the vehicle normally.
Use a short cranking attempt, not continuous cranking.
Starter motors and jump boxes handle enormous current during starting, creating heat rapidly.
Clore’s jump-start guidance for many of its units calls for short cranking periods followed by a cooling/rest interval if the engine does not start.
Other manufacturers specify different timing.
The important rule is to follow the crank/rest duty cycle in your jump starter’s manual.
If the engine fails to start, release the key or start button and allow the specified rest period before trying again.
Do not keep the starter engaged continuously in the hope that another few seconds will solve the problem.
If the Engine Cranks Strongly but Will Not Start
A jump starter only addresses inadequate starting-battery power.
Once the booster makes the engine crank normally, it has largely done its job.
If the engine spins strongly but never begins running, the problem may involve fuel delivery, ignition, engine management, compression, or another mechanical/electrical fault.
Continuing to apply more jump-starting current will not repair those systems.
Similarly, if a properly charged jump box makes absolutely no difference to a no-crank condition, the vehicle may have a starter, cable, control-circuit, or other starting-system problem rather than simply a discharged battery.
What If the Jump Box Does Not Detect the Battery?
Smart lithium jump starters sometimes require a minimum connected-battery voltage before automatically enabling their output.
The NOCO GB40, for example, provides a manual override function for a battery that is below its normal automatic detection threshold.
Manual override deserves caution.
NOCO warns that override operation changes or disables some normal safety protections, so polarity must be positively verified before using it.
Do not use an override just because the vehicle failed to start on the first attempt.
Only use the feature if:
The jump starter supports it.
The battery voltage and chemistry are compatible.
You have confirmed the positive and negative connections.
You understand the model-specific procedure.
If you are uncertain, normal troubleshooting is safer than defeating automatic protections.
Step 10: Disconnect the Box After the Car Starts
Once the engine starts and is running normally, disconnect the booster rather than leaving it attached indefinitely.
For the connection method recommended by Clore, remove the black negative clamp from the vehicle ground first, then remove the red positive clamp from the positive terminal.
If your jump starter has a master power switch, follow its specified shutdown sequence.
Keep the removed clamps separated from one another and away from vehicle metal while the jump box remains energized.
Return the clamps and cables to their proper storage positions after use.
Recharge the Jump Starter After Using It
Do not throw the box back into your trunk and forget about it.
Recharge it after the jump according to the manufacturer’s instructions.
A jump starter that successfully starts a car can still have plenty of charge left, but restoring it to full capacity means it is ready for the next emergency.
Periodically check a stored jump box even if you have not used it.
Recharge intervals vary between lithium and sealed lead-acid models, so use the schedule in your manual rather than a universal calendar rule.
Common Jump Starter Box Mistakes
One of the most common mistakes is treating every jump box as if it operates identically.
A traditional AGM jump box with a manual ON/OFF switch behaves differently from a smart lithium pack that detects the battery electronically.
Another mistake is connecting the negative lead to the nearest convenient piece of metal. Clore recommends a substantial engine or chassis ground—not painted metal, thin sheet metal, fuel-system components, or moving parts.
Other problems include using the wrong voltage, attempting to jump a damaged battery, ignoring reverse-polarity warnings, using a nearly discharged jump box, or repeatedly cranking beyond the unit’s duty cycle.
Avoiding these mistakes matters more than trying to perform the procedure as quickly as possible.
Can You Leave the Jump Starter Connected for a Few Minutes?
Before starting, some jump starters may benefit from a short connection period on a heavily discharged battery, but this is model-specific.
After the engine has started, however, portable jump boxes should generally be disconnected according to their instructions rather than intentionally left attached.
A jump starter is not automatically a battery charger.
Its primary job is providing the short burst of power needed to crank the engine.
If the vehicle battery needs charging afterward, use the appropriate battery-charging procedure.
Frequently Asked Questions
How Do You Use a Jump Starter Box?
Charge the box, confirm voltage compatibility, turn the vehicle off, connect red to positive and black to the approved ground, activate the box if necessary, and make a short starting attempt. Disconnect it after the engine starts.
Which Clamp Goes on First?
On a conventional negative-ground vehicle, the red positive clamp goes on first. Clore then recommends connecting the black negative clamp to a proper engine or chassis ground.
Do You Turn the Jump Box On Before Connecting It?
Many traditional jump boxes should remain off until the clamps are securely connected. Follow your exact manual because smart lithium boosters may use automatic electronic activation instead.
Where Should the Black Clamp Go?
Clore recommends a substantial unpainted engine or chassis ground away from the battery on conventional negative-ground vehicles. Your vehicle may also have a designated ground starting point.
How Long Should You Crank With a Jump Starter Box?
Use only the short cranking period specified by the jump starter manufacturer, followed by its required rest interval if the vehicle does not start. Do not continuously crank the starter.
Why Is My Jump Starter Box Beeping?
A beep may indicate reverse polarity, incorrect voltage, improper connection, or another fault depending on the model. Check the warning indicator and manual before attempting to start the vehicle. Schumacher offers jump boxes with reverse-connection warning alarms.
Can You Use a Jump Box on a Completely Dead Battery?
Some smart jump starters can assist extremely low-voltage batteries through a manual override feature. Because override can reduce normal safety protection, use it only according to the manufacturer’s instructions.
Can You Use a Jump Starter Box on a Frozen Battery?
No. Do not jump-start a frozen battery. NOCO specifically warns against attempting to boost frozen or damaged batteries.
Do You Remove the Black or Red Clamp First?
With the standard Clore procedure, remove the black negative clamp from the vehicle ground first, then the positive clamp.
Should You Recharge a Jump Box After Every Use?
Recharging after use is good practice because it restores the unit to full readiness. Follow the maintenance-charging schedule provided by the manufacturer for longer-term storage.
How to Use a Jump Starter Box Correctly
To use a jump starter box correctly, make sure the booster is charged and matches the vehicle voltage, turn the car off, connect positive first and the negative lead to the approved ground, activate the jump starter, and crank the engine only for the permitted duration. Once the engine starts, disconnect the negative lead first under the standard ground-connection procedure, followed by the positive lead.
The exact details can vary between traditional AGM jump boxes and smart lithium jump starters. Some units have manual switches, others automatically detect the battery, and certain lithium models provide low-voltage override modes that require additional care.
Use the vehicle’s designated jump points when provided, never attempt to boost a frozen or damaged battery, and stop repeated attempts when the engine cranks normally but still will not run.
A jump starter box is straightforward to use once you remember the priorities: correct voltage, correct polarity, secure connections, short cranking attempts, and prompt disconnection after a successful start.