To clean tinted windows, use a clean microfiber cloth dampened with water or a film-compatible, nonabrasive glass cleaner. Wipe the glass gently, then dry it with a second microfiber cloth to prevent streaks. Avoid abrasive pads, sharp scrapers, and excessive pressure near the film’s edges.
Unlike ordinary bare glass, aftermarket automotive tint is usually a thin film attached to the inside surface of the window. Fingerprints, dust, and residue can collect on this surface, but aggressive cleaning may scratch its protective coating or damage the film.
Newly installed tint also requires special care. Cleaning too early can interfere with the installation process, and different film manufacturers specify different waiting periods. Once the film is ready for normal cleaning, maintaining clear windows is relatively simple.
In this article, I explain which cleaners and cloths are suitable for tinted windows, how to clean each window without leaving streaks, and how long to wait after installation. I also cover cleaning ceramic tint, removing stubborn stains, protecting rear defroster lines, and avoiding mistakes that can shorten the film’s lifespan.
What Is the Best Way to Clean Tinted Car Windows?
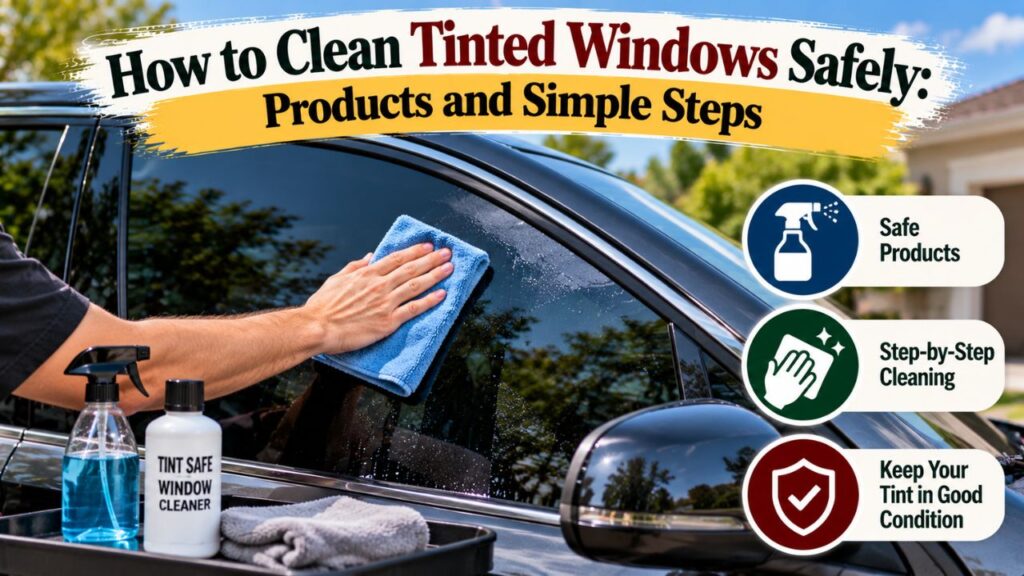
The safest general approach is to use soft microfiber cloths, a mild film-compatible cleaner, and light wiping pressure.
This method removes ordinary dirt and fingerprints without relying on harsh chemicals or abrasive tools.
The main goal is to clean the film’s surface without scratching it, lifting its edges, or leaving cleaning residue.
Use a Soft Microfiber Cloth
A clean microfiber cloth is one of the most useful tools for cleaning tinted windows.
Its soft fibers can collect dust, fingerprints, and light residue without requiring aggressive scrubbing.
For better results, use two separate cloths:
- Cleaning cloth: Slightly dampened with water or an appropriate cleaner.
- Drying cloth: Clean and dry for removing remaining moisture and streaks.
Choose cloths designed for glass or delicate automotive surfaces.
Avoid microfiber towels that have previously been used with abrasive polishing compounds, wax, or gritty detailing products.
Even a soft cloth can scratch film if it contains trapped dirt or sand.
Choose a Gentle Window Cleaner
For routine cleaning, plain water is often sufficient.
When the glass has fingerprints or oily residue, use a nonabrasive glass cleaner approved for automotive window film.
An ammonia-free, pH-neutral cleaner is a practical default when the film’s exact compatibility requirements are unknown.
However, not every ammonia-containing cleaner is automatically incompatible with every cured tint film. Some manufacturers permit certain ammonia-based products after the film has fully cured.
The manufacturer’s instructions should always take priority.
Clean the Interior Film Carefully
Aftermarket automotive tint is normally installed on the inside of the vehicle’s glass.
This means the interior surface needs special attention.
The exterior surface is usually ordinary automotive glass, which can be cleaned according to the vehicle manufacturer’s recommendations.
However, avoid allowing aggressive cleaners to run around window edges or into areas where they could contact the film.
Key Takeaway: Clean tinted windows with soft, uncontaminated materials and a suitable cleaner. Gentle cleaning is more important than using a strong chemical product.
What Do You Need to Clean Tinted Windows?
Most routine cleaning jobs require only a few inexpensive supplies.
You do not need a complicated detailing kit.
Recommended Cleaning Supplies
| Cleaning Item | Purpose | Recommendation |
| Clean microfiber cloth | Removes dirt and fingerprints | Recommended |
| Second dry microfiber cloth | Prevents streaks and water marks | Recommended |
| Clean water | Gentle routine cleaning | Recommended |
| Film-compatible glass cleaner | Removes oily residue | Recommended |
| Mild, diluted soap solution | Alternative for suitable cured films | Use sparingly |
| Soft glass-cleaning towel | General maintenance | Suitable if nonabrasive |
| Paper towels | Wiping glass | Better avoided on film |
| Abrasive cleaning sponge | Scrubbing stains | Avoid |
| Razor blade or metal scraper | Removing stuck-on material | Avoid on film |
The most important supplies are clean water, a suitable cleaner, and two soft microfiber towels.
Can You Use a Homemade Cleaner?
Yes, provided the ingredients are suitable for the film.
A simple option for routine cleaning is clean water with a very small amount of mild, unscented liquid dish soap.
For example, one or two drops in approximately 16 fluid ounces of water can create a lightly soapy solution.
Use only enough soap to loosen ordinary residue.
Too much detergent can leave streaks or a film on the surface.
If the manufacturer does not recommend soap, use its approved cleaning product instead.
Avoid mixing different household cleaners.
Is Distilled Water Better Than Tap Water?
Distilled water can be useful for reducing water spots and mineral residue.
Some tap water contains dissolved minerals that remain on the glass after the water evaporates.
These deposits may create visible spots or streaks.
Using distilled water can be particularly helpful when:
- Local tap water is hard.
- The windows frequently develop water spots.
- You prepare a diluted cleaning solution.
- You want to reduce mineral residue.
However, ordinary clean water can still be suitable when allowed by the film manufacturer.
How to Clean Tinted Windows Step by Step
The following method works for most properly cured automotive window films, provided the cleaner and tools meet the manufacturer’s care instructions.
Step 1: Park the Vehicle in a Shaded Area
Choose a shaded location or a garage.
Avoid cleaning windows when the glass is extremely hot from direct sunlight.
High temperatures can cause cleaning solution to evaporate quickly.
This may leave streaks before you have time to wipe the surface.
Allow hot glass to cool naturally before cleaning.
Also make sure the windows are fully closed.
Step 2: Remove Loose Dust and Dirt
Inspect the interior surface of each window.
Look for loose dust, sand, and other particles.
If the glass is dusty, use a clean microfiber cloth with a little water to lift the particles gently.
Avoid dragging a dry cloth aggressively across gritty material.
Dirt trapped between the cloth and film can scratch the coating.
If the glass is heavily contaminated, gently dampen the surface first and lift away the particles without scrubbing.
Step 3: Apply a Suitable Cleaner
Lightly spray the cleaner onto a microfiber cloth rather than directly saturating the window.
This provides better control over the amount of liquid used.
It also helps reduce cleaner runoff into:
- Door panels
- Window switches
- Interior trim
- Weatherstripping
- Film edges
- Electrical components
The cloth should be slightly damp rather than dripping wet.
Too much liquid does not necessarily improve cleaning performance.
Step 4: Wipe the Film Gently
Begin at the upper portion of the window.
Wipe gently using overlapping passes.
You can work from top to bottom or use a consistent side-to-side motion.
Avoid pressing hard against the film.
Pay extra attention to fingerprints and other areas where residue accumulates.
If a spot does not come off immediately, dampen it again and allow the cleaner to soften the residue.
Do not switch to an abrasive sponge or sharp tool.
Step 5: Clean Around the Edges Carefully
Window film edges can be more vulnerable than the central surface, particularly when the installation is new or already showing signs of lifting.
Use light pressure when cleaning near:
- The upper window edge
- Door weatherstripping
- Window corners
- Rear glass edges
- Areas where the film meets trim
Avoid catching a cloth or tool beneath the film’s edge.
Do not attempt to flatten a lifting edge by scrubbing it.
If the tint is peeling, have the installer inspect it.
Step 6: Dry With a Second Microfiber Cloth
Once the glass is clean, use a separate dry microfiber cloth.
Wipe away remaining moisture before it evaporates.
This helps prevent water marks and streaks.
A clean, dry cloth can also remove small amounts of remaining cleaner residue.
Use gentle, overlapping movements.
Do not apply excessive pressure.
Step 7: Inspect the Window From Different Angles
Look through the glass from inside and outside the vehicle.
Check for:
- Streaks
- Smudges
- Fingerprints
- Water spots
- Remaining dust
- Cleaning residue
If necessary, repeat a gentle pass using a lightly damp cloth, followed by the dry cloth.
Avoid repeatedly scrubbing the same area when a mark appears to be beneath the film.
Some apparent stains may be installation defects, trapped moisture, or damage rather than removable surface contamination.
How Long After Tinting Can You Clean Your Windows?
The correct waiting period depends on the film manufacturer, product, installer, and environmental conditions.
Newly installed tint contains an adhesive system that needs time to stabilize.
The installation solution must also dry.
Cleaning too early may disturb the film or place unnecessary pressure on its edges.
Manufacturer Instructions Are Not Identical
The 3M Automotive Window Tint Product Care Guide instructs owners to avoid cleaning or operating newly tinted windows for at least 48 hours after installation. It also recommends soft, nonabrasive cleaning materials and clean water.
The XPEL Product Care Instructions recommend waiting approximately one to five days before cleaning or rolling down windows, depending on the climate. XPEL also recommends a microfiber towel lightly dampened with water or a mild, non-ammonia cleaner when necessary.
Some specific films and installer instructions require longer waiting periods.
These differences show why a single curing rule should not be applied to every tint product.
Why Does New Window Tint Need Time to Cure?
Window film is commonly installed using a liquid application solution.
After installation, some moisture may remain between the film and glass.
The adhesive gradually stabilizes as the remaining moisture dissipates.
Curing time is affected by:
- Film construction
- Temperature
- Humidity
- Glass size
- Sunlight exposure
- Installation conditions
Cool or humid weather may slow drying.
Do not assume the film has fully cured simply because the window looks dry.
Can You Clean Newly Tinted Windows With Water?
Water is gentle, but wiping a newly tinted surface can still disturb the film before the permitted cleaning period.
Therefore, even plain water should not be used for routine cleaning until the installer or manufacturer allows it.
If there is an urgent contamination problem, contact the installer for guidance.
Avoid trying to remove a stubborn mark from new film yourself.
Can You Wash the Outside of the Windows Immediately?
Exterior automotive glass is typically separate from the interior tint film.
However, the installer may recommend avoiding certain washing activities while the film is new.
To prevent accidental damage, follow the care instructions for the complete installation.
When in doubt, avoid directing excessive water or cleaning chemicals toward vulnerable window edges.
What Cleaners Should You Avoid on Tinted Windows?
The main risks are abrasive action, incompatible chemicals, and excessive moisture near vulnerable film edges.
Not every ordinary glass cleaner is appropriate for every window film.
Abrasive Cleaners and Scrubbing Pads
Avoid abrasive powders, scouring pads, steel wool, and rough cleaning sponges.
These materials can scratch the film’s protective coating.
Scratches may become particularly noticeable when sunlight passes through the window.
A damaged coating cannot usually be restored through ordinary cleaning.
Razor Blades and Metal Scrapers
Do not use a razor blade to remove stains or adhesive from the tinted interior surface.
Although professional glass-cleaning methods sometimes involve scrapers on suitable bare glass, film is different.
A sharp blade can cut, gouge, or lift the tint.
This may require partial or complete film replacement.
Strong Solvents and Degreasers
Avoid applying strong solvents, paint thinners, adhesive removers, or aggressive degreasers unless the film manufacturer explicitly approves them.
These chemicals may affect coatings, adhesives, or other materials associated with the installation.
Do not assume a product is safe for window tint because it is labeled suitable for automotive use.
Some automotive cleaners are intended for paint, metal, or bare glass rather than plastic window film.
Ammonia-Based Glass Cleaners
Ammonia requires a more careful distinction.
Some tint manufacturers allow certain ammonia-containing cleaners after their films have cured.
Others recommend non-ammonia products.
Therefore, saying ammonia always destroys automotive tint is inaccurate.
However, an ammonia-free, nonabrasive cleaner is the simpler default when you do not know the film manufacturer’s requirements.
Check the care instructions before using ammonia-based products.
Household Vinegar Solutions
Diluted vinegar is sometimes used for household glass cleaning.
However, automotive window film has its own compatibility requirements.
Do not assume vinegar is approved for every tint product.
When the manufacturer recommends only water or a specified mild cleaner, follow that guidance.
How to Clean Ceramic Tinted Windows
Ceramic window tint requires much the same gentle cleaning approach as other automotive films.
Although ceramic materials contribute to the film’s solar-control performance, the exposed interior surface still needs protection.
Use Water or Approved Glass Cleaner
A soft microfiber towel dampened with water is a practical starting point.
For fingerprints or oily residue, use a film-compatible, nonabrasive cleaner.
Avoid assuming that ceramic tint can withstand stronger cleaning chemicals than dyed or carbon film.
The exposed protective coating and adhesive system matter as much as the ceramic materials inside the film.
Do Not Scrub Ceramic Film Aggressively
Ceramic tint is not automatically scratchproof.
Abrasive tools can still damage the film’s surface.
Use clean microfiber towels and gentle movements.
For stubborn contamination, soften the residue instead of increasing pressure.
Does Ceramic Tint Need Special Cleaning Products?
Not necessarily.
Many ceramic automotive films can be maintained using clean water and an approved mild glass cleaner.
However, different manufacturers may specify different products or waiting periods.
Check the warranty and aftercare instructions supplied with the installation.
How to Remove Streaks From Tinted Windows
Streaks are common when cleaning tinted glass.
They usually result from excess cleaner, dirty towels, hard-water residue, or cleaning under unsuitable conditions.
Common Causes of Streaks
Several conditions can leave visible marks:
- Too much cleaning solution
- Reusing a dirty microfiber cloth
- Detergent residue
- Mineral-rich water
- Cleaning hot glass
- Allowing liquid to dry before wiping
- Using towels contaminated with wax or polish
Streaks can be especially noticeable on dark tint.
Best Method for Streak-Free Cleaning
To remove ordinary streaks:
- Allow the window to cool.
- Use a fresh microfiber cloth.
- Lightly dampen it with clean water or an approved cleaner.
- Wipe the affected area gently.
- Immediately dry with a second clean cloth.
- Inspect the window against natural light.
If the streaks persist, switch to a clean towel.
Do not keep adding more cleaning solution without removing the previous residue.
Why Does Tinted Glass Look Cloudy After Cleaning?
Cloudiness may result from residue on the film’s surface.
However, it can also occur when moisture remains beneath newly installed tint.
XPEL notes that temporary haze or moisture bubbles may remain visible for up to approximately ten days after installation, depending on conditions.
If the haze is beneath the film, ordinary surface cleaning will not remove it.
Contact the installer if the appearance persists beyond the expected curing period or becomes worse.
How to Clean Fingerprints and Oily Marks Off Window Tint
Fingerprints are among the most common marks found on interior automotive glass.
They contain skin oils and other residues that may smear when wiped with plain water.
Use a Mild Film-Compatible Cleaner
Lightly dampen a clean microfiber cloth with an approved glass cleaner.
Wipe the fingerprint using gentle, overlapping movements.
If necessary, repeat with a clean section of the cloth.
Finish with a separate dry microfiber towel.
Avoid excessive spraying.
Do Not Rub Oily Spots With a Dry Cloth
Rubbing an oily fingerprint with a dry cloth may spread the residue instead of removing it.
A small amount of suitable cleaner can help lift the oil.
However, too much product may leave additional streaks.
The goal is to remove the residue with minimal pressure and moisture.
What if the Mark Will Not Come Off?
If a spot remains after gentle cleaning, inspect whether it is actually on the film surface.
Marks may come from:
- Contamination beneath the tint
- Scratches in the coating
- Adhesive irregularities
- Water trapped during installation
- Film discoloration
Do not attempt to scrape or polish the film.
Have a qualified installer inspect persistent defects.
How to Clean Tinted Rear Windows With Defroster Lines
Rear automotive windows often contain electrical heating elements that remove condensation or frost.
These defroster lines may be positioned beneath the tint film.
Cleaning must avoid damaging either the film or the heating elements.
Use a Soft Cloth and Light Pressure
Dampen a microfiber cloth with a suitable cleaner.
Wipe the glass gently without aggressive scrubbing.
Avoid using metal tools, sharp objects, or abrasive pads.
If the rear window contains visible horizontal defroster lines, gentle wiping parallel to the lines can help limit unnecessary crosswise friction.
However, the main precaution is avoiding pressure and scraping.
Avoid Scraping Around Defroster Lines
Do not use razor blades to remove adhesive, decals, or stuck-on residue from the interior rear window.
A blade can damage the tint and may also affect the defroster elements.
This is particularly important when removing old tint.
Professional removal is advisable when film is strongly attached to defroster-equipped glass.
What if the Tint Is Peeling Near a Defroster Line?
Do not pull or scrape the loose material.
Peeling may indicate adhesive failure, installation damage, or aging.
Attempting to remove the film without appropriate equipment can damage the rear defroster system.
Have the window examined by a qualified tint installer.
How to Remove Stubborn Spots From Tinted Windows
Some contamination requires more than a quick wipe.
The safest approach is to soften the material rather than scrape it away.
Removing Dried Food or Drink Splashes
If a drink splashes onto the interior glass, allow a damp microfiber cloth to soften the dried residue.
Hold the cloth gently against the spot for a short period.
Then wipe away the softened material.
Repeat if needed.
Avoid soaking the window edges or adjacent electronics.
Removing Sticky Residue
Sticky residue may come from fingerprints, stickers, or other materials.
Begin with a little clean water or manufacturer-approved cleaner.
Allow the residue to soften.
Do not use a razor blade or strong adhesive remover on the film.
If the residue does not respond to gentle cleaning, ask the installer for an approved removal method.
Removing Water Spots
Light mineral deposits may come off with a damp microfiber cloth followed by immediate drying.
Distilled water can help avoid adding more minerals to the surface.
If the deposits remain, do not apply acidic descalers or abrasive polishing compounds without confirming film compatibility.
Persistent water spots may require professional assessment.
Removing Smoke or Interior Film Residue
Smoke, airborne oils, and interior surface emissions can contribute to haze on automotive glass.
Use a film-compatible cleaner and clean microfiber cloth.
Work in small sections and dry promptly.
If the film has become discolored rather than dirty, cleaning may not restore its original appearance.
Can You Use Paper Towels or Windex on Tinted Windows?
These are common questions because both are widely used for cleaning household windows.
However, tinted automotive glass deserves more careful treatment.
Are Paper Towels Safe for Window Tint?
Paper towels are generally less desirable than clean microfiber cloths.
Some paper products can leave lint, and their texture may be less gentle on film coatings.
They may also trap grit during wiping.
A high-quality microfiber towel is the more dependable choice.
Can You Use Windex on Tinted Windows?
It depends on the exact product and film.
Windex is a brand with different glass-cleaning formulations, including products that may contain ammonia and others that do not.
Check the ingredients and the window film manufacturer’s cleaning requirements.
Do not assume every Windex product is safe or unsafe.
An appropriate nonabrasive, ammonia-free glass cleaner is usually the easier choice when product compatibility is uncertain.
Can You Use a Squeegee on Tinted Glass?
Some manufacturers permit soft squeegees on cured window film.
However, a squeegee must be clean, undamaged, and appropriate for the surface.
Hard edges or trapped grit can scratch the film.
For routine automotive interior cleaning, a microfiber cloth is often simpler and less likely to catch vulnerable film edges.
How Often Should You Clean Tinted Car Windows?
There is no fixed cleaning schedule that applies to every vehicle.
Cleaning frequency depends on how quickly the windows collect fingerprints, dust, smoke residue, and other contamination.
Regularly Driven Vehicles
For everyday vehicles, cleaning the interior windows every few weeks may be sufficient.
However, heavily used vehicles may require more frequent attention.
Clean the glass whenever residue affects visibility.
Vehicles Exposed to Dust or Smoke
Trucks and cars regularly used on dusty roads may accumulate dirt more quickly.
Interior glass exposed to smoke or airborne oils may also develop haze.
Remove residue before it becomes difficult to clean.
Use gentle methods rather than increasing cleaning pressure.
Should You Clean Tint Every Day?
Daily cleaning is usually unnecessary unless the windows become dirty.
Repeated wiping with contaminated towels can increase the likelihood of scratching.
Clean the glass when needed, using fresh materials.
How to Protect Tinted Windows From Scratches and Peeling
Proper maintenance involves more than choosing a safe cleaner.
Everyday handling can affect the condition of window tint.
Keep Microfiber Towels Clean
Wash microfiber towels separately from heavily soiled materials when practical.
Avoid fabric softeners and products that leave residue on the fibers.
Follow the towel manufacturer’s laundering instructions.
Inspect towels before using them on tinted glass.
Discard or repurpose any towel containing embedded grit.
Avoid Sharp Objects Near the Film
Keys, rings, tools, and other hard objects can scratch the interior film.
Be careful when cleaning near window edges or moving objects around the cabin.
Do not attach stickers directly to the tint unless the film manufacturer approves the application.
Removing adhesive later may damage the film.
Be Careful With Window Weatherstripping
Dirt trapped around window seals can rub against the glass when the window moves.
If the seals contain grit, it may contribute to scratches.
Keep accessible seals reasonably clean using a method suitable for the vehicle’s interior materials.
Do not pry or modify the seals without appropriate instructions.
Inspect Peeling or Bubbling Film
Small moisture patterns may be normal shortly after installation.
However, persistent bubbles, peeling edges, or spreading discoloration may indicate a problem.
Cleaning cannot repair failed adhesive or permanently damaged film.
Contact the installer if these conditions appear.
Follow the Tint Warranty Instructions
Some window film warranties include specific maintenance requirements.
Using incompatible cleaners or attempting unauthorized repairs may affect warranty coverage.
Keep your installation paperwork or a record of the film brand and series.
This makes it easier to check the appropriate care instructions later.
Common Mistakes When Cleaning Tinted Windows
Avoiding a few common errors can help keep tinted windows clear and in good condition.
Cleaning Freshly Installed Tint Too Soon
New film needs time for the adhesive and installation moisture to stabilize.
Cleaning before the specified waiting period can disturb the installation.
Follow the actual product and installer instructions rather than assuming every tint requires the same curing time.
Spraying Too Much Cleaner
Excess liquid may run toward window seals, interior trim, and film edges.
It can also create more streaks.
Use a lightly dampened microfiber cloth instead of soaking the window.
Scrubbing With Abrasive Materials
A rough sponge or contaminated towel can scratch film.
Once the coating is visibly damaged, ordinary cleaning will not remove those scratches.
Use gentle wiping methods.
Using Strong Chemicals Without Checking Compatibility
A cleaning product designed for household glass is not automatically suitable for automotive window film.
Check the cleaner’s ingredients and manufacturer recommendations.
Avoid solvents, abrasive cleaners, and unapproved chemical mixtures.
Ignoring Dirt on Cleaning Cloths
Even a suitable microfiber towel can cause problems when it contains sand or other hard particles.
Always inspect and clean your towels.
Replace the cloth when it becomes dirty.
Trying to Clean Away Damage Beneath the Film
Bubbles, contamination, adhesive defects, and discoloration are not necessarily surface dirt.
Repeated scrubbing cannot remove problems sealed beneath the film.
Have persistent defects assessed instead of increasing cleaning pressure.
Conclusion
Knowing how to clean tinted windows is mainly about using gentle tools, compatible products, and the correct technique.
For most properly cured automotive films, a clean microfiber cloth dampened with water or an approved nonabrasive glass cleaner is sufficient.
Wipe gently, use minimal liquid, and dry the surface with a second microfiber towel to reduce streaks.
Avoid abrasive pads, razor blades, harsh chemicals, and aggressive scrubbing around film edges.
Newly installed tint requires additional care because cleaning and window operation may need to be delayed until the manufacturer or installer permits them.
For ordinary maintenance, I recommend keeping two dedicated microfiber towels and a compatible mild glass cleaner in your detailing supplies.
The safest way to preserve window tint is to remove dirt gently without scratching the film or disturbing its adhesive.
FAQs About How to Clean Tinted Windows
What Is the Safest Cleaner for Tinted Car Windows?
Clean water or a manufacturer-approved, nonabrasive glass cleaner is generally the safest choice. An ammonia-free, pH-neutral product is a practical default when the exact film requirements are unknown. Use a clean microfiber cloth and avoid excessive pressure.
Can You Clean Tinted Windows With Just Water?
Yes. Plain clean water is often sufficient for removing light dust and fingerprints from properly cured tint. Use a lightly damp microfiber cloth and dry with a second cloth to prevent water marks. For oily residue, an approved mild cleaner may work better.
How Long Should You Wait to Clean Newly Tinted Windows?
The waiting period depends on the product and installation conditions. Some manufacturers specify at least 48 hours, while others recommend several days or longer. Follow the instructions supplied for your exact film and contact the installer if you are unsure.
Can You Use Vinegar to Clean Tinted Windows?
Do not assume vinegar is suitable for every window film. Some homemade glass-cleaning methods use diluted vinegar, but compatibility varies by product. A manufacturer-approved cleaner or plain water is a more dependable choice.
Can You Use Windex on Ceramic Window Tint?
It depends on the Windex formulation and the ceramic film manufacturer’s instructions. Some film products allow certain ammonia-based cleaners after curing, while others recommend non-ammonia products. Check both products before use. When uncertain, choose a compatible ammonia-free, nonabrasive cleaner.
How Do You Clean Tinted Windows Without Leaving Streaks?
Clean the glass while it is cool, use only a small amount of suitable cleaner, and wipe with a fresh microfiber cloth. Immediately dry the surface with a second clean cloth. Avoid dirty towels, excess detergent, and hard water that can leave visible residue.
Can Cleaning Damage Rear Window Tint and Defroster Lines?
Yes, if abrasive tools or excessive force are used. The interior rear window may contain defroster elements beneath the film. Clean gently with a soft cloth and avoid scraping, cutting, or aggressively removing old adhesive. Have damaged or peeling rear tint inspected professionally.