To jump start a car with a portable jump starter, turn the vehicle off, verify that the booster matches the battery voltage, connect the red clamp to positive and the black clamp to the manufacturer-approved ground or negative connection, activate the jump starter, and crank the engine. Once the car starts, switch the booster off if required and remove the clamps in the specified reverse order.
The exact procedure can differ between jump-starter and vehicle models, especially regarding remote jump points, negative-clamp location, low-voltage override, and maximum cranking time. Clore Automotive recommends checking both manuals before connecting the booster, while NOCO likewise instructs users to review the vehicle owner’s manual for model-specific jump-starting precautions.
Before You Connect the Jump Starter
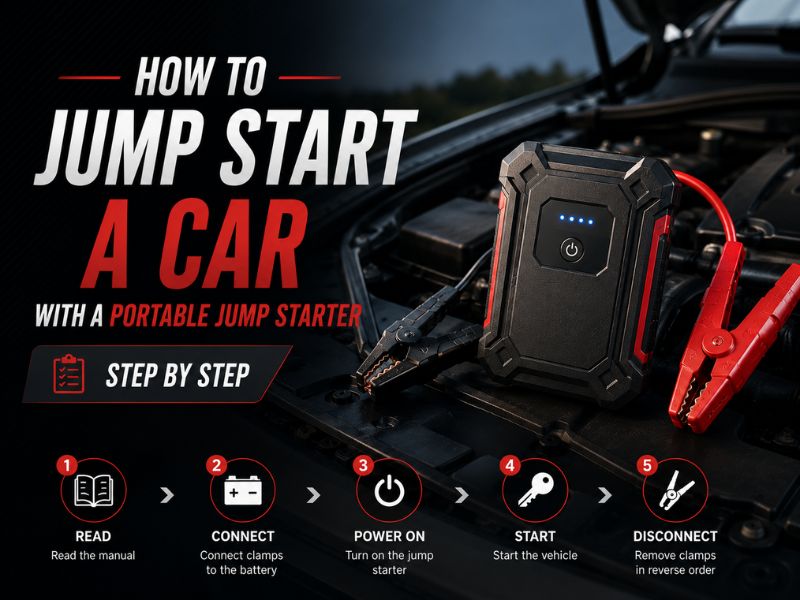
A successful jump starts with a booster that is adequately charged and suitable for the vehicle.
Clore recommends using a jump starter that is at or near full charge and verifying that it matches the vehicle’s system voltage. A typical passenger car commonly uses a 12V starting system, but you should verify the actual vehicle rather than assuming the voltage, particularly with commercial or specialty equipment.
Also inspect the jump starter itself.
Do not use a unit with a swollen or badly damaged case, exposed wiring, damaged clamps, or other obvious defects. Clore recommends inspecting cables, clamps, housing, and charge status before every jump-start attempt.
The jump starter should also be disconnected from its charger or AC power source before you use it to start a vehicle.
Step 1: Make Sure the Battery Is Safe to Jump
Before attaching clamps, look at the vehicle battery.
Do not attempt to jump-start a battery that is frozen or visibly damaged. NOCO specifically warns against jump-starting damaged or frozen batteries and recommends operating around lead-acid batteries in a well-ventilated environment.
If you notice a cracked case, significant leakage, severe deformation, or another obvious abnormality, stop rather than treating the situation as a routine dead battery.
Also verify the battery chemistry if your jump starter has restrictions. For example, the current NOCO GB40 manual specifies compatibility with 12V lead-acid batteries only and instructs users not to use it when battery chemistry or voltage is uncertain. Other jump starters may support different battery types, so your own manual controls.
Step 2: Turn the Car and Accessories Off
Put the vehicle in Park for an automatic transmission or follow the vehicle manufacturer’s procedure for a manual transmission. Apply the parking brake.
Turn the ignition off before connecting the booster.
Switch off unnecessary electrical loads such as the headlights, climate control, radio, heated seats, and other accessories. NOCO specifically directs users to turn vehicle power loads off before attempting a jump start.
This leaves the available electrical energy focused on starting the engine.
Keep the jump starter itself switched off during clamp connection if the unit has a manual master switch and its instructions call for that sequence. Clore recommends making the connections before switching its applicable jump starters on.
Step 3: Find the Correct Jump-Start Points
Do not automatically assume the battery posts are the correct connection locations.
Some vehicles place the battery in the trunk, under a seat, or behind panels and provide dedicated remote jump-start terminals under the hood.
Clore recommends checking the vehicle owner’s manual to determine whether manufacturer-designated starting points are provided.
If the vehicle has designated positive and ground terminals, use those locations exactly as the vehicle manufacturer specifies.
This is particularly important on modern vehicles where battery monitoring systems, unusual battery locations, or manufacturer-specific electrical layouts can affect the recommended jump procedure.
Step 4: Connect the Red Positive Clamp
With the jump starter off if its design requires it, attach the red positive (+) clamp to the vehicle’s positive battery terminal or designated positive jump point.
Make sure the clamp has a firm metal-to-metal connection.
Clore’s standard procedure starts by connecting the positive clamp to the battery’s positive terminal or manufacturer-approved alternate starting point.
Keep the cable away from belts, cooling fans, pulleys, and anything else that can move when the engine starts.
A loose or poor connection can limit how much starting current reaches the vehicle.
Step 5: Connect the Black Negative Clamp
This step deserves particular attention because manufacturer instructions vary.
Clore recommends attaching the black negative (-) clamp to a suitable heavy, unpainted vehicle ground, such as an appropriate engine or frame ground, rather than completing the circuit directly at the negative battery post. It specifically advises against carburetors, fuel lines, thin sheet metal, painted surfaces, and moving parts.
Some smart lithium jump starters provide different instructions. The current NOCO GB40 manual, for example, allows its black clamp to connect to the negative battery terminal or vehicle chassis in a conventional negative-ground vehicle.
Therefore, the correct rule is:
Follow the connection point specified by both your vehicle and jump-starter manufacturer.
Do not improvise a ground simply because a metal component is convenient.
Step 6: Check for a Reverse-Polarity Warning
Before attempting to crank the engine, look at the jump starter’s status indicators.
Many modern lithium boosters include reverse-polarity protection.
On the NOCO GB40, for example, a red error indicator appears if the clamps have been connected backward. The manufacturer instructs the user to correct the connections before attempting to start the vehicle.
If your booster displays an error, alarm, warning light, or buzzer, stop and determine the cause.
Do not repeatedly press buttons or attempt to bypass a warning without knowing what it means.
Clore likewise warns that a buzzer on an applicable jump starter can indicate an unsafe condition such as reverse polarity or mismatched voltage.
Step 7: Turn the Portable Jump Starter On
Once the clamps are correctly positioned and the cables are clear of moving parts, activate the jump starter according to its instructions.
Some models power the output automatically when they detect a valid battery connection. Others require pressing a power button or moving a master switch to ON.
For example, NOCO’s GB40 indicates that it is ready through its Boost indicator after it detects a proper connection.
Clore’s procedure places activation after the positive and negative clamps have already been secured.
Do not assume that every jump pack follows the same button sequence.
Step 8: Try to Start the Car
Now attempt to start the engine normally.
Do not hold the key or starter button indefinitely.
Jump starters have duty-cycle limits, and prolonged cranking creates heat in the booster, vehicle starter, cables, and electrical connections.
Clore’s general guidance recommends stopping after a short cranking attempt and allowing the jump starter to rest before trying again; its specific products commonly use a six-second crank followed by roughly three minutes of rest. The exact limit for your booster may differ.
NOCO gives different instructions for its GB40: some vehicles may benefit from having the booster connected for up to 30 seconds before the attempt, and if the vehicle does not start, NOCO recommends waiting 20–30 seconds before another attempt. It also limits repeated attempts according to the model’s duty cycle.
The takeaway is not to memorize one universal number.
Use the crank/rest limits printed in your jump starter’s manual.
Step 9: What if the Engine Doesn’t Start?
A jump starter only helps when insufficient battery power is the reason the vehicle cannot start.
If the engine now cranks strongly but never begins running, the battery may no longer be the main problem.
A fuel-delivery, ignition, sensor, starter-control, compression, or other mechanical/electrical problem can produce a no-start that additional battery power will not solve. Clore specifically warns that a vehicle may fail to start for reasons unrelated to its battery and that a jump starter cannot correct those faults.
Repeatedly cranking the engine is therefore not a useful substitute for diagnosis.
If several correctly performed attempts produce no useful change, stop and investigate the actual starting problem.
Step 10: Disconnect the Jump Starter After the Engine Starts
Once the engine is running, remove the jump starter promptly according to its required disconnect procedure.
Clore recommends removing the negative clamp from the vehicle ground first, switching the jump starter off where applicable, and then removing the positive clamp.
NOCO also instructs users to disconnect the battery clamps and remove the booster after the vehicle has started.
Do not intentionally leave a portable booster attached to the running car in an attempt to recharge it.
Clore warns that vehicle alternator output can exceed the charging rate intended for the jump starter’s internal battery and recommends disconnecting the booster promptly after a successful start.
What if the Battery Is Too Dead for the Jump Starter to Detect?
Some smart lithium jump starters need to detect battery voltage before enabling their output.
An extremely discharged vehicle battery may be below that threshold.
The NOCO GB40, for example, normally detects 12V lead-acid batteries down to approximately 2 volts. Below that level, its normal Boost function may not activate.
It offers a manual override function for that situation—but this is not just another normal button.
NOCO warns that Manual Override disables protections including spark-proof and reverse-polarity safeguards and therefore requires extreme care.
Do not use an override merely because your first starting attempt failed.
Only use it if your exact jump starter supports the feature, you have verified the correct battery voltage and chemistry, and you fully understand the manufacturer’s instructions.
What to Do After a Successful Jump
If the car starts, the job is not necessarily finished.
Ask why the battery was discharged.
If you accidentally left an interior light on overnight, the explanation may be obvious. But if the vehicle repeatedly needs a jump, the battery, charging system, or electrical system may need testing.
Clore recommends investigating why the vehicle battery became discharged rather than relying repeatedly on the jump starter.
You should also recharge the portable jump starter.
Clore recommends recharging the booster after use so it is ready for the next emergency and warns against leaving the internal battery in a deeply discharged state.
Common Portable Jump Starter Mistakes
Most problems come from a few avoidable errors.
Using the wrong voltage is one of the most serious. Match the jump starter to the electrical system before making connections.
Another is reversing the clamps. Red belongs on the positive connection; the black clamp goes to the manufacturer-approved negative or ground connection.
Do not allow the clamps to touch each other while energized.
Keep cables clear of fans and belts because those components may begin moving immediately when the engine starts. NOCO and Clore both explicitly caution users to position cables away from moving vehicle and engine components.
Finally, do not keep cranking a vehicle indefinitely. Respect the booster’s duty cycle.
Frequently Asked Questions
Do You Connect Red or Black First With a Portable Jump Starter?
For a conventional negative-ground vehicle, standard procedures connect the red positive clamp first. Clore then recommends attaching the black clamp to an appropriate vehicle ground. Always follow your exact vehicle and jump-starter instructions.
Where Does the Black Clamp Go?
Use the connection specified by the manufacturers. Clore recommends a heavy unpainted engine or frame ground away from the battery, while some products such as the NOCO GB40 also permit connection to the negative battery terminal on compatible negative-ground systems.
Should the Jump Starter Be On When Connecting the Clamps?
Many units should be off while you attach the clamps and activated afterward. Clore specifically uses this sequence for units equipped with an ON/OFF switch. Check your booster’s instructions because smart units can operate differently.
How Long Should I Leave a Jump Starter Connected Before Starting?
Some vehicles can be attempted immediately. NOCO says certain vehicles using its GB40 may benefit from having the unit connected for up to 30 seconds before attempting the start. Follow your specific product instructions.
How Long Can I Crank the Engine?
Follow the jump starter’s duty cycle. Clore commonly specifies a short crank followed by several minutes of cooling on its products, while other manufacturers use different limits.
Why Does My Jump Starter Say Reverse Polarity?
It generally means the clamps are connected incorrectly. NOCO’s GB40 displays a red error indicator for reverse polarity and instructs the user to correct the connections before proceeding.
Why Won’t My Portable Jump Starter Turn On?
Possible reasons include insufficient charge in the booster, incorrect connections, temperature protection, or a vehicle battery whose voltage is below the jump starter’s detection threshold. NOCO identifies an extremely low connected-battery voltage as one reason its Boost indicator may not activate.
Can You Jump-Start a Completely Dead Battery?
Some portable jump starters can assist extremely discharged batteries and may offer a manual override feature. Because override modes can disable important protections, they should only be used exactly as the manufacturer directs.
Can You Jump-Start a Frozen Car Battery?
No. Do not attempt to jump-start a frozen battery. NOCO specifically warns against jump-starting batteries that are frozen or damaged.
Should You Leave the Jump Starter Connected After the Car Starts?
Generally, disconnect it promptly according to its instructions. Clore specifically advises against leaving a portable jump starter connected to a running vehicle to recharge from the alternator.
How to Jump Start a Car With a Portable Jump Starter Safely
To jump start a car with a portable jump starter, verify the booster and battery are compatible, turn the vehicle and accessories off, connect red to positive, connect black to the approved ground or negative point, activate the booster, and make a short starting attempt. Once the engine starts, disconnect the jump starter promptly using the sequence specified for your equipment.
Do not treat the procedure as completely universal. Some vehicles have dedicated remote terminals, and jump starters differ in their connection requirements, activation procedures, low-voltage detection, manual-override features, and duty cycles.
Most importantly, do not use the jump pack on a frozen, damaged, or incompatible battery, and never bypass a safety warning without understanding why it appeared.
If the engine cranks strongly but still will not run—or several properly performed jump attempts make no difference—the problem may not be the battery at all. At that point, further diagnosis is more useful than continuing to crank or reaching for a larger jump starter.