Yes, tinting your own car windows can be difficult, especially if you’ve never worked with automotive window film. Applying tint to a small, relatively flat side window is manageable for a patient beginner, but achieving a smooth, bubble-free finish on curved rear glass requires more skill, practice, and specialized tools.
The hardest parts of DIY window tinting are cleaning the glass thoroughly, cutting the film accurately, keeping dust away from the adhesive, and removing air and moisture without creating wrinkles. A small mistake can leave visible imperfections or require replacing the film.
However, professional-looking results aren’t impossible at home. Precut tint kits, suitable application tools, and a clean workspace can make the process easier. The difficulty also depends on your vehicle’s window shapes and the type of film you choose.
Before starting, consider the cost of materials, your available time, and local tint regulations. A cheaper DIY installation may not save money if several pieces of film need replacing.
In this article, I cover how difficult car window tinting is for beginners, which windows are easiest and hardest, the tools and installation steps, common mistakes, and how DIY costs compare with professional services. You’ll also learn when tinting your own windows is worthwhile and when hiring an installer makes more sense.
Is It Hard to Tint Your Own Car Windows for a Beginner?
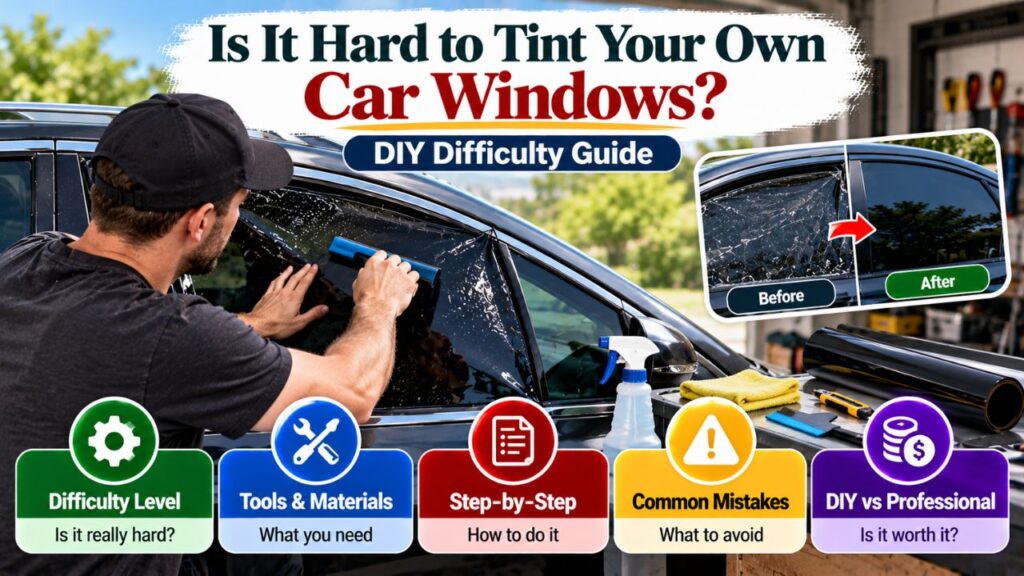
Tinting car windows is a moderately difficult DIY project, but the difficulty increases significantly with curved glass, moving windows, and large pieces of film.
The basic process is straightforward: clean the glass, prepare the film, apply it to the inside surface, and remove trapped air and moisture.
However, carrying out those steps without defects requires careful handling.
Window tint is thin and flexible, but adhesive-backed film can crease, fold onto itself, or collect dust while being positioned.
Once the film begins bonding to the glass, correcting mistakes becomes more difficult.
Difficulty Level by Window Type
Not every car window requires the same amount of work.
| Window type | DIY difficulty | Main challenge |
| Small, flat quarter window | Easy to moderate | Accurate trimming |
| Front roll-down side window | Moderate | Fitting around window seals |
| Rear side window | Moderate | Glass curvature and limited access |
| Large frameless door window | Moderate to difficult | Edge alignment and film handling |
| Curved rear windshield | Difficult | Heat shrinking and complex curves |
| Rear glass with defroster lines | Difficult | Avoiding damage to heating elements |
| Front windshield | Very difficult | Large glass area, visibility, and legal restrictions |
These ratings are relative estimates rather than formal skill classifications.
For a first attempt, a small side window is generally a better starting point than a large curved rear windshield.
Why Window Tinting Looks Easier Than It Is
Professional installers often make tinting appear effortless because they have practiced the same techniques repeatedly.
They know how much application solution to use, how to handle adhesive film, and how to remove wrinkles before they become permanent.
A beginner must learn these skills while working with material that can be damaged easily.
The challenge isn’t understanding the instructions. It’s performing several precise tasks before dust, drying adhesive, or handling errors affect the result.
What Makes DIY Car Window Tinting Difficult?
Several parts of the installation process require more precision than beginners usually expect.
Cleaning Every Part of the Glass
Glass preparation is one of the most important factors in a successful tint installation.
Tiny pieces of dirt, hair, dust, and lint can become trapped between the film and glass.
Once the adhesive bonds, these particles may create permanent visible spots.
Cleaning the main glass surface is only part of the job.
Contamination can also come from:
- Rubber window seals
- Felt-lined weatherstripping
- Door panels
- Dust inside window channels
- Clothing fibers
- Dirty application tools
- Airborne particles
A window can appear perfectly clean while still containing particles large enough to affect the finished tint.
This is why a sheltered, clean workspace matters.
Cutting the Film Accurately
Window tint must fit the glass without covering seals incorrectly or leaving uneven gaps.
A poorly cut film may expose noticeable clear edges.
Cutting too close to the glass boundary can also damage rubber seals or scratch certain glass surfaces.
Roll-down windows are particularly challenging because the film needs to fit the upper glass edge and extend appropriately into the lower window channel.
A precut kit can reduce the amount of trimming needed.
However, the film must still be positioned and applied correctly.
Preventing Wrinkles and Creases
Automotive tint film can bend, but it doesn’t behave like a stretchy fabric.
Improper handling may create sharp folds or permanent creases.
Wrinkles can also develop when a flat piece of film is forced onto curved glass.
Some wrinkles can be corrected during preparation using an appropriate shrinking technique.
A sharp crease in the adhesive film, however, may make the piece unusable.
Removing Air and Water Bubbles
During installation, application solution allows the film to move across the glass before bonding.
The installer uses a squeegee to remove this solution and trapped air.
Insufficient pressure or incorrect squeegee movement can leave pockets beneath the film.
According to Gila’s automotive window tint installation guidance, small water bubbles may disappear as the film cures, but trapped air bubbles generally require correction during installation.
This distinction matters because not every visible bubble requires immediate film replacement.
However, bubbles containing dirt or permanent creases usually won’t disappear through curing.
Working Around Curved Glass
Curved rear windows are often the most demanding part of a complete DIY tint job.
Many rear windshields curve both vertically and horizontally.
This is called a compound curve.
Flat film cannot naturally conform to every compound curve without additional shaping.
Some suitable automotive films can be heat-shrunk to fit, while certain DIY products use multiple narrow strips for curved rear glass.
The correct technique depends on the specific film.
Using excessive heat or trying to stretch the material can damage the film.
What Tools Do You Need to Tint Your Own Car Windows?
Using the right tools improves control and reduces avoidable installation problems.
Household cleaning supplies alone generally aren’t enough for a high-quality tint application.
Essential DIY Window Tinting Tools
| Tool or material | Purpose |
| Automotive window tint film | Provides the selected darkness and solar protection |
| Film application solution | Allows film positioning and wet installation |
| Spray bottle | Applies solution to the glass and adhesive |
| Tint-safe squeegee | Removes trapped air and moisture |
| Hard card with soft protective edge | Helps finish difficult edges |
| Low-lint microfiber cloth | Cleans and dries surrounding surfaces |
| Precision cutting tool | Trims film to the window shape |
| Glass-safe scraper | Removes suitable contamination from compatible glass |
| Transparent tape | Helps separate adhesive backing from film |
| Heat gun, when required | Shapes compatible film around curved glass |
| Protective towels | Protects interior trim and electrical components |
Choose tools intended for automotive window film.
Sharp blades can damage glass, heating elements, and window seals if used incorrectly.
A heat gun should only be used with film designed for heat shrinking and according to the manufacturer’s procedure.
Is a Precut Window Tint Kit Easier?
Yes. A precut tint kit can make the process easier because the pieces are already shaped for a particular vehicle and window arrangement.
This reduces the need to measure and trim large pieces of film.
However, precut kits have limitations.
Their accuracy depends on correct vehicle identification, including the model year, body style, and glass configuration.
A precut film may still require heat shaping on curved glass.
You also need to clean the windows, remove the backing, position the film, and remove trapped moisture.
For beginners, a vehicle-specific precut kit is usually easier than cutting every piece from a universal roll.
Do You Need a Heat Gun?
Not every window requires heat shrinking.
Some relatively flat side windows can be tinted without using a heat gun.
However, curved rear windows often require special shaping techniques.
A heat gun can help shrink compatible film, but excessive heat can melt or distort the material.
It can also damage surrounding trim or create thermal stress in glass.
For beginners unfamiliar with heat shrinking, leaving a complex rear windshield to a professional is often the safer choice.
How to Tint Your Own Car Windows Step by Step
The following process describes a general wet application method for adhesive-backed automotive window film.
Specific products may require different trimming, preparation, or installation techniques.
Always follow the instructions supplied with the film.
Step 1: Check Your State’s Tint Laws
Before purchasing film, determine which tint percentages are permitted on your vehicle.
Window tint darkness is measured using Visible Light Transmission (VLT).
A lower VLT means less visible light passes through the glass.
For example:
- 70% VLT allows 70% of visible light through.
- 50% VLT allows 50% through.
- 35% VLT allows 35% through.
- 20% VLT allows 20% through.
The applicable legal limits vary by state, window location, and vehicle classification.
Also, the finished glass-and-film combination can be darker than the film’s advertised VLT.
Check the regulations before installation rather than assuming a commonly sold tint shade is legal.
Step 2: Choose a Clean Installation Area
Work in a sheltered, well-lit location protected from wind and blowing dust.
A clean garage is often more suitable than an open driveway.
Avoid extremely windy conditions because airborne particles can stick to exposed film adhesive.
Keep the surrounding work area clean.
Remove loose dust from nearby surfaces before opening the tint film packaging.
Protect door panels, switches, speakers, and electrical components from cleaning solution.
Step 3: Clean the Window Thoroughly
Spray the glass with the approved cleaning or application solution.
Remove dirt, grease, fingerprints, and other contaminants.
Pay particular attention to the lower window seals and edges.
Use a glass-safe cleaning tool suitable for the specific surface.
Never scrape across rear-window defroster lines, printed antennas, or other delicate glass-mounted components with a metal blade.
After cleaning, inspect the glass under good lighting.
If particles remain, clean the surface again before applying film.
Step 4: Measure and Prepare the Tint Film
For a universal tint roll, use the outside of the window as a temporary patterning surface when instructed by the film manufacturer.
Position the film with the protective liner facing the correct direction.
Cut a manageable piece that covers the intended glass area.
Trim it carefully according to the product instructions.
For roll-down windows, account for the upper edge and the portion of film that must fit into the lower window channel.
If using a precut kit, verify that the piece matches the intended window before removing the liner.
Step 5: Remove the Protective Liner
Adhesive-backed tint film has a removable liner protecting the adhesive.
Separate the liner carefully.
For certain films, small pieces of transparent tape can help separate the liner from the film at a corner.
As the adhesive becomes exposed, spray it with the approved application solution.
This helps reduce the chance of the adhesive sticking to itself and collecting dust.
Avoid touching the adhesive with your fingers.
Do not remove the entire liner until you’re ready to position the film.
Step 6: Apply the Film to the Inside of the Glass
Automotive adhesive tint is normally installed on the interior surface of the window, even when the exterior glass is used for trimming.
Spray the inside of the glass with application solution.
Carefully transfer the film to the wet surface with the adhesive facing the glass.
Slide the film into the correct position.
Make sure the edges align with the intended window boundaries.
Avoid folding the material or allowing the adhesive to touch dusty interior trim.
For moving side windows, use the film manufacturer’s specified method for fitting the upper edge and tucking the lower section into the window channel.
Step 7: Remove Moisture and Air With a Squeegee
Once the film is positioned, spray its exposed surface as directed to help the squeegee glide without scratching.
Begin removing the application solution.
Use controlled, overlapping strokes that push liquid and air toward the nearest accessible edge.
Maintain even pressure without stretching or creasing the film.
Pay special attention to the corners and edges.
Use a suitable hard card wrapped in a soft, low-lint material where the instructions recommend it.
Avoid repeatedly lifting the film after the adhesive begins setting.
Step 8: Inspect the Edges and Finish the Installation
Check the film for:
- Visible dust particles
- Air pockets
- Trapped water
- Wrinkles
- Creased corners
- Uneven cut lines
- Loose edges
Small water pockets may disappear during curing.
However, a trapped hair, dirt particle, or sharp crease generally requires more than waiting.
Correct defects while the film is still workable, following the product instructions.
If the film has already bonded and contains a permanent defect, replacement may be necessary.
Step 9: Allow the Film to Cure
Newly applied tint needs time for remaining moisture to evaporate and the adhesive to bond.
The curing period depends on the film, temperature, humidity, and manufacturer.
Do not roll down tinted side windows until the film manufacturer permits it.
Some products require several days, while others specify longer periods.
For example, Gila advises avoiding window operation during a curing period that may extend approximately a week to 10 days for its automotive films.
Follow the specific film’s instructions rather than assuming that every tint is ready after 24 hours.
Why Is Tinting a Rear Car Window So Difficult?
The rear windshield is usually the most demanding glass surface in a complete tint installation.
Its size, curvature, and limited interior access make accurate film handling more difficult.
Rear Windows Have Compound Curves
Many rear windshields curve both horizontally and vertically.
Applying a flat sheet directly over these curves can create wrinkles or raised sections commonly called fingers.
Some automotive films can be heat-shrunk on the exterior glass before installation.
The process requires controlled heating and careful shaping.
Too much heat can distort or damage the film.
Not all products support the same heat-shrinking method.
Rear Defroster Lines Can Be Damaged
Many rear windows contain thin electrical heating elements bonded to the glass.
These lines help clear fog or frost.
Aggressive scraping, cutting, or film removal can damage them.
An inexperienced installer may accidentally scratch the heating elements while cleaning or trimming.
For this reason, the rear windshield deserves greater caution than an ordinary side window.
Interior Access Is Limited
Rear glass is often positioned above a parcel shelf and close to interior trim.
Working around rear headrests, brake lights, and curved corners can make it difficult to position the film.
The larger the glass, the harder it becomes to prevent the film from folding onto itself or touching contaminated surfaces.
For a beginner, a professionally installed rear windshield may be worth the additional expense even if the side windows are tinted at home.
Common DIY Window Tint Mistakes and How to Avoid Them
Understanding the most frequent installation problems helps reduce wasted film and unnecessary rework.
| Problem | Likely cause | Practical prevention |
| Dust spots under tint | Contaminated glass or adhesive | Clean glass, seals, and workspace thoroughly |
| Large air bubbles | Air trapped during application | Use proper wet application and squeegee strokes |
| Small water pockets | Remaining installation solution | Allow manufacturer-specified curing time |
| Sharp creases | Film folded during handling | Keep film supported and properly lubricated |
| Wrinkles on curved glass | Incorrect shaping | Use approved shrinking methods or professional installation |
| Uneven edges | Inaccurate trimming | Use a verified precut kit or careful patterning |
| Peeling corners | Poor cleaning or edge finishing | Clean seals and finish edges properly |
| Scratched glass | Incorrect blade or tool use | Use glass-compatible tools and proper technique |
| Melted or distorted film | Excessive heat | Follow the film’s heat-shrinking instructions |
| Illegal darkness | Incorrect VLT selection | Verify final glass-and-film transmission |
Applying Tint With Too Little Solution
An insufficient amount of application solution can make the film stick before it is positioned correctly.
This increases the chance of wrinkles and adhesive contamination during repositioning.
Use the amount and type of solution recommended by the film manufacturer.
Avoid using arbitrary household mixtures because some additives may interfere with adhesive performance.
Touching the Adhesive
Fingerprints and dirt on the adhesive can remain visible beneath the film.
Handle the film by its edges whenever possible.
Keep the adhesive wet as instructed and avoid letting it touch clothing or interior surfaces.
Trying to Fix Every Bubble Immediately
Not all bubbles mean the installation has failed.
Small trapped-water pockets may disappear during curing.
Air bubbles, dirt particles, and sharp creases are different problems.
Avoid repeatedly pushing or peeling at a film that has started bonding.
Check the manufacturer’s guidance before attempting a repair.
DIY Window Tint vs. Professional Installation
The main advantage of DIY tinting is lower initial labor cost.
Professional installation provides experience, specialized tools, and a controlled application process.
The better choice depends on the vehicle and the finish you expect.
| Factor | DIY window tinting | Professional tinting |
| Initial labor cost | No paid installation labor | Labor included in price |
| Tools | Must provide or purchase | Installer supplies equipment |
| Film cutting | Your responsibility unless precut | Typically handled by installer |
| Curved glass | Difficult for beginners | Routine work for experienced technicians |
| Dust control | Depends on workspace | Often more controlled |
| Installation time | Can be lengthy for beginners | Usually more efficient |
| Rework | Additional film may be needed | Depends on workmanship warranty |
| Material selection | Limited by retail availability | Broader access may be available |
| Final appearance | Depends heavily on skill | More predictable with a reputable shop |
Is DIY Window Tinting Cheaper?
DIY tinting is generally cheaper if the installation works on the first attempt and the necessary tools are already available.
Potential expenses include:
- Window tint film
- Application solution
- Squeegee and trimming tools
- Heat gun if required
- Cleaning materials
- Additional film for mistakes
- Existing film removal supplies
If several pieces need replacing, the savings become smaller.
A complete vehicle installation can also demand considerable time, particularly for someone learning the process.
Why Professional Tinting Costs More
Professional shops charge for labor, equipment, installation experience, and business overhead.
The price also depends on:
- Number of windows
- Window size and curvature
- Vehicle body style
- Film brand and type
- Ceramic, dyed, or hybrid technology
- Existing tint removal
- Warranty coverage
- Local labor rates
A curved rear windshield usually requires more installation skill than a small fixed side window.
Premium ceramic films also generally cost more than basic dyed products.
Does Professional Tint Last Longer?
Professional installation can reduce problems caused by contamination, poor adhesion, and incorrect film handling.
However, actual film lifespan also depends on material quality, environmental exposure, and maintenance.
A high-quality DIY film installed correctly may last for many years.
Likewise, poor professional workmanship can cause early failures.
Compare the film manufacturer’s material warranty with the installer’s workmanship warranty before choosing a service.
Is It Worth Tinting Your Own Car Windows?
DIY tinting can be worthwhile when the project matches your experience, equipment, and expectations.
It is less attractive when the vehicle has difficult glass or you expect a nearly flawless finish.
When DIY Tinting Makes Sense
Consider doing the work yourself when:
- You only need to tint one or two relatively flat windows.
- A suitable precut kit is available.
- You have a clean, sheltered workspace.
- You’re comfortable using precise hand tools.
- You can follow installation instructions carefully.
- You accept the possibility of replacing a damaged piece.
- The planned tint complies with applicable laws.
A removable practice pane or inexpensive practice material can help you learn how the film behaves before working on the vehicle.
When Professional Installation Makes More Sense
Consider hiring an installer when:
- The vehicle has a large curved rear windshield.
- You want a seamless, high-quality appearance.
- You have limited time for trial and error.
- The existing film is damaged or difficult to remove.
- The rear glass contains delicate heating or antenna elements.
- You’re purchasing expensive premium film.
- The vehicle has complex glass shapes or tight interior access.
- You need help confirming legal VLT.
For an expensive vehicle or a full ceramic tint installation, the additional installation cost may be reasonable.
The goal is not simply to get the film onto the glass. It is to produce a durable, clear finish without damaging the vehicle.
Window Tint Laws and Safety Issues to Check Before DIY Installation
Even a technically successful tint installation can create problems if the shade is illegal or interferes with visibility.
Check the Finished VLT, Not Just the Film Label
Factory automotive glass already reduces some visible light.
Installing aftermarket film decreases the combined transmission further.
For example, if factory glass transmits 80% of visible light and the new film transmits 50%, the simplified combined transmission is:
0.80 × 0.50 = 0.40
The finished window would transmit approximately 40% of visible light.
Actual compliance should be checked with an appropriate tint meter.
According to the Texas Department of Public Safety’s window tinting standards, front side windows immediately beside the driver must transmit at least 25% of visible light when the film and original glass are measured together.
Texas also places restrictions on reflectivity and windshield tint placement.
Other states have different requirements.
Always check the current rules where the vehicle will be registered and operated.
Protect the Windshield and Driver’s Visibility
Windshield tint is subject to strict restrictions.
Large windshield films are also more difficult to apply because of glass size, curvature, sensors, and other vehicle components.
Never install film that obstructs the driver’s view or interferes with cameras and driver-assistance equipment.
For most beginners, full windshield tinting is not an appropriate first DIY project.
Avoid Damage From Blades and Heat
Sharp blades can damage window seals, interior trim, and heating elements.
Heat guns can become hot enough to damage film and surrounding materials.
Use protective equipment and follow the tool manufacturer’s instructions.
Keep electrical devices and application solution away from sensitive controls and wiring.
If the vehicle contains specialized glazing or integrated electronic components, verify film compatibility before proceeding.
How to Care for DIY Window Tint After Installation
Proper aftercare helps the film bond and reduces the likelihood of accidental edge damage.
Allow Enough Curing Time
Freshly installed film may look slightly hazy while residual moisture evaporates.
Curing can take longer in cold or humid conditions.
Do not assume that a temporary haze means the film has failed.
Follow the product’s specified waiting period before operating tinted windows or cleaning their surfaces.
Use Suitable Cleaning Materials
Once the manufacturer permits cleaning, use a soft, nonabrasive cloth and a cleaner compatible with the particular film.
Avoid rough scrub pads and sharp tools.
Some film manufacturers permit certain ammonia-based cleaners under specific conditions, while others recommend different products.
The safest approach is to follow the exact film’s cleaning instructions.
Watch for Persistent Installation Defects
Inspect the film after the recommended curing period.
Small water pockets may resolve naturally.
However, persistent air bubbles, lifting edges, visible debris, or creases may require repair or replacement.
Avoid attempting aggressive repairs after the adhesive has fully bonded.
Conclusion
Is it hard to tint your own car windows? Yes, it can be challenging for beginners, but relatively flat side windows are manageable with the right tools, preparation, and patience.
The main difficulties involve cleaning the glass thoroughly, handling adhesive film, cutting accurate edges, and preventing bubbles or creases.
Curved rear windshields require considerably more skill because the film may need heat shaping, and the glass often contains delicate defroster elements.
For a beginner, I recommend starting with a simple side window and a vehicle-specific precut tint kit. A clean workspace and careful film handling will improve the chances of a satisfactory result.
For a complete vehicle installation, particularly one involving expensive ceramic film or complex rear glass, professional tinting is often the more predictable choice.
Whether you install the film yourself or hire a professional, choose a legal tint percentage, follow manufacturer instructions, and protect the vehicle’s glass and interior components.
FAQs About Is It Hard to Tint Your Own Car Windows
Can a Beginner Tint Car Windows Successfully?
Yes. A beginner can tint relatively flat car windows successfully with suitable tools, clean glass, and careful installation.
However, the first attempt may contain imperfections. Starting with a small window or practice material is more manageable than attempting the rear windshield immediately.
How Long Does It Take to Tint Car Windows Yourself?
The time varies with the vehicle, number of windows, film type, and installer experience.
A first-time installer may spend several hours preparing and tinting a few windows, especially if trimming or repositioning is required.
Curved rear glass can take considerably longer.
The installation time is separate from the film’s curing period.
Is It Easier to Use Precut Window Tint?
Yes. Precut kits eliminate much of the measuring and cutting required with universal film rolls.
However, they do not remove the need for thorough cleaning, careful adhesive handling, correct positioning, and proper squeegee work.
Curved glass may still require special preparation.
Can You Tint Your Car Windows Without a Heat Gun?
Yes. Some relatively flat automotive windows can be tinted without heat shrinking.
However, many curved rear windows require heat shaping or another manufacturer-approved installation technique.
Check whether your particular film and glass shape require a heat gun.
Can You Remove DIY Tint and Try Again?
Yes, automotive tint film can generally be removed, but removal requires care.
Adhesive-backed film that has already bonded is usually not reusable.
Removing film from rear glass also requires special caution to avoid damaging defroster lines.
Is DIY Ceramic Window Tint Harder to Install?
Ceramic film is not automatically harder to install solely because it contains ceramic particles.
Difficulty depends on film thickness, handling characteristics, adhesive system, shrinkability, and window curvature.
Because premium ceramic film can be expensive, mistakes may cost more to correct.
Why Do Bubbles Appear After Tinting Car Windows?
Bubbles may result from trapped application solution, air, dust, or contamination.
Small moisture pockets can disappear as the film cures.
Air bubbles, embedded dirt, and sharp creases usually require correction and may not resolve on their own.
Should You Tint Your Own Rear Windshield?
A beginner is generally better off leaving a strongly curved rear windshield to an experienced installer.
The large glass area, compound curvature, restricted access, and defroster lines make the process more demanding than tinting ordinary side windows.
A suitable flat rear window may be easier, but the installation still requires careful preparation and film handling.