Professional window tinting is generally the better choice for a smooth, consistent finish and reliable warranty coverage, while DIY window tint is more affordable for drivers willing to handle the installation themselves. Both methods can deliver good results, but the outcome depends on film quality, preparation, tools, and installation skill.
DIY automotive window tint kits can cost as little as 30–50 for basic film. Professional installation often costs significantly more because the price includes labor, specialized equipment, and access to different film options.
The biggest challenge with DIY tint is applying the film without trapping dust, creating wrinkles, or leaving uneven edges. Curved rear windshields are especially difficult for beginners.
Professional installers generally have controlled work areas and experience shaping film around complex glass. However, an expensive installation doesn’t automatically guarantee better heat rejection or durability.
The right choice depends on your budget, vehicle, expectations, and the number of windows being tinted.
In this article, I compare DIY and professional window tinting costs, installation quality, tools, time requirements, film choices, warranties, and common mistakes. I also explain when doing it yourself makes sense and when professional installation offers better long-term value.
DIY Window Tint vs Professional: Main Differences
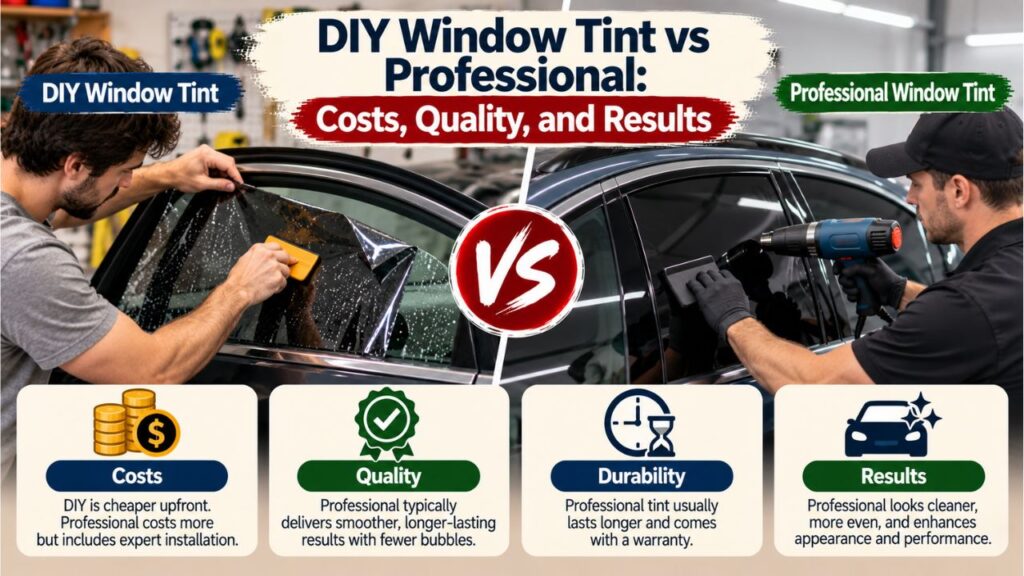
The primary difference between DIY and professional window tinting is who prepares, cuts, and installs the film.
A DIY installation requires purchasing the film, preparing the glass, cutting the material, and applying it without professional assistance.
Professional installation includes these tasks as part of the service.
| Feature | DIY Window Tint | Professional Window Tint |
| Initial cost | Lower | Higher |
| Installation skill | Requires learning and practice | Performed by an experienced installer |
| Film selection | Depends on retail availability | Often includes premium professional-grade films |
| Cutting accuracy | Hand-cut or precut kit | Often computer-cut or professionally trimmed |
| Curved glass installation | Difficult for beginners | More manageable with proper equipment |
| Dust contamination | Higher risk in uncontrolled environments | Usually lower in a prepared work area |
| Installation time | Often several hours or longer | Commonly a few hours |
| Appearance | Depends heavily on skill | Usually more consistent |
| Warranty | Varies; often limited film-only coverage | May include film and labor coverage |
| Mistake-related costs | Owner pays for wasted film | Installer generally handles workmanship corrections under shop policy |
| Best application | Small, simple jobs and experienced DIY users | Complete vehicles, complex glass, and premium tint |
These differences describe typical installations rather than guaranteed outcomes.
An experienced DIY installer using quality film may achieve excellent results. Likewise, an inexperienced professional installer may produce visible defects.
The main advantage of professional tinting is consistency, not an automatic difference in the film’s underlying performance.
How Much Does DIY Window Tint Cost?
DIY window tint is attractive because you don’t have to pay for professional installation labor.
However, the total cost includes more than the film itself.
You may also need application tools, cleaning supplies, replacement film, and a suitable workspace.
DIY Window Tint Film Prices
According to AutoZone’s window tint cost guide, basic DIY window film can start around 30–50, while professional installation can range from approximately $100 to $800 depending on the vehicle and film.
Film prices vary by type, quality, and coverage.
Common options include:
- Dyed window tint
- Carbon window tint
- Ceramic window tint
- Metallic window tint
- Precut automotive tint kits
Basic dyed films are often the least expensive.
Higher-performance carbon and ceramic products generally cost more.
A small roll may be sufficient for one or two side windows, while a complete vehicle requires more material.
Additional DIY Tinting Tool Costs
A beginner may need to purchase tools separately.
Common requirements include:
| Tool or Supply | Purpose |
| Application squeegee | Removes water and air during installation |
| Slip or application solution | Allows film positioning |
| Spray bottle | Applies cleaning and installation solution |
| Lint-free cloth | Cleans the glass |
| Appropriate scraping tool | Removes debris from compatible glass |
| Sharp film-cutting knife | Trims film edges |
| Heat gun | Shapes suitable film around curved glass |
| Hard card with protective sleeve | Helps finish edges and remove moisture |
Some DIY kits include basic tools.
Others contain only the film.
A heat gun may be unnecessary for a simple precut side-window installation but is often used when shaping film for curved glass.
Always follow the film manufacturer’s temperature and installation instructions.
Example DIY Tinting Budget
Consider a hypothetical project involving a small sedan.
| Expense | Estimated Cost |
| DIY window tint film | $55 |
| Application tools | $25 |
| Cleaning and installation supplies | $10 |
| Extra film allowance | $30 |
| Total planned cost | $120 |
These amounts illustrate a possible budget, not a verified market quote.
A driver who already owns the necessary tools could spend less.
However, needing to repeat several windows can quickly increase the final expense.
Does DIY Tinting Save Money?
Usually, yes, when the installation works correctly on the first attempt.
The savings become less certain when mistakes require replacement film or professional correction.
DIY also requires personal time, which may be important if the vehicle is needed for daily transportation.
Key Takeaway: DIY tinting has a clear initial cost advantage, but the actual savings depend on tool purchases, film quality, and how many attempts are needed.
How Much Does Professional Window Tinting Cost?
Professional window tinting generally costs more because the service includes installation labor and shop equipment.
Pricing also depends on the vehicle’s glass area, film technology, and local labor rates.
Typical Professional Window Tint Prices
The following are broad U.S. planning ranges for professional automotive window tinting.
| Film Type | Approximate Installed Cost |
| Basic dyed tint | 100–350 |
| Carbon tint | 200–500 |
| Ceramic tint | 300–800 |
| Premium specialty film | May exceed $800 |
These ranges are not guaranteed quotes.
A larger SUV may cost more than a compact sedan because it has more glass.
Some shops charge separately for windshields, panoramic roofs, or old tint removal.
What Is Included in Professional Installation?
A standard professional service may include:
- Assessment of the existing glass
- Discussion of tint darkness and film options
- Glass cleaning and preparation
- Film measurement and cutting
- Heat shaping where necessary
- Film application
- Edge finishing
- Final visual inspection
- Basic aftercare instructions
- Applicable warranty documentation
The exact service varies by installer.
Ask whether the quoted price includes every window you want tinted.
Why Professional Tinting Costs More
Professional window tinting requires specialized skills.
Experienced installers understand how to handle curved glass, manage application solution, and reduce contamination.
Shops may also use computerized film-cutting systems that produce patterns for specific vehicle models.
These systems can reduce the need for manual trimming directly against the glass.
The added cost pays for both the film and the installation process.
Is Professional Tinting Worth the Higher Price?
Professional installation is often worth the higher price when you want a consistent appearance across every window.
It is also useful for vehicles with difficult rear windshields, integrated electronics, or expensive interior trim.
However, compare the actual film series, warranty, and shop reputation rather than selecting the most expensive quote automatically.
Key Takeaway: Professional tinting costs more upfront but usually provides greater convenience, better installation consistency, and access to warranty support.
DIY vs Professional Window Tint Quality and Appearance
Installation quality is one of the most noticeable differences between the two methods.
Even high-quality window film can look poor when installed incorrectly.
Why DIY Window Tint May Have Bubbles
Bubbles can appear when air, moisture, or contaminants become trapped between the film and glass.
Some initial moisture patterns are normal during the curing process.
However, permanent air pockets, dirt particles, and improperly applied sections may remain visible.
Common causes include:
- Inadequate cleaning
- Dust entering during installation
- Insufficient or uneven squeegee pressure
- Incorrect film positioning
- Damaged adhesive
- Excessive stretching or creasing
A small amount of temporary moisture should not automatically be treated as failed installation.
Follow the manufacturer’s curing instructions before deciding that the film needs replacement.
Why Professional Tint Usually Looks Smoother
Professional installers generally work in a prepared environment.
They also use specialized tools and repeated installation techniques.
This can help reduce:
- Visible contamination
- Crooked edges
- Uneven spacing
- Film creases
- Excessive trapped moisture
- Poor adhesion near window seals
However, even professional installation can show temporary moisture patterns while the film cures.
Perfectly invisible installation is not a realistic guarantee under every lighting condition.
Does Professional Tint Look Darker?
Not necessarily.
Window darkness is mainly determined by Visible Light Transmission (VLT).
A 35% VLT film allows approximately 35% of visible light to pass through the film under its specified measurement conditions.
A professionally installed 35% film is not automatically darker than a DIY 35% film.
The final appearance also depends on existing factory glass, film color, and reflectivity.
Key Takeaway: Professional tint usually offers more consistent workmanship, but tint darkness and solar performance come from the film specifications rather than the installation method.
Is DIY Window Tint Hard to Install?
Automotive window tinting is more difficult than simply placing an adhesive sheet against glass.
The film must be correctly positioned, shaped, and applied without contamination.
The difficulty varies by window.
Side Windows Are Usually Easier
Many door windows are smaller and more accessible than windshields.
They can be a reasonable starting point for beginners.
However, side windows still require careful work around rubber seals, glass edges, and moving window mechanisms.
Common challenges include:
- Cutting the film accurately
- Removing dirt near window seals
- Positioning the film without touching the adhesive
- Avoiding contamination
- Finishing the top edge cleanly
- Preventing the film from peeling during window movement
A precut kit can reduce measuring and cutting errors.
It does not eliminate the need for careful preparation and installation.
Rear Windshields Are More Difficult
Rear windshields often have compound curves.
A flat film must be shaped to fit these surfaces.
Many professional installers use controlled heat-shrinking techniques to achieve a smooth fit.
This requires practice because overheating can damage the film.
Rear glass may also contain:
- Defroster lines
- Integrated antennas
- Tight interior trim
- Brake light housings
- Complex curved edges
Improper scraping or tint removal can damage defroster elements.
For beginners, the rear windshield is often the strongest reason to choose a professional installer.
Are Precut Window Tint Kits Easier?
Yes, precut kits reduce some of the work.
They are designed to match the approximate shapes of specific vehicle windows.
However, a precut film still needs to be:
- Applied to clean glass.
- Positioned accurately.
- Shaped where required.
- Smoothed without contamination.
- Finished around the edges.
The accuracy of precut kits also depends on the vehicle model, production year, and supplier.
A poorly matched pattern can still require adjustment.
Key Takeaway: Small side windows are more manageable for beginners, while curved rear glass and complex vehicle trim make professional installation more attractive.
How to Tint Car Windows Yourself: Basic Steps
A DIY installation requires careful preparation and suitable tools.
The following overview describes the general process for compatible aftermarket automotive window film.
Always follow the instructions supplied with the specific film.
Step 1: Check Window Tint Laws
Before purchasing film, check the legal VLT limits for your state and vehicle type.
Different rules may apply to the windshield, front side windows, and rear windows.
Some states also restrict reflective finishes.
Do not assume that a film labeled 20%, 35%, or 50% will automatically produce a legal finished window.
Step 2: Prepare a Clean Workspace
Work in a sheltered, well-lit area.
Avoid windy or dusty environments.
Clean the surrounding work area before opening the film package.
Dust and loose fibers can become trapped in the adhesive.
Step 3: Clean the Glass Thoroughly
Remove dirt, grease, and residue from the window.
Pay attention to the edges and rubber seals.
Use cleaning products and tools compatible with the glass and film.
Avoid damaging rear-window defroster lines or factory coatings.
Step 4: Measure and Prepare the Film
Use a precut kit or measure the film according to its instructions.
Leave enough material for accurate positioning.
If the film requires shaping to fit curved glass, follow the manufacturer’s recommended technique.
Do not attempt aggressive heat shrinking without appropriate experience and temperature control.
Step 5: Apply the Installation Solution
Apply the recommended solution to the glass and adhesive surface as directed.
This helps position the film before it bonds fully.
Do not substitute household chemicals unless the film manufacturer specifically allows them.
Step 6: Position the Film
Carefully place the adhesive side against the prepared glass.
Align the upper and side edges.
Avoid repeatedly lifting the film or touching the exposed adhesive.
If contamination becomes trapped, correct it according to the installation instructions.
Step 7: Remove Excess Solution and Air
Use the appropriate squeegee.
Work carefully to move trapped solution and air toward the edges.
Maintain suitable pressure without scratching or creasing the film.
Excessive force can damage the material.
Step 8: Finish the Edges and Let the Film Cure
Inspect the edges for poor adhesion or trapped material.
Follow the film manufacturer’s instructions before lowering windows or cleaning the glass.
Curing times vary with temperature, humidity, film type, and installation method.
Do not assume that every tint product has the same waiting period.
Key Takeaway: DIY tinting requires careful cleaning, accurate positioning, and proper curing. Rushing these stages can create defects that are difficult to repair later.
How Long Does DIY Window Tint Take vs. Professional Installation?
The amount of time required depends on the number of windows, their shapes, and installer experience.
DIY Window Tinting Time
A beginner may spend several hours tinting a small number of windows.
A complete vehicle can take much longer, especially when installation mistakes require additional work.
The process includes:
- Preparing tools and workspace
- Cleaning the glass
- Measuring and cutting film
- Applying and adjusting film
- Finishing edges
- Cleaning up
- Repeating failed sections when necessary
There is no reliable universal DIY completion time.
The rear windshield and other curved surfaces often require the greatest attention.
Professional Installation Time
A typical professional tinting job may take approximately 2–4 hours for many passenger vehicles.
Some installations require more time.
Factors include:
- Vehicle size
- Number of windows
- Film type
- Old tint removal
- Glass curvature
- Interior trim complexity
The installer can provide a more accurate schedule after inspecting the vehicle.
Does Tint Cure Faster When Professionally Installed?
Not automatically.
Curing depends on the film, adhesive, weather, glass temperature, and remaining moisture.
Professional installation may reduce excess application solution, but the film still needs time to cure.
Both DIY and professionally installed tint can show temporary haziness or moisture patterns during the initial curing period.
Key Takeaway: Professional installation usually saves the owner substantial working time, but curing still follows the selected film’s requirements.
DIY vs Professional Tint: Film Quality and Heat Rejection
A common misconception is that professional installation automatically makes a car cooler.
In reality, the film’s measured solar performance largely determines how much solar energy it rejects.
Does DIY Tint Block Heat?
Yes, when the film is designed to reject solar heat.
However, not all films perform equally.
Basic dyed tint primarily reduces visible light and glare.
Some premium carbon and ceramic films offer substantially better solar heat rejection.
A dark appearance does not necessarily mean strong thermal performance.
Does Professional Tint Block More Heat?
Professional shops often carry higher-performance film lines that may not be readily available through ordinary retail channels.
This can give professional tinting an advantage in product selection.
However, if the same film is properly installed using either method, its underlying laboratory solar performance does not change simply because a professional applied it.
The installer affects fit, adhesion, and appearance, not the film’s stated solar-rejection specification.
Which Heat-Rejection Measurements Matter?
Important specifications include:
| Measurement | Meaning |
| VLT | Percentage of visible light transmitted |
| TSER | Total solar energy rejected |
| IRR | Infrared rejection over the stated measurement range |
| IRER | Infrared energy rejection under the stated method |
| UV rejection | Percentage of ultraviolet radiation blocked |
| VLR | Visible light reflected by the film |
Total Solar Energy Rejected (TSER) is particularly useful when comparing overall solar heat performance.
Be careful with advertised infrared-rejection percentages.
A film claiming 95% infrared rejection does not necessarily reject 95% of the sun’s total energy.
Compare products using the same testing definitions whenever possible.
Can You Install Ceramic Tint Yourself?
Yes, if a suitable ceramic film is available for DIY installation.
However, ceramic film does not eliminate installation challenges.
You still need proper tools, preparation, positioning, and shaping techniques.
Expensive ceramic film may be particularly costly to replace after mistakes.
For a full vehicle, professional installation often makes more sense when using premium ceramic products.
Key Takeaway: Heat rejection depends on film technology and specifications. Professional shops may offer better film choices, but professional labor alone does not increase a film’s tested solar performance.
DIY Window Tint vs Professional Warranty Coverage
Warranty protection is another important difference.
DIY products may carry manufacturer warranties against certain material defects.
Professional installations can include both product coverage and workmanship protection.
However, the terms vary significantly.
What Does a DIY Tint Warranty Cover?
A retail film warranty may cover specific manufacturing defects.
Possible covered issues include:
- Material defects
- Certain forms of discoloration
- Adhesive failure
- Premature film deterioration
Coverage depends on the exact product.
Improper installation, contamination, cutting mistakes, or other user-caused damage may be excluded.
Some warranties provide replacement film without covering the time required to remove or reinstall it.
Check the written terms before purchasing.
What Does a Professional Tint Warranty Cover?
Professional tint warranties may cover both the film and qualifying installation-related defects.
For example, 3M’s official automotive window film support states that its qualifying U.S. and Canadian automotive window films installed by authorized installers carry warranty protection while the original purchaser owns the vehicle.
The stated coverage includes qualifying product defects, with replacement film and reapplication labor under the written warranty conditions.
This does not mean every professional window tint job includes the same warranty.
Coverage depends on the film brand, product series, installer authorization, and terms.
Does Professional Tint Always Have a Lifetime Warranty?
No.
Some premium automotive films offer limited lifetime warranties, while others provide shorter coverage.
A shop may also offer a separate workmanship warranty.
Always ask whether the warranty covers:
- Film defects
- Peeling
- Bubbling
- Adhesive failure
- Color changes
- Replacement labor
- Removal of defective film
- Transfer to another vehicle owner
Retain the purchase receipt and warranty documents.
Is the Warranty Worth Paying Extra For?
It can be.
If a film fails after several years, professional coverage may reduce replacement expenses.
However, a warranty provides value only when the problem is covered and the claim process can be completed.
A well-known brand with a clear written warranty is generally preferable to a vague promise of lifetime protection.
Key Takeaway: Professional tinting often offers stronger warranty support, especially when authorized installation includes replacement labor. Read the actual terms rather than relying on the phrase lifetime warranty.
Common DIY Window Tint Mistakes and How to Avoid Them
First-time tint installations frequently encounter problems that affect appearance or durability.
Understanding these issues helps determine whether DIY is a realistic option.
1. Dust Trapped Beneath the Film
Tiny dust particles can create noticeable spots.
To reduce contamination, clean the glass thoroughly and work in a sheltered environment.
Keep the adhesive protected until installation.
2. Uneven Film Edges
Crooked trimming can leave visible gaps or overlapping material.
Use a quality precut kit or measure carefully.
Avoid cutting directly against sensitive glass components, seals, or vehicle trim.
3. Wrinkles and Creases
Film can wrinkle when it doesn’t conform to the glass or when it is handled incorrectly.
Permanent creases may require replacement.
Do not assume that additional squeegee pressure will remove a sharply folded section.
4. Using Too Much Heat
A heat gun can help shape compatible film.
However, excessive heat can distort, shrink unevenly, or damage the material.
Follow the film manufacturer’s heat-shaping instructions.
5. Scratching the Glass
Improper use of cutting tools and scrapers can damage glass or factory coatings.
Rear defroster lines are especially vulnerable.
Use compatible tools and avoid unnecessary trimming directly on the installed window.
6. Rolling Windows Down Too Early
Moving side windows before the film has reached the manufacturer’s recommended curing stage can disturb the edges.
Follow the specific aftercare instructions.
Do not use an arbitrary waiting period for every product.
7. Buying Tint Without Checking the Law
Installing an illegal shade may lead to fines, inspection problems, or mandatory film removal.
Verify local regulations before buying the film.
8. Choosing Film Only by Darkness
A dark film does not necessarily provide excellent heat rejection or UV protection.
Compare the actual product specifications.
Key Takeaway: The most common DIY problems involve contamination, cutting, shaping, and curing. Good preparation helps, but difficult windows still require considerable skill.
Is DIY Window Tint Legal in the United States?
DIY window tinting itself is generally not prohibited merely because the vehicle owner performs the installation.
However, the completed window treatment must comply with applicable state laws.
Some jurisdictions have additional rules affecting installation, labeling, or certification.
Understanding Window Tint Percentages
Window tint darkness is commonly expressed as VLT.
A lower VLT means less visible light passes through.
| Film VLT | General Appearance |
| 70% | Very light |
| 50% | Light |
| 35% | Moderately dark |
| 20% | Dark |
| 5% | Extremely dark |
These descriptions are approximate.
Factory glass already affects visible light transmission.
For example, applying a 50% VLT film to glass that transmits 80% of visible light produces an approximate combined VLT of:
0.50 × 0.80 = 0.40
Approximate final VLT = 40%
The actual result should be measured with suitable equipment when compliance matters.
Do Tint Laws Differ by State?
Yes.
U.S. states regulate automotive window tint differently.
Requirements may depend on:
- Window position
- Vehicle classification
- Visible light transmission
- Reflectivity
- Tint color
- Windshield location
- Medical exemptions
- Required stickers or certifications
Front side windows are often regulated more strictly than rear passenger windows.
However, no single darkness percentage is legal everywhere.
Does Professional Installation Guarantee Legal Tint?
No.
An installer may explain local laws and offer compliant options, but responsibility for vehicle compliance is not automatically eliminated by paying a professional.
Ask the shop to confirm the expected combined VLT and any applicable reflectivity restrictions.
For DIY installation, check the current rules published by the relevant state motor vehicle or law enforcement agency.
Key Takeaway: DIY and professional window tinting must meet the applicable legal requirements. Paying an installer does not exempt a vehicle from tint laws.
Can DIY Window Tint Last as Long as Professional Tint?
Yes, a properly installed high-quality DIY film can last for years.
However, the installation method affects the risk of premature failure.
What Determines Tint Lifespan?
Important factors include:
- Film material quality
- Adhesive formulation
- UV exposure
- Installation cleanliness
- Proper edge finishing
- Curing conditions
- Heat exposure
- Cleaning methods
A low-quality film may deteriorate even when installed professionally.
A high-quality film may also fail early if it is contaminated or incorrectly applied.
Why DIY Tint May Peel Sooner
DIY installations are more vulnerable to mistakes at the edges.
For example, film that overlaps a moving seal may be lifted when the window is lowered.
Contamination can also interfere with adhesive bonding.
A poorly shaped film may retain tension that contributes to edge lifting.
Professional installers are generally better equipped to prevent these problems.
Does Ceramic Tint Last Longer When Professionally Installed?
Professional installation can reduce workmanship-related problems.
However, it does not automatically change the ceramic film’s chemical composition or inherent resistance to sunlight.
Product quality and correct application work together to determine durability.
How to Maintain Either Type of Tint
After installation:
- Follow the specified curing period.
- Avoid lowering side windows until permitted.
- Do not scrape the tinted surface.
- Use approved cleaning products.
- Clean with soft, nonabrasive materials.
- Inspect the edges for lifting.
- Contact the installer or film supplier if defects appear.
Avoid assuming that all automotive window films can tolerate the same cleaning chemicals.
Follow the instructions for the actual installed product.
Key Takeaway: DIY tint can last a long time when the film and installation are good, but professional workmanship reduces several common causes of early failure.
When Is DIY Window Tint Better Than Professional Installation?
DIY tinting makes sense under certain conditions.
It is most attractive when the work is simple and the potential cost of a failed attempt is manageable.
Choose DIY Window Tint If You Want
- The lowest possible initial installation cost
- To tint one or two relatively simple side windows
- To learn automotive film installation
- To work on an older or project vehicle
- To use an appropriate precut tint kit
- To complete the job at your own pace
- To accept the possibility of removing and replacing poorly installed film
DIY may also suit drivers who already have experience applying vinyl, protective films, or other adhesive materials.
However, these skills do not automatically transfer perfectly to automotive tinting.
When DIY Tint Is Not the Best Option
DIY may be less attractive when:
- The vehicle has a large, curved rear windshield.
- The windows have delicate defroster or antenna components.
- You are installing expensive premium film.
- A nearly flawless finish is important.
- You lack a clean workspace.
- You need the vehicle returned quickly.
- You want comprehensive labor-backed warranty coverage.
For these situations, the installation risk may outweigh the initial savings.
When Should You Choose Professional Window Tinting?
Professional installation is generally the stronger option for a complete vehicle.
It is particularly valuable when installation quality and long-term support matter.
Choose Professional Tint If You Want
- Consistent appearance across all windows
- Cleaner film edges
- Lower risk of visible contamination
- Installation on complex curved glass
- Access to professional film lines
- Experienced handling of delicate trim
- Written warranty documentation
- Less personal installation time
However, professional service quality varies.
Choose an installer based on experience, film specifications, and warranty support.
How to Find a Good Window Tint Installer
Before booking, ask:
- Which film brands and series do you install?
- What are their published TSER and VLT ratings?
- Is the shop authorized by the film manufacturer?
- Are the patterns precut or hand-trimmed?
- Is old film removal included?
- What does the installation warranty cover?
- Can I see examples of completed work?
- How long should the film cure before normal window operation?
A reputable shop should provide clear information about its materials and installation process.
Avoid choosing solely by the lowest quoted price.
DIY Window Tint vs Professional: Which Offers Better Long-Term Value?
Long-term value depends on the total cost, film performance, installation quality, and possible replacement expenses.
Consider the following hypothetical comparison.
| Expense | DIY Installation | Professional Installation |
| Film and initial materials | $65 | Included |
| Additional tools | $30 | Included |
| Installation labor | Your own time | Included |
| Replacement film after a failed attempt | $65 | $0 if no correction needed |
| Total cost | $160 | $250 |
| Warranty | Product-dependent | Product- and installer-dependent |
These are illustrative costs, not real quotes.
In this example, DIY remains cheaper even after one failed attempt.
However, the difference is only $90.
If the owner needs additional film or eventually pays a shop to fix the result, the savings may disappear.
Best Value for a Single Side Window
DIY can be economical for a simple side window.
The amount of film is smaller, and a precut pattern may reduce preparation time.
However, a professional single-window service may also be reasonably priced.
Compare the actual tool and material expense with a local installation quote.
Best Value for a Full Sedan
Professional installation is often a better value for a complete sedan if appearance and time matter.
The rear windshield adds difficulty, and inconsistencies become more noticeable when several windows are tinted.
DIY can still save money when the installer already has the required skills.
Best Value for SUVs and Larger Vehicles
Large vehicles require more film and may have complex rear glass.
This increases the amount of material at risk during DIY installation.
Professional installation is often preferable when multiple large windows are involved.
Best Value for Premium Ceramic Tint
Professional installation is usually the better choice for expensive ceramic film.
Wasting premium film can significantly increase DIY expenses.
An authorized installation may also provide access to stronger warranty coverage.
Key Takeaway: DIY offers the best value when installation is straightforward and successful. Professional service becomes more attractive as film cost, glass complexity, and appearance expectations increase.
Final Verdict: DIY or Professional Window Tint?
The best option depends on your experience, budget, and vehicle.
| Situation | Better Choice | Why |
| Lowest upfront cost | DIY | Avoids professional labor |
| First-time installation on one simple window | DIY may work | Small, manageable project |
| Full-car tinting | Professional | More consistent results |
| Curved rear windshield | Professional | Requires advanced shaping skills |
| Premium ceramic film | Professional | Reduces risk of wasting expensive film |
| Strong warranty support | Professional | May include qualifying labor coverage |
| Learning a new automotive skill | DIY | Provides hands-on experience |
| Limited available time | Professional | Less personal work required |
| Best chance of a clean finish | Professional | Experienced application and equipment |
| Maximum heat rejection | Depends on film | Compare TSER, not installation method |
For most drivers, professional window tinting is the better overall choice because it reduces installation risks and provides a more predictable finished appearance.
DIY remains a reasonable option for simpler windows and drivers willing to invest time in learning the process.
Conclusion
The DIY window tint vs professional decision comes down to initial cost, installation difficulty, appearance, and long-term value.
DIY tinting can save a substantial amount of money, particularly for small projects using affordable film. However, beginners may struggle with trapped dust, uneven edges, wrinkles, and curved glass.
Professional tinting costs more because it includes skilled labor, specialized tools, and often broader warranty options. For a complete vehicle or premium ceramic film, those advantages can justify the extra expense.
Remember that heat rejection, UV protection, and darkness depend primarily on the selected film’s specifications rather than who installs it.
If you’re tinting one simple window and don’t mind practicing, DIY can be worthwhile. If you want a consistent finish across the entire vehicle with minimal installation risk, hiring an experienced professional is usually the more practical investment.
FAQs About DIY Window Tint vs Professional
Is DIY window tint as good as professional tint?
It can be when the same quality film is installed correctly. However, professional installers generally produce more consistent results because they have experience, suitable tools, and a controlled work environment. DIY mistakes can affect appearance and adhesion.
How much money can I save by tinting my own car windows?
DIY materials can cost as little as 30–50 for basic film, while professional tinting may cost approximately 100–800 depending on coverage and film type. Actual savings depend on tools, wasted material, and whether any windows need to be redone.
Is it hard to tint car windows yourself?
It can be challenging, especially for beginners. Small side windows are generally easier than curved rear windshields. The most difficult tasks often involve cleaning, shaping the film, cutting accurate edges, and preventing contamination.
Does professional window tint last longer than DIY tint?
Professional installation can reduce problems caused by incorrect application, but lifespan also depends on film quality, adhesive, sunlight exposure, and maintenance. A correctly installed DIY film can last many years, while a poorly installed professional film may fail early.
Can I install ceramic window tint myself?
Yes, provided a suitable film is available for DIY installation. However, ceramic film still requires proper preparation, shaping, and application. Because premium ceramic film can be expensive, professional installation may provide better overall value.
Does DIY window tint come with a warranty?
Some DIY tint products include limited manufacturer warranties. However, coverage often excludes installation errors and may not include replacement labor. Professional installations may have broader film and workmanship coverage, depending on the brand and installer.
Is it cheaper to buy tint film and have a professional install it?
Not always. Some shops install customer-supplied film, but others refuse because they cannot verify the material or provide their usual warranty. Labor-only pricing may also reduce the expected savings. Confirm the shop’s policy before purchasing film.