To tint a car’s rear window, clean both sides of the glass, measure and cut the window film, heat-shrink it to match the rear windshield’s curvature, and apply it to the inside surface using a suitable installation solution and squeegee. The most important precautions are protecting the rear defroster lines, preventing dust contamination, and avoiding excessive heat.
Tinting a rear windshield is more challenging than tinting a flat side window. Most rear windows have compound curves, meaning the glass bends both vertically and horizontally. A flat sheet of film cannot always follow those curves without wrinkles.
The rear window may also contain delicate defroster wires, embedded antennas, and a center brake light. Damaging any of these components can lead to expensive repairs.
With suitable tools and careful preparation, DIY installation is possible. However, getting a clean, single-piece finish requires patience and practice.
In this article, I explain how to tint rear window glass from preparation to final installation, including film selection, heat shrinking, trimming, and bubble removal. You’ll also learn how to protect defroster lines, handle existing tint, follow state tint laws, and care for the film while it cures.
How to Tint Rear Window Glass Step by Step
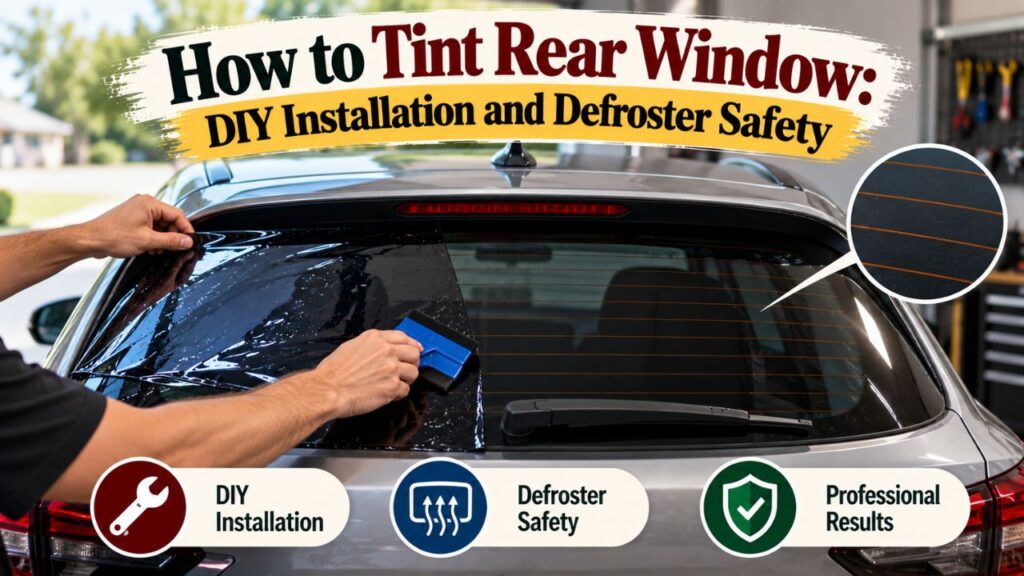
Most modern automotive rear windshield films are installed on the inside of the glass.
However, the film is commonly measured, trimmed, and heat-shrunk against the outside surface first.
This allows the installer to shape the film without interfering with the defroster grid inside.
Step 1: Check Rear Window Tint Laws
Before buying film, confirm the legal visible light transmission (VLT) requirement for your vehicle’s rear window.
VLT describes how much visible light passes through the film or completed glass-and-film system.
A lower VLT percentage means darker tint.
Common choices include:
| Tint Percentage | Appearance | Rearward Visibility |
| 70% | Nearly clear | High |
| 50% | Light | Relatively high |
| 35% | Medium | Moderately reduced |
| 20% | Dark | Reduced, especially at night |
| 5% | Very dark | Significantly restricted |
Rear windshield tint laws vary across the United States.
Some states allow dark rear window tint when the vehicle has appropriate side mirrors. Others establish minimum light-transmission limits or additional requirements.
The International Window Film Association’s automotive tint law resource provides state-by-state guidance.
Always verify current requirements with the relevant state motor vehicle authority before installation.
Remember that factory glass may already reduce light transmission.
The finished window can therefore be darker than the film’s advertised VLT.
Step 2: Gather the Necessary Tools
Using the correct tools makes a major difference when working with curved rear glass.
Recommended tools and materials include:
- Automotive window tint film
- Spray bottle
- Film-compatible slip or installation solution
- Clean microfiber towels
- Rubber window squeegee
- Felt-edged squeegee or application card
- Heat gun with adjustable temperature
- Film-cutting knife and suitable cutting surface
- Measuring tape
- Lint-free cleaning materials
- Protective towels or plastic covers
- Bright inspection light
- Compatible film-handling tape
- Protective gloves
A purpose-made automotive film installation solution is preferable to guessing at a soap mixture.
If the film manufacturer permits a diluted soap solution, follow its instructions.
Too much soap can interfere with adhesion, while insufficient lubrication can make the film difficult to position.
Important: Avoid using razor blades directly against the inside of a rear windshield that contains defroster lines.
Step 3: Prepare the Vehicle and Work Area
Park the vehicle in a clean, sheltered, well-lit area.
Dust and wind can contaminate the exposed adhesive during installation.
A garage or enclosed work area is usually better than an open driveway.
Before beginning:
- Turn off the rear defroster.
- Allow the rear glass to reach a moderate temperature.
- Remove loose items from the rear parcel shelf or cargo area.
- Protect nearby upholstery and electronic components with clean covers.
- Make sure the interior and exterior glass are accessible.
- Check whether the center brake light affects access to the rear windshield.
Avoid installing film on extremely hot or cold glass.
Excessive temperature changes can make the film harder to handle and may increase the risk of damage.
If interior trim needs removal, follow the vehicle manufacturer’s instructions.
Don’t disturb side-curtain airbag components or electrical wiring simply to improve access.
Step 4: Clean the Outside of the Rear Window
The outside surface is used to measure and shape the film.
Start by spraying the exterior glass with suitable cleaning solution.
Use a clean microfiber towel or rubber squeegee to remove dirt, dust, and residue.
Pay attention to the edges and corners.
Any debris trapped between the film and exterior glass during shaping can leave marks or interfere with the process.
Inspect the glass for:
- Dirt
- Tree sap
- Adhesive residue
- Water spots
- Existing coatings
- Scratches or chips
Use only cleaning products and tools appropriate for the glass surface.
Be especially careful with coated or specialty glass.
Dry the surface or prepare it for the film manufacturer’s recommended heat-shrinking method.
Step 5: Measure and Cut the Window Tint Film
Measure the rear glass before cutting the film.
Use material large enough to cover the intended tinted area, including a small allowance for fitting and trimming.
For a curved rear windshield, follow the manufacturer’s film orientation requirements.
Many automotive films are designed to be heat-shrunk primarily in one direction.
Incorrect orientation can make it difficult or impossible to remove wrinkles cleanly.
Lay the film on the outside of the glass with its protective release liner facing outward, as specified for the shrink method being used.
Do not remove the liner at this stage.
The liner protects the adhesive while you shape the film.
A pre-cut rear windshield kit can save time, but even accurately cut film may require heat shrinking to conform to a curved window.
Step 6: Position the Film on the Outside Glass
Place the oversized film against the exterior rear windshield.
Make sure it is centered and covers the required glass area.
Use the film manufacturer’s recommended shrinking preparation.
Depending on the product, professional methods may use a dry-shrink preparation or a wet-shrink process.
For many dry-shrink methods, a small central area is anchored while other sections remain free to move as the film shrinks.
This prevents the film from shifting excessively.
Avoid forcing the entire sheet flat before the shrinking process.
The purpose of heat shrinking is to remove the excess material created by the curved glass.
Step 7: Heat-Shrink the Film to Match the Glass
Heat shrinking is usually the most technically demanding part of rear window tint installation.
Avery Dennison’s official automotive window film installation bulletin describes shaping rear windshield film against the outside glass using controlled heat and a felt-edged squeegee.
The general process is:
- Keep the protective liner attached.
- Secure the film in its proper orientation.
- Identify the raised wrinkles or channels, often called fingers.
- Use a moving heat gun to shrink manageable sections.
- Gently guide the softened film with a suitable felt-edged tool.
- Work gradually toward the edges according to the film’s shrink direction.
- Continue until the film conforms smoothly to the rear glass.
Never hold the heat gun stationary against one area.
Too much concentrated heat can burn, crease, or distort the film and may damage the glass or nearby vehicle components.
Different films have different shrinking characteristics.
Follow the specific product’s temperature and handling guidance rather than applying one universal heat setting.
If the film develops severe creases or permanent distortion, replacing the sheet is usually better than forcing it flat.
Step 8: Trim the Film to the Rear Window Shape
After the film has been properly heat-shrunk, trim it to match the intended installation area.
Many rear windshields have a black ceramic border called a frit, sometimes surrounded by a pattern of black dots.
The border can help conceal film edges, but the dot-matrix texture may also create adhesion challenges.
For accurate trimming:
- Check the film’s alignment.
- Identify the intended perimeter.
- Mark the cutting line when appropriate.
- Transfer the film to a suitable cutting surface if using a marked template.
- Trim carefully using a sharp, appropriate cutting tool.
- Check the final fit against the exterior glass.
Avoid cutting directly against glass when a safer template or cutting-surface method is available.
A blade can scratch glass or damage coatings.
Don’t cut across rear defroster lines or embedded antenna components.
Step 9: Clean the Inside of the Rear Windshield
The inside surface is where the film will permanently adhere.
This step requires special care because many rear windows contain electrically conductive defroster lines.
Start by protecting the rear shelf, speakers, seats, and other interior components from moisture.
Spray an appropriate glass-cleaning or installation solution onto the interior glass.
Use clean, nonabrasive materials to remove dust and residue.
Pay careful attention to the spaces around the defroster grid.
Do not use a metal scraper or razor blade across rear defroster lines.
Scratching or cutting a conductive line can interrupt the electrical circuit.
Also avoid aggressive scrubbing of any integrated antenna lines.
If the inside glass has stubborn contamination, consult the vehicle and film manufacturer’s instructions before using stronger cleaning methods.
Once the glass is clean, remove loose water and inspect for remaining debris.
A final light application of suitable installation solution prepares the surface for the film.
Step 10: Remove the Protective Film Liner
After shaping and trimming, prepare the tint for installation.
The protective liner covers the adhesive side.
Work in a clean area to prevent dust and hair from contacting the adhesive.
A practical technique is to:
- Place the prepared film on a clean, suitable handling surface.
- Identify the liner edge.
- Begin separating the liner carefully.
- Spray the exposed adhesive with installation solution.
- Continue peeling while keeping the adhesive wet.
- Avoid touching the adhesive with dry fingers.
Do not allow the adhesive surface to fold onto itself.
Large rear windshield films can be difficult to control alone.
Having a second person assist with handling may reduce the chance of contamination or creasing.
Step 11: Apply the Tint to the Inside Rear Window
Carefully carry the prepared film into the vehicle.
For a sedan, access may be easiest through a rear door.
For an SUV or hatchback, the open rear hatch may provide better access.
Position the wet adhesive side against the cleaned interior glass.
Keep the film supported so it doesn’t touch the upholstery, headliner, or other contaminated surfaces.
Begin aligning the film with the upper and lower borders.
The installation solution should allow limited repositioning before the adhesive begins bonding.
Check that the film isn’t blocking the center brake light or interfering with required equipment.
Avoid excessive stretching or pulling.
The film should already have the required curved shape from the heat-shrinking stage.
Step 12: Squeegee Out Water and Air
Once the film is correctly positioned, begin removing the installation solution trapped between the film and glass.
Use a clean, film-safe squeegee.
A typical process involves:
- Lightly securing the film near the center.
- Working outward with controlled, overlapping strokes.
- Moving trapped water toward the edges.
- Using smaller tools for tight areas.
- Rechecking the film position as the solution is removed.
- Carefully drying accessible edges.
Keep the exposed film surface appropriately lubricated while squeegeeing to reduce scratching.
Use gentle, controlled pressure around defroster lines.
Avoid dragging a sharp tool across the grid.
The objective is to remove installation fluid without damaging the film or underlying electrical components.
Step 13: Inspect the Edges and Defroster Area
After the main application, inspect the rear window from several angles.
Look for:
- Trapped debris
- Large water pockets
- Air bubbles
- Wrinkles
- Lifted edges
- Incomplete adhesion around defroster lines
- Excessive film overlap
- Obstruction of the center brake light
Minor moisture haze may disappear during curing.
However, hard creases, trapped dust, and improperly shaped film generally won’t correct themselves.
If the film has shifted or developed major wrinkles, assess whether it can be repositioned while still wet.
Don’t keep applying heat or pressure until the film becomes damaged.
Step 14: Allow the Rear Window Tint to Cure
Window film needs time for the remaining installation moisture to evaporate and the adhesive to develop its final bond.
The required period depends on the film, temperature, humidity, and installation conditions.
Follow the film manufacturer’s instructions.
Some products reach initial adhesion within a few days, while complete drying may take several weeks.
During the initial curing period:
- Avoid cleaning the film.
- Don’t scrape or rub its edges.
- Don’t attach suction cups or accessories.
- Avoid disturbing the installation.
- Follow the manufacturer’s directions for rear defroster use.
Don’t assume the film is completely cured simply because its surface feels dry.
Key Takeaway: The cleanest DIY rear window tint installations depend on careful glass preparation, correct heat shrinking, precise positioning, and protecting the defroster grid throughout the process.
Why Is Tinting the Rear Window Harder Than Tinting Side Windows?
Rear windshields often have more curvature and additional built-in components.
These features make installation more difficult than applying film to a relatively flat side window.
Compound Curvature
Many rear windows bend in more than one direction.
A flat film sheet naturally forms excess material when placed over those curves.
Heat shrinking allows suitable film to conform to the glass.
Without proper shrinking, the installation may develop long fingers, wrinkles, or lifted edges.
Defroster Lines
Rear defroster lines are conductive elements attached to or embedded in the glass.
They help remove condensation and frost by warming the window.
Tint film can normally be installed over compatible defroster grids, but the lines must remain undamaged.
Cutting or scraping them may cause sections of the defroster to stop working.
Limited Interior Access
Rear windshield installation may require working around:
- Rear seats
- Headrests
- Rear parcel shelves
- Interior trim
- Speakers
- Center brake light housings
- Hatch supports
Restricted access makes it harder to position the film and remove water from the edges.
Large curved windows may be especially difficult for one person to handle.
Black Dot-Matrix Borders
Many rear windows have a raised black-dot pattern around the perimeter.
Film adhesive may not make full contact between the raised dots.
This can create a silvery-looking border.
A small amount of dot-matrix silvering is different from an ordinary trapped water bubble.
Not every film or vehicle design produces a perfectly uniform appearance over this textured area.
How to Tint Rear Window Without Damaging Defroster Lines
Protecting the defroster grid should be a priority throughout the job.
Damage often occurs during cleaning or old-tint removal rather than during the basic application itself.
Never Scrape Across the Defroster Grid
Avoid metal blades, hard scrapers, and abrasive pads directly over the grid.
The conductive material can be delicate.
Scratching one line may interrupt its function.
Use cleaning methods approved for the vehicle’s glass and defroster components.
Shape Film on the Outside
Heat-shrink the film against the outer glass before installation.
This allows shaping without directing unnecessary heat or sharp tools toward the defroster grid.
The film is then transferred to the inside surface.
Avoid attempting major heat shrinking after the film has been attached over defroster lines.
Use Appropriate Squeegee Pressure
Apply enough pressure to remove trapped solution, but don’t scrape or catch the raised defroster lines with hard tool edges.
A properly prepared film should settle over the grid without requiring aggressive force.
Check the Defroster After Installation
Before tinting, verify that the rear defroster works.
After the film has cured and the manufacturer permits normal operation, check it again.
If one or more horizontal sections fail to clear condensation, an electrical line may be damaged.
Don’t attempt to repair a defroster grid by cutting or peeling the new tint without understanding the repair procedure.
Can You Tint Over Existing Rear Window Tint?
Applying new tint over old rear window film is generally not recommended.
The new film’s appearance and adhesion depend on the condition of the underlying material.
Old tint may contain scratches, fading, adhesive damage, or trapped contamination.
Adding another layer doesn’t correct those problems.
Why Double Tinting Can Cause Problems
Installing film over existing tint may create:
- Excessive darkness
- Additional haze
- Poor adhesion
- Visible defects
- Increased difficulty during future removal
- A finished VLT below the legal limit
A new layer may also affect optical clarity.
For most replacement jobs, removing the old film first is preferable.
How to Remove Old Rear Window Tint Safely
Rear tint removal needs special care because of the defroster grid.
Some professional methods use controlled steam or film-compatible adhesive-removal techniques.
However, the safest method depends on the original film, adhesive condition, and vehicle glass.
Do not pull stubborn tint away forcefully.
Avoid using razor blades across the inner glass.
If the existing film is badly deteriorated or tightly bonded to the defroster grid, professional removal may be safer than a DIY attempt.
Do You Need to Heat-Shrink Rear Window Tint?
Not every rear window requires extensive heat shrinking.
The amount depends on the curvature of the glass and the film’s construction.
Flat Rear Windows
Some pickup trucks and older vehicles have relatively flat rear glass.
These windows may require little or no heat shrinking.
A properly sized film can sometimes be applied using standard wet-installation techniques.
However, sliding rear windows and narrow glass sections introduce their own fitting challenges.
Curved Rear Windshields
Many modern sedan and SUV rear windows require heat shrinking for a clean, single-piece installation.
Trying to force flat film over compound curves can produce permanent wrinkles.
Correctly shaped film should conform to the glass before its adhesive liner is removed.
Can You Install Rear Tint Without a Heat Gun?
Sometimes.
A nearly flat rear window may not require substantial shrinking.
Certain DIY kits also use multiple strips rather than one continuous piece.
However, seams may be visible, and poor overlapping can affect appearance.
For strongly curved rear glass, a professional heat gun and suitable shrinking technique are generally necessary for a clean single-piece result.
A household hair dryer may not provide enough controlled heat for all automotive film types.
What Is the Best Window Tint Film for a Rear Windshield?
The best film depends on heat rejection, budget, visibility, and the vehicle’s intended use.
Rear windows are available in several film technologies.
| Film Type | Main Advantage | Main Limitation |
| Dyed tint | Lower cost and privacy | Generally lower heat rejection |
| Carbon tint | Color stability and moderate heat control | Performance varies |
| Ceramic tint | Strong solar heat rejection | Higher cost |
| Metalized tint | Solar control and durability | Can affect certain electronic signals |
| Premium multilayer film | Advanced solar-control performance | Often more expensive |
Dyed Window Tint
Dyed film is commonly selected for appearance and privacy.
It is usually less expensive than premium ceramic film.
However, basic dyed film may reject less infrared energy.
Lower-quality products can also fade or change color over time.
Carbon Window Tint
Carbon tint offers another option for drivers who want better color stability and solar performance than basic dyed film.
Individual products vary, so compare their published specifications.
Ceramic Window Tint
Ceramic film is popular for reducing solar heat entering through treated glass.
It can provide strong infrared rejection without requiring an extremely dark shade.
This may be particularly useful for vehicles with large rear windshields.
However, ceramic tint doesn’t automatically make a dark VLT legal or safe for nighttime visibility.
Choosing the Right VLT
Consider how often you drive at night and how much rearward visibility is required.
A very dark rear tint can make reversing and checking traffic more difficult, especially when the backup camera is dirty, blocked, or unavailable.
Choose a film that meets applicable state requirements and provides adequate visibility for your driving conditions.
How to Prevent Bubbles When Tinting a Rear Window
Bubbles are among the most common DIY tint installation problems.
However, not every bubble has the same cause.
Water Bubbles
Small moisture pockets can remain temporarily after wet installation.
Some may disappear as the film cures.
Don’t immediately puncture every small bubble.
Follow the product manufacturer’s curing guidance and monitor whether the pockets gradually shrink.
Air Bubbles
Air trapped during application can form larger, more defined bubbles.
These may result from incomplete squeegeeing or film that wasn’t properly shaped.
While the adhesive is still wet, some bubbles can be worked toward the nearest edge.
Once the adhesive has bonded, permanent air pockets may require replacement.
Dust Bubbles
A speck of dust or fiber trapped beneath the film creates a raised point.
These defects usually don’t disappear during curing.
The best prevention is thoroughly cleaning the glass and keeping the exposed adhesive away from dust.
Wrinkles and Fingers
Long, raised channels often indicate that the film wasn’t fully shaped to the glass.
These are especially common on curved rear windows.
Proper heat shrinking before installation is the most effective prevention.
A severe crease can’t usually be repaired without replacing the film.
Dot-Matrix Silvering
Silvering appears as a lighter or silvery area near the black ceramic dot pattern.
Because the dots create an uneven surface, the film may not contact every point uniformly.
The appearance can be difficult to eliminate completely.
Don’t apply excessive heat or force in an attempt to flatten the film over every raised dot.
How Long Does Rear Window Tint Take to Dry?
Rear window tint may become reasonably stable within several days, but complete curing can take considerably longer.
The exact time depends on the adhesive system, remaining installation moisture, and environmental conditions.
Warm Weather
Moderately warm conditions can support moisture evaporation.
However, excessive heat isn’t a substitute for proper curing.
Do not leave the rear defroster on continuously to accelerate drying.
Follow the film manufacturer’s instructions.
Cold or Humid Weather
Cold temperatures and high humidity can slow evaporation.
A rear windshield may retain temporary haze for longer than expected.
This doesn’t necessarily mean the installation has failed.
When Should You Be Concerned?
Contact the installer or assess the installation if you notice:
- Persistent large bubbles
- Visible trapped debris
- Peeling edges
- Deep wrinkles
- A growing area of delamination
- Distorted visibility
- Defroster malfunction
Small moisture spots that gradually decrease are different from permanent defects.
If the film’s appearance isn’t improving within the manufacturer’s expected curing period, seek an inspection.
Can You Use the Rear Defroster After Tinting?
Yes, compatible automotive window film is generally designed to work with a functioning rear defroster.
However, newly installed film requires time to bond.
Some installers recommend temporarily avoiding rear defroster use while the adhesive cures.
The appropriate waiting period varies by product and installation method.
Follow the film manufacturer’s specific aftercare instructions rather than assuming one waiting period applies to every product.
After curing, the defroster should normally function without needing to remove or modify the tint.
If a defroster section no longer works, the problem may involve damaged grid lines or electrical components.
Don’t scrape or peel the film in an attempt to restore operation.
How to Clean a Tinted Rear Window
Once the film has cured, use gentle cleaning methods.
The film is installed on the interior surface, so harsh contact can damage its protective coating.
Use a Soft Microfiber Cloth
Choose a clean, lint-free cloth.
Avoid dirty cloths that may contain abrasive particles.
Wipe gently, especially around the defroster grid.
Choose a Film-Compatible Cleaner
Use a product approved by the film manufacturer.
Many automotive films can be cleaned with mild, nonabrasive solutions.
Avoid harsh chemicals and abrasive cleaning tools.
Different film manufacturers have different recommendations concerning ammonia-containing products, so follow the instructions for the installed film.
Avoid Scrapers and Sharp Objects
Never use a razor blade or hard scraper against the tinted rear window.
These tools can scratch the film and damage the defroster grid.
If adhesive residue or another stubborn material appears, use a cleaning method approved for both the film and the vehicle’s rear glass.
Common DIY Rear Window Tinting Mistakes to Avoid
Several mistakes can turn an inexpensive DIY job into a costly replacement.
Cutting Film on the Inside Glass
Cutting directly against the rear defroster grid is risky.
Use pre-cut film, a template, or an appropriate cutting surface whenever possible.
Overheating the Film
Concentrated heat can create permanent wrinkles, burns, and distorted areas.
Keep the heat gun moving and follow the film manufacturer’s shrinking method.
Installing Film in a Dusty Area
Even small dust particles can become visible once trapped beneath tint.
Choose a clean installation area and protect the adhesive throughout handling.
Removing the Liner Before Shaping
For common rear windshield heat-shrinking methods, the liner remains attached while the film is shaped on the exterior.
Removing it too early exposes the adhesive to contamination and makes handling difficult.
Using Too Much Installation Soap
Excessive soap can interfere with film adhesion.
Use a compatible solution at the recommended concentration.
Blocking the Third Brake Light
The center high-mounted stop lamp is a safety component.
Don’t cover or obstruct it with tint in a way that reduces its required performance.
Use an appropriate cutout or manufacturer-approved installation arrangement where necessary.
Ignoring Existing Factory Tint
Factory privacy glass can reduce the final VLT after aftermarket film is applied.
Measure the existing window and select a legal finished shade.
Cleaning the Tint Too Soon
Premature cleaning can disturb film that hasn’t finished curing.
Follow the manufacturer’s aftercare instructions before wiping or attaching accessories.
DIY Rear Window Tint vs. Professional Installation
DIY installation can reduce labor costs, but the rear windshield is one of the most difficult windows to tint.
| Factor | DIY Rear Tint | Professional Rear Tint |
| Labor cost | No paid installation labor | Professional labor included |
| Equipment | Must supply necessary tools | Specialized tools available |
| Heat shrinking | Requires practice | Experienced shaping |
| Defroster risk | Higher if handled incorrectly | Generally lower with a qualified installer |
| Dust control | Depends on work area | Usually more controlled |
| Finish quality | Depends on skill | More consistent |
| Warranty | Primarily product-dependent | May include installation workmanship |
When DIY Installation Makes Sense
DIY rear window tinting may be reasonable when:
- The rear window is relatively flat.
- You have appropriate film-installation tools.
- You can work in a clean environment.
- You understand the shrinking process.
- You have time to practice.
- The vehicle doesn’t have complicated or damaged defroster components.
A pre-cut kit may reduce some trimming work.
However, even a pre-cut film may need heat shrinking.
When Professional Installation Is Better
Professional installation is preferable when:
- The rear windshield has a deep compound curve.
- Existing tint must be removed from a delicate defroster grid.
- The vehicle has integrated rear-glass antennas or complex trim.
- You want a seamless single-piece finish.
- You are installing expensive premium ceramic film.
- You don’t have experience using a heat gun around automotive glass.
A qualified installer may complete the job with less material waste and a lower chance of damaging vehicle components.
Final Checklist Before and After Tinting the Rear Window
Before installation, verify that you have the correct film, tools, and workspace.
- Confirm the legal rear window tint percentage.
- Check the factory glass VLT.
- Verify that the defroster works.
- Inspect the glass for damage.
- Protect the vehicle interior from moisture.
- Clean both sides of the glass.
- Shape the film correctly before removing its liner.
- Use the appropriate heat-shrinking method.
- Avoid sharp tools on the defroster grid.
- Keep the center brake light unobstructed.
- Remove trapped water carefully.
- Inspect the edges and film alignment.
- Follow the manufacturer’s curing instructions.
- Test the defroster after the approved waiting period.
Completing these checks helps reduce installation defects and protects the rear windshield’s electrical components.
Conclusion
Learning how to tint rear window glass requires more preparation than tinting a typical side window.
The most important steps are thoroughly cleaning the glass, cutting the film correctly, heat-shrinking it to match the rear windshield’s curvature, and applying it to the interior surface without damaging the defroster lines.
For a clean installation, keep dust away from the adhesive, use controlled heat, and remove the installation solution with suitable film-safe tools.
Rear window tint should also comply with the applicable state law, preserve the center brake light’s function, and maintain reasonable rearward visibility.
If the glass has complex curvature, old adhesive, or delicate electrical components, professional installation may be the safer choice.
A properly installed film can improve privacy, reduce glare, and provide solar heat protection while preserving the rear window’s normal functions.
FAQs About How to Tint Rear Window
Can You Tint a Rear Window Yourself?
Yes. DIY rear window tinting is possible with the correct film, tools, and installation technique.
However, curved rear glass usually requires heat shrinking, which takes practice. Protecting the defroster lines is also essential.
Do You Put Window Tint on the Inside or Outside of the Rear Window?
Automotive rear window tint is normally installed on the inside of the glass.
The film may be measured and heat-shrunk against the outside first, but the adhesive side is ultimately applied to the interior surface.
Can You Tint Over Rear Defroster Lines?
Yes. Suitable automotive window film can generally be installed over rear defroster lines.
However, the lines must not be scratched, scraped, or cut during cleaning and installation.
Can You Tint a Rear Window Without Removing It?
Yes. Most rear windshield tint installations are completed with the glass still installed in the vehicle.
Some interior trim components may need temporary removal for access, but removing the entire rear window is not usually necessary.
Can You Tint a Rear Window Without a Heat Gun?
Sometimes. Flat rear windows may not need extensive heat shrinking.
However, many curved sedan and SUV rear windshields require controlled heat shrinking to achieve a smooth, single-piece installation.
How Do You Remove Bubbles From Rear Window Tint?
Small moisture pockets may disappear naturally during curing.
While the film is still wet, certain air or water bubbles can be worked toward the edges with a suitable squeegee.
Bubbles caused by trapped dust, hard creases, or incorrect film shaping generally require more extensive correction or replacement.
How Long Should You Wait Before Using the Rear Defroster?
Follow the installed film manufacturer’s instructions.
Some products require a waiting period before using the defroster, while others have different curing recommendations.
Don’t assume every film has the same waiting period.
Is 20% Rear Window Tint Legal?
It depends on the state and vehicle.
Some jurisdictions permit 20% or darker tint on rear windshields, subject to conditions such as appropriate mirrors. Others require greater visible light transmission.
Verify local law and the finished glass-and-film VLT before installation.