To mount a trailer tongue box, position the toolbox on the trailer’s A-frame, verify clearance around the hitch and jack, and secure it using manufacturer-approved mounting brackets, U-bolts, or mechanical fasteners. The mounting system must support the loaded toolbox without damaging the trailer frame or interfering with towing equipment.
Trailer tongue boxes provide convenient storage for tie-down straps, tools, wheel chocks, and other towing accessories. However, an improperly mounted box can loosen during travel, damage trailer wiring, interfere with turning clearance, or add excessive weight to the hitch.
Not every trailer tongue box uses the same installation method. Some products include mounting hardware, while others require separately purchased brackets or fasteners. Trailer frame construction also determines whether drilling or clamp-on mounting is appropriate.
Choosing the correct mounting position is especially important because the trailer tongue contains several safety-related components, including the coupler, jack, safety chains, and electrical connections.
In this article, I explain how to measure and position a trailer tongue box, compare mounting methods, install appropriate hardware, avoid common clearance problems, and check tongue weight and mounting security before towing.
How to Mount a Trailer Tongue Box Step by Step
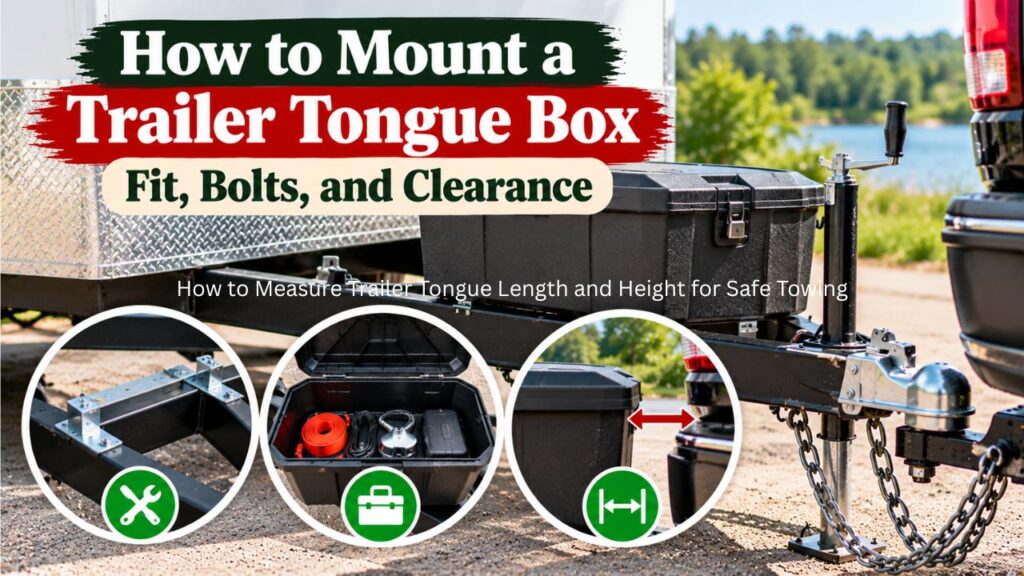
Most A-frame trailer tongue boxes are designed to sit across the two frame rails behind the coupler.
The exact installation depends on the toolbox dimensions, frame construction, and approved mounting hardware.
The following procedure covers the general process for mounting a conventional trailer tongue storage box.
Step 1: Park and Secure the Trailer
Start by parking the trailer on a firm, level surface.
Apply the towing vehicle’s parking brake if the trailer remains connected.
If the trailer is disconnected, support the tongue with its properly rated jack and chock the trailer wheels to prevent movement.
Before starting work:
- Remove loose items from the trailer tongue.
- Confirm the trailer is stable.
- Clean dirt and debris from the mounting area.
- Inspect the frame for corrosion or structural damage.
- Identify electrical wiring and other nearby components.
Do not work beneath an unsupported trailer tongue.
If the trailer frame has cracks, damaged welds, or substantial corrosion, have the structure inspected before installing additional equipment.
Step 2: Measure the Trailer Tongue
Measure the available space between the trailer coupler and the front of the trailer body.
For an A-frame trailer, check the distance between the frame rails at the proposed mounting location.
You should measure:
- Available width across the A-frame rails.
- Distance from the coupler to the trailer body.
- Height and width of each frame rail.
- Available space around the tongue jack.
- Clearance for safety chains and electrical connections.
- Available room for opening the toolbox lid.
Compare these measurements with the toolbox’s exterior dimensions.
Also check the bottom of the toolbox. Its mounting surface must be compatible with the rails or approved supporting brackets.
Important: Do not assume that a toolbox advertised as an A-frame model will fit every A-frame trailer.
Frame angles, coupler positions, crossmembers, and jack locations vary.
Step 3: Position the Toolbox on the A-Frame
Place the empty toolbox on the proposed mounting area without securing it.
Center it from side to side unless the manufacturer specifies another position.
The box should rest on suitable supporting surfaces rather than hanging unsupported from a thin section of its bottom panel.
Check whether the front of the box interferes with the tongue jack or coupler.
Also verify that the rear of the box provides enough room for its hinges and lid.
Some lids swing backward as they open, requiring clearance from the trailer’s front wall.
Move the box until you find a position that provides proper support and access.
Step 4: Check Hitch, Jack, and Turning Clearance
Before marking mounting holes, inspect all equipment surrounding the toolbox.
Make sure the installation will not obstruct:
- The trailer coupler latch.
- The tongue jack handle or crank.
- A swivel jack’s movement.
- Safety chain attachments.
- The electrical connector.
- The emergency breakaway cable.
- Weight-distribution hitch brackets, when installed.
- Propane equipment or other tongue-mounted accessories.
Check clearance between the toolbox and the rear of the tow vehicle.
The vehicle and trailer change their relative angle during sharp turns and when traveling over uneven ground.
A toolbox that clears the vehicle while driving straight may still contact the bumper, tailgate, or other components during a tight turn.
Safety Note: Verify clearance throughout the expected turning and articulation range. Do not rely only on measurements taken with the trailer aligned straight behind the tow vehicle.
Step 5: Choose an Approved Mounting Method
Trailer tongue boxes can be attached using different hardware systems.
Common options include:
- Manufacturer-supplied mounting brackets.
- Properly sized U-bolts.
- Through-bolts and reinforcing hardware.
- Manufacturer-approved self-tapping or thread-cutting fasteners.
- Specially designed mounting plates or crossmembers.
The correct method depends on the trailer and toolbox construction.
If the trailer manufacturer prohibits drilling into the tongue or frame rails, use an approved non-drilling system or consult a qualified trailer technician.
Do not drill structural frame members merely because a toolbox has mounting holes.
Step 6: Mark the Mounting Points
Once the toolbox is correctly positioned, identify the mounting points specified by the installation instructions.
Many A-frame toolboxes use multiple attachment points distributed around the base.
The etrailer aluminum trailer tongue toolbox installation manual describes a four-point mounting arrangement for its specified models, with attachment points near the corners of the toolbox bottom.
That manual also emphasizes checking for hidden wiring before drilling.
The four-point arrangement is specific to that installation design and should not be treated as a universal requirement.
Use a marker or center punch to identify the correct hole positions.
Remove the box before drilling whenever the procedure requires it.
Step 7: Drill the Toolbox Mounting Holes if Required
If the selected hardware requires holes through the toolbox bottom, measure and drill according to its instructions.
For a typical installation:
- Confirm the hole locations against the actual mounting hardware.
- Remove the toolbox from the trailer.
- Support the toolbox on a stable working surface.
- Mark the hole centers.
- Drill pilot holes where appropriate.
- Enlarge the holes to the required fastener size.
- Remove sharp burrs and metal shavings.
- Protect exposed metal edges as appropriate.
Wear safety glasses and use suitable drilling tools.
Do not use an arbitrary drill size. The required hole diameter depends on the mounting hardware and the toolbox manufacturer’s instructions.
If drilling the trailer frame is required, obtain confirmation that the proposed hole locations and method are permitted by the trailer manufacturer before proceeding.
Step 8: Secure the Toolbox to the Trailer
Reposition the toolbox on the A-frame.
Align the prepared mounting holes with the approved brackets or fastener locations.
Install the mounting hardware according to its instructions.
Depending on the installation, this may involve bolts, nuts, washers, backing plates, U-bolts, or other components.
Tighten the hardware evenly so the box remains properly supported.
Do not overtighten fasteners against thin aluminum or plastic toolbox panels.
Use reinforcement plates or washers when required to distribute the clamping force.
If the manufacturer provides torque specifications, follow them. Otherwise, obtain the correct specification for the selected hardware and installation rather than guessing.
Step 9: Inspect the Finished Installation
After mounting, check the toolbox from several directions.
Verify that:
- The box sits firmly on its supports.
- All mounting hardware is secured.
- The lid opens and closes normally.
- The toolbox does not move independently of the trailer frame.
- The lock and latch function properly.
- Electrical wires are not pinched.
- The jack and coupler remain accessible.
- Safety equipment operates without interference.
Look underneath the mounting area for fastener ends that could contact wiring or other components.
Correct any interference before loading the toolbox.
Step 10: Load the Box and Recheck Tongue Weight
Place the intended tools and accessories inside the toolbox.
Distribute the contents so they cannot shift excessively during transportation.
Close and secure the lid.
Measure the trailer’s tongue weight with the toolbox loaded in its normal travel condition.
If the added weight pushes the trailer or tow vehicle beyond its limits, remove or relocate cargo.
After a short initial trip, inspect the mounting hardware again for loosening, movement, or damage.
Best Ways to Mount a Trailer Tongue Box
There is no single mounting method suitable for every trailer.
An A-frame utility trailer may accept a clamp-on system, while another design may require approved brackets or a dedicated mounting platform.
Mounting a Trailer Tongue Box With U-Bolts
U-bolts are commonly considered when the trailer frame should not be drilled.
A U-bolt wraps around a suitable frame member and passes through compatible mounting holes or brackets.
A correctly designed system clamps the toolbox or its mounting brackets to the trailer tongue.
General installation involves:
- Measure the frame rail’s width, depth, and shape.
- Select U-bolts compatible with the rail dimensions and the approved mounting design.
- Confirm that the U-bolts will not pinch wiring, tubing, or other components.
- Position the toolbox and mark the required holes.
- Drill the toolbox or mounting brackets as specified.
- Install approved backing plates or reinforcement hardware.
- Position the U-bolts around the permitted frame locations.
- Secure the nuts and tighten them to the specified torque.
- Inspect the installation for movement and interference.
For a typical A-frame tongue, the U-bolts must fit the angled rails without slipping or applying damaging pressure.
Do not clamp U-bolts around a frame member if doing so would crush thin tubing, deform an aluminum rail, or interfere with structural components.
A purpose-built mounting kit is preferable to improvising a fastening arrangement.
Advantages of U-Bolt Mounting
A properly designed U-bolt system can provide several advantages:
- May avoid drilling structural frame members.
- Can allow toolbox removal.
- Works with certain A-frame arrangements.
- Can accommodate different mounting bracket designs.
However, suitability depends on the actual frame and the clamp design.
Mounting With Bolts and Nuts
Some trailer tongue boxes are designed to be installed using bolts through approved attachment points.
This can create a strong mechanical connection when the frame and mounting surfaces are suitable.
A typical bolt-through installation uses:
- Correctly sized bolts.
- Compatible nuts.
- Appropriate washers.
- Reinforcement plates where specified.
- Approved frame mounting points.
Bolts should be selected according to the installation requirements, not simply because they fit through the holes.
Where holes in structural trailer members are necessary, follow the trailer manufacturer’s drilling restrictions.
Drilling near critical welds, coupler attachments, or highly stressed frame areas without approval can weaken the structure.
Mounting With Self-Tapping Screws
Certain toolbox manufacturers specify self-tapping or thread-cutting screws for particular trailer applications.
These fasteners can simplify installation because they may not require access beneath the frame for nuts.
However, they are not appropriate for every trailer material or wall thickness.
A screw suitable for one steel trailer may not provide the required holding strength in another frame.
Follow the toolbox and trailer manufacturers’ instructions for fastener type, diameter, installation depth, and placement.
Avoid substituting ordinary household screws for specified mounting hardware.
Mounting With Crossmembers or Brackets
Some trailers do not have a suitable flat mounting surface for a tongue box.
In these cases, an approved crossmember or mounting platform may be necessary.
A crossmember can provide support beneath the toolbox and distribute its load across suitable frame attachment points.
The design should account for:
- Toolbox dimensions.
- Fully loaded toolbox weight.
- Dynamic loads during travel.
- Trailer frame construction.
- Corrosion protection.
- Clearance around towing equipment.
Do not weld additional supports to the trailer frame without manufacturer approval or qualified engineering assessment.
Improper welding can alter structural properties or damage important frame components.
Tools and Hardware Needed to Mount a Trailer Tongue Box
The required materials depend on the mounting system.
The following table covers common installation equipment.
| Tool or Material | Main Purpose |
| Tape measure | Checking tongue and toolbox dimensions |
| Marker or center punch | Marking mounting points |
| Drill and suitable bits | Preparing permitted mounting holes |
| Socket and wrench set | Installing mechanical fasteners |
| Torque wrench | Applying specified fastener torque |
| Mounting brackets or U-bolts | Securing the toolbox |
| Bolts, nuts, and washers | Creating mechanical connections |
| Backing or reinforcement plates | Distributing mounting pressure |
| Deburring tool or file | Removing sharp drilled edges |
| Suitable corrosion protection | Protecting exposed metal |
| Safety glasses and gloves | Reducing installation hazards |
Check whether the toolbox includes hardware before purchasing additional components.
Some products include mounting fasteners, while others require an application-specific kit.
What Size Bolts Should You Use?
The correct bolt size depends on the toolbox mounting holes, mounting system, material thickness, and expected loads.
There is no universal bolt diameter for every trailer tongue box.
Use the sizes and grades specified by the manufacturer.
If the toolbox doesn’t provide installation specifications, obtain a compatible mounting kit or consult a qualified installer.
Using a larger bolt does not automatically improve an installation if the mounting surface is too thin or the attachment locations are unsuitable.
Should You Use Stainless Steel or Galvanized Hardware?
Both may be suitable in certain installations, depending on strength and corrosion requirements.
However, corrosion resistance alone does not establish the fastener’s structural capacity.
Dissimilar metals, such as stainless steel fasteners and aluminum components, can experience galvanic corrosion in the presence of moisture and electrolytes.
Use suitable isolation materials or protective measures where specified.
For trailers regularly exposed to saltwater, such as boat trailers, corrosion resistance deserves additional attention.
Where Should a Trailer Tongue Box Be Positioned?
Most purpose-built tongue boxes are positioned on the A-frame between the trailer coupler and the front of the trailer body.
However, the available mounting space differs between trailer designs.
Positioning on an A-Frame Trailer
An A-frame tongue has two angled frame members that meet near the coupler.
A compatible wedge-shaped or trapezoidal toolbox can fit within or over this area.
Position the toolbox where its bottom is adequately supported and where the lid remains accessible.
Avoid shifting the box excessively toward one side unless the mounting design specifically allows it.
Check the front and rear clearances before attaching hardware.
Mounting on a Straight-Tongue Trailer
Straight-tongue trailers have a single central tongue member rather than two angled A-frame rails.
Many A-frame boxes are not designed to attach directly to this configuration.
A straight-tongue trailer may need a model-specific mounting platform or engineered bracket system.
The support must account for the box’s width, loaded weight, and road vibration.
Do not mount a large toolbox on a narrow tongue using improvised fasteners that leave the box unsupported.
How Far From the Coupler Should the Box Sit?
There is no universal required distance.
The correct position depends on the dimensions of the coupler, box, jack, tow vehicle, and other installed accessories.
The box must allow:
- Full coupler operation.
- Safe attachment and removal of safety chains.
- Electrical connector access.
- Jack operation.
- Vehicle-to-trailer articulation.
- Required maintenance access.
Also account for the coupler’s movement relative to the vehicle during sharp turns and changes in road elevation.
Test the actual combination rather than relying on a fixed clearance number.
How Much Space Is Needed Behind the Toolbox?
The required rear clearance depends on the lid and hinge design.
Some boxes have lids that lift nearly vertically, while others swing backward.
Test the lid with the box sitting in the proposed position.
Confirm that it can open sufficiently without hitting the trailer body or nearby equipment.
If the box will store large tools, make sure there is also enough room to remove them comfortably.
Can You Mount a Trailer Tongue Box Without Drilling?
Yes, some trailer tongue boxes can be mounted without drilling the trailer frame.
Approved U-bolt systems and clamp-on mounting brackets are possible alternatives.
However, a no-drill installation still needs adequate structural support and suitable fasteners.
When No-Drill Mounting Makes Sense
A no-drill approach may be preferable when:
- The trailer manufacturer prohibits frame drilling.
- The tongue uses a material or design that requires special drilling approval.
- A compatible clamp-on kit is available.
- The toolbox may need to be removed later.
- The frame has suitable clamping surfaces.
A no-drill installation does not necessarily mean the toolbox itself requires no holes.
Some systems require drilling only through the toolbox bottom or separate mounting plates.
When a Mounting Kit Is Necessary
A mounting kit may be necessary when the frame rails have unusual dimensions or when the box does not have adequate built-in attachment points.
Use a kit designed for the frame material and toolbox application.
Do not assume that any generic U-bolt will be suitable.
If the installation requires custom structural supports, consult a qualified trailer fabrication professional.
Will a Trailer Tongue Box Increase Tongue Weight?
Yes, installing a toolbox on the trailer tongue generally increases tongue weight, particularly when the box is loaded with tools or equipment.
However, the exact increase depends on the box’s weight and its location relative to the axle and coupler.
How Tongue Box Weight Affects the Hitch
Consider a toolbox weighing 25 pounds.
If you place 35 pounds of equipment inside, the combined added weight is:
25 + 35 = 60 pounds
Because the box is mounted ahead of the trailer axle, it will generally increase the load at the coupler.
However, the increase in measured tongue weight is not necessarily exactly 60 pounds.
The actual load change depends on the trailer’s geometry and weight distribution.
The correct approach is to measure tongue weight after installing and loading the box.
Recommended Tongue Weight Range
For most conventional ball-hitch trailers, a common tongue weight target is approximately 10–15% of the loaded trailer weight.
The CURT guide to measuring trailer tongue weight explains this range and describes methods for measuring the downward force applied at the coupling point.
For example:
| Loaded Trailer Weight | 10% Tongue Weight | 15% Tongue Weight |
| 1,500 lbs | 150 lbs | 225 lbs |
| 2,000 lbs | 200 lbs | 300 lbs |
| 3,000 lbs | 300 lbs | 450 lbs |
| 4,000 lbs | 400 lbs | 600 lbs |
| 5,000 lbs | 500 lbs | 750 lbs |
These figures are general guidelines for conventional trailers. Follow the actual trailer and tow vehicle manufacturers’ requirements.
Check the Tow Vehicle and Trailer Weight Limits
Before loading the box, confirm the applicable limits for:
- Trailer gross vehicle weight rating (GVWR).
- Trailer axle ratings.
- Tow vehicle payload capacity.
- Tow vehicle rear axle rating.
- Hitch receiver tongue weight rating.
- Ball mount and hitch ball ratings.
- Toolbox and mounting system capacity.
Extra weight placed near the front of the trailer can add load to the tow vehicle’s rear axle.
Even if the trailer remains within its GVWR, the added tongue weight can exceed another component’s rating.
Do not use the toolbox to add unnecessary ballast when the towing combination is already near its limits.
How to Prevent Water and Rust Around a Mounted Tongue Box
Trailer tongue boxes are exposed to rainfall, road spray, dust, and vibration.
Proper installation and periodic maintenance help reduce water entry and corrosion.
Protect Drilled Mounting Holes
Drilling removes protective coatings from some metal components.
After drilling permitted holes, remove metal shavings and sharp burrs.
Use corrosion protection compatible with the toolbox material and fasteners.
If the installation instructions specify sealing washers or sealant, apply them as directed.
Avoid sealing drainage openings that the toolbox requires.
Avoid Trapping Water Beneath the Box
Water can collect between the toolbox bottom and the trailer frame if the supporting surfaces are poorly arranged.
Use manufacturer-approved supports or isolation materials where necessary.
Do not introduce thick, soft spacers that allow the toolbox to move or cause mounting hardware to loosen.
Check for standing water and corrosion during routine inspections.
Inspect the Lid Seal and Lock
A secure mounting system cannot prevent water entry if the lid gasket is damaged.
Check the lid seal for cracks, wear, or poor contact.
Keep the latch clean and confirm that it closes completely.
Use appropriate lock maintenance products according to the manufacturer’s instructions.
Do not assume a weather-resistant toolbox is completely waterproof under every driving condition.
Common Trailer Tongue Box Mounting Mistakes
Several installation errors can create problems even when the toolbox appears securely attached.
Drilling the Trailer Frame Without Approval
The trailer tongue is a structural component.
Unauthorized holes may weaken certain frame designs or interfere with hidden systems.
Check manufacturer instructions before drilling any structural member.
If approval is unavailable, use a verified alternative mounting system or professional assistance.
Mounting the Box Too Close to the Hitch
A toolbox positioned too close to the coupler may interfere with the tow vehicle during sharp turns.
This can damage the toolbox, bumper, tailgate, or other equipment.
Test the required turning clearance before finalizing the mounting position.
Blocking Trailer Jack Operation
Some tongue jacks have handles that rotate through a wide arc.
Others swing sideways for travel.
The toolbox must not obstruct normal jack operation or storage.
Check both operating and travel positions.
Ignoring Trailer Wiring
Electrical wires may run inside or underneath trailer frame members.
Drilling or fastening without identifying these components can damage lighting circuits or electric brake wiring.
Locate the wiring before installing hardware.
Secure any affected wiring using an appropriate protected routing system.
Using Fasteners That Are Too Small
Undersized or unsuitable fasteners may loosen or fail under road vibration.
Use mounting hardware rated for the application.
Do not substitute ordinary hardware-store screws for the manufacturer’s specified fasteners without confirming their suitability.
Loading the Toolbox Beyond Its Capacity
Even a correctly mounted box has a load limit.
Excessive weight can damage the toolbox bottom, mounting hardware, or supporting frame.
Keep heavy items properly secured and avoid exceeding the box’s rated capacity.
Mounting the Box on Inadequate Supports
A toolbox should not be supported only by thin, flexible material unless the manufacturer has designed the product for that attachment method.
Unsupported overhang can allow the bottom panel to flex during towing.
Use approved rails, brackets, or crossmembers to distribute the load.
How to Check a Trailer Tongue Box After Installation
An installation is not complete until its function and security have been checked with the intended load.
Perform a Stationary Inspection
With the box loaded and the trailer stationary:
- Check every mounting fastener.
- Verify that the box does not shift relative to its supports.
- Open and close the lid.
- Confirm the latch engages securely.
- Inspect wiring and nearby accessories.
- Operate the tongue jack.
- Verify safety chain and breakaway cable clearance.
- Check the trailer’s measured tongue weight.
If any part moves, flexes excessively, or interferes with towing equipment, correct the problem before travel.
Recheck After the First Trip
Road vibration can reveal issues that were not obvious during installation.
After a short initial trip, inspect:
- Loose mounting nuts or screws.
- Movement around mounting holes.
- Cracked or bent brackets.
- Damage to the toolbox bottom.
- Corrosion or damaged protective coatings.
- Abraded wiring.
- Lid and latch security.
Recheck fastener torque according to the applicable manufacturer’s instructions.
Avoid driving with a toolbox that moves independently of its mounting structure.
Include the Box in Routine Trailer Maintenance
Inspect the toolbox whenever you perform regular trailer maintenance.
Look for developing cracks, loose hardware, damaged mounting surfaces, and signs of water intrusion.
Check the condition of the contents and remove unnecessary heavy items.
A properly maintained installation should remain secure without interfering with the trailer’s normal operation.
Conclusion
Understanding how to mount a trailer tongue box involves more than simply attaching a storage container to the front of a trailer.
The correct installation starts with measuring the available tongue space, checking hitch and jack clearance, and choosing mounting hardware approved for the specific trailer and toolbox.
U-bolts, brackets, and mechanical fasteners can all be suitable in the right application, but drilling structural frame members requires particular care and manufacturer approval.
After installation, load the box, measure tongue weight, and verify that the toolbox does not interfere with turning, wiring, or safety equipment.
For a standard A-frame utility trailer, a properly supported and securely fastened tongue box can provide convenient storage without compromising safe towing.
If the frame design or mounting requirements are uncertain, having a qualified trailer technician complete the installation is the safer choice.
FAQs About How to Mount a Trailer Tongue Box
Can You Mount a Trailer Tongue Box With U-Bolts?
Yes, a trailer tongue box can be mounted with U-bolts when the toolbox, trailer frame, and mounting system are compatible.
The U-bolts must fit the frame correctly and provide adequate holding strength without crushing or damaging the structural members.
Follow an approved mounting design rather than using improvised clamps.
Do You Have to Drill Into the Trailer Tongue to Mount a Toolbox?
No. Some installations use clamp-on brackets or U-bolts that do not require drilling into the trailer frame.
Other toolbox designs may specify mechanical fasteners installed through approved mounting locations.
Always check the trailer manufacturer’s requirements before drilling structural members.
Can You Mount a Trailer Tongue Box on a Single Straight Tongue?
Yes, but the toolbox may require a dedicated mounting platform or compatible bracket system.
Many A-frame toolboxes are not designed for direct installation on a single center tongue.
The mounting structure must support the loaded box without excessive overhang or frame damage.
How Much Weight Can a Trailer Tongue Box Hold?
The allowable weight depends on the toolbox model, its construction, mounting hardware, and the trailer’s available capacity.
There is no universal weight rating for all tongue boxes.
Follow the toolbox manufacturer’s load rating and verify that the combined trailer and tow vehicle remain within their applicable limits.
Can You Mount a Trailer Tongue Box Behind the Jack?
Yes, if the location provides adequate support and clearance.
Many A-frame toolboxes are positioned behind the tongue jack and ahead of the trailer body.
However, the toolbox must not obstruct the jack handle, coupler, wiring, breakaway cable, or vehicle turning clearance.
Does a Trailer Tongue Box Need Support Underneath?
The box needs adequate support according to its mounting design.
Some products are designed to rest directly on suitable trailer frame rails, while others require mounting brackets or crossmembers.
Do not assume that bolts through a thin toolbox bottom will safely support a heavily loaded box without appropriate reinforcement.
Can You Weld a Trailer Tongue Box to the Frame?
Welding may be possible for certain compatible metal structures, but it is not a universal mounting solution.
Welding can damage protective coatings, affect material properties, or weaken a trailer frame if performed incorrectly.
Use manufacturer-approved mounting methods, and consult a qualified trailer fabrication professional before considering any structural welding.