To build a trailer tongue, choose a suitable straight or A-frame design, measure the trailer frame, cut properly specified structural steel, securely attach the tongue to the chassis, and install a compatible coupler, jack, and safety chains. The finished assembly must support the intended trailer weight and withstand the forces created during towing, braking, and turning.
A trailer tongue is more than a steel bar extending from the front of the frame. It transfers pulling forces between the tow vehicle and trailer while supporting the downward load at the hitch. Poor material selection, weak connections, or incorrect alignment can create dangerous failures on the road.
The construction method depends on the trailer’s size, frame design, intended gross vehicle weight rating, and coupling arrangement. Building a light utility trailer tongue requires different structural considerations than modifying a heavy equipment trailer.
In this article, I cover trailer tongue designs, suitable steel materials, essential measurements, frame assembly, coupler installation, and safety equipment. I also explain how to avoid common construction problems and determine when professional design or welding is necessary.
What Is a Trailer Tongue and How Does It Work?
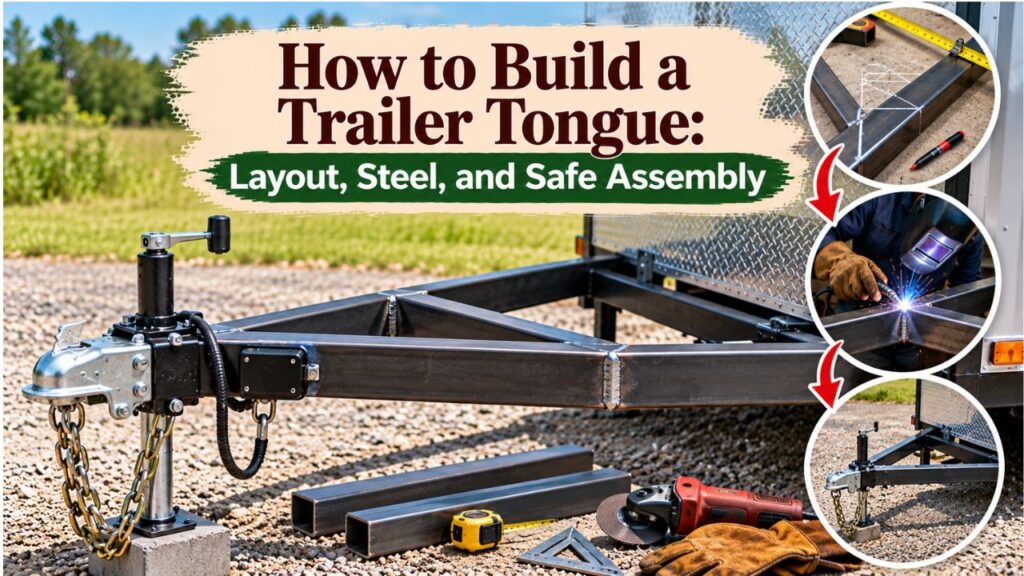
A trailer tongue is the structural assembly connecting the main trailer frame to the towing vehicle’s hitch.
On a conventional bumper-pull trailer, the tongue extends forward from the chassis and terminates at a coupler that locks onto the hitch ball.
Its primary functions include:
- Transferring pulling and braking forces between the tow vehicle and trailer
- Supporting the trailer’s vertical hitch load
- Maintaining the connection between the coupler and trailer frame
- Providing mounting locations for the trailer jack and safety chain attachments
- Maintaining sufficient clearance during turning and backing
The tongue experiences several types of loading during operation.
Vertical bending results from hitch weight and road movement. Longitudinal forces develop during acceleration and braking, while turning and uneven road surfaces introduce additional bending and twisting.
Because these forces act together, the tongue must be designed as part of the complete trailer structure.
Simply welding a piece of heavy steel to the front crossmember does not establish that the assembly is strong enough for road use.
Choose the Right Trailer Tongue Design Before Building
The two common configurations for conventional trailers are straight tongues and A-frame tongues.
Both can work well when properly designed for their intended loads.
Straight Trailer Tongue
A straight tongue uses a central structural member extending forward from the trailer chassis.
It is commonly found on some lightweight utility trailers, small equipment trailers, and boat trailers.
The main beam usually consists of rectangular or square structural steel tubing, although other engineered steel sections may be used.
Its design must provide an adequate load path into the trailer chassis.
Advantages include:
- A relatively straightforward layout
- Compatibility with certain channel-mounted couplers
- Convenient mounting positions for some swivel jacks
- A narrow front profile that may suit certain boat trailer designs
However, a straight tongue concentrates loads through its central structural member and the connections supporting it.
A long unsupported extension can experience considerable bending.
Depending on the intended trailer capacity, additional structural support may be necessary.
A-Frame Trailer Tongue
An A-frame tongue uses two structural members that extend diagonally forward from opposite sides of the trailer chassis.
The members converge near the coupler, forming a triangular front assembly.
This design is common on utility trailers, enclosed cargo trailers, and travel trailers.
An A-frame arrangement can distribute hitch forces into both sides of the main frame when its members and connections are properly engineered.
Advantages include:
- A broad connection to the trailer frame
- Space for a centrally mounted tongue jack
- Compatibility with purpose-built A-frame couplers
- Convenient mounting locations for selected accessories
- A structural layout commonly used on medium-duty trailers
However, the A-frame shape alone does not guarantee adequate capacity.
The steel sections, connection points, geometry, and weld quality must all be suitable for the trailer.
Straight Tongue vs. A-Frame Tongue
| Feature | Straight Tongue | A-Frame Tongue |
| Main structure | Central beam | Two angled members |
| Typical applications | Small utility and boat trailers | Utility, cargo, and travel trailers |
| Hitch connection | Straight-channel coupler | A-frame coupler |
| Main load path | Through the central beam and its supports | Through both angled members and their frame connections |
| Fabrication complexity | Often simpler geometry | More angled fitting and alignment |
| Jack placement | Often side-mounted | Often centrally mounted |
| Structural capacity | Depends on engineering | Depends on engineering |
For a new general-purpose utility trailer, an A-frame design may be a practical option when it is supported by a suitable construction plan.
A properly designed straight tongue can also be appropriate, particularly for trailers originally engineered with that configuration.
Key Takeaway: Choose the tongue configuration based on the trailer’s structural requirements rather than appearance or assumed strength.
What Materials and Tools Do You Need to Build a Trailer Tongue?
The materials depend on the trailer’s intended capacity, construction method, and selected tongue geometry.
Use structural materials with known specifications rather than unidentified scrap metal.
Structural Steel for the Tongue
Common steel options include:
- Rectangular steel tubing: Provides a closed section with useful bending and torsional properties.
- Square steel tubing: Frequently used for straight tongues and some structural supports.
- Structural C-channel: Used in certain trailer frame and tongue designs.
- Structural reinforcement plates: Used where the approved design requires additional joint reinforcement.
- Crossmembers and braces: Help transfer loads through the intended chassis structure.
Rectangular tubing can be practical because its width and height can be selected to suit different loading directions.
However, a larger-looking tube is not automatically stronger in every application.
Its actual performance depends on section dimensions, wall thickness, steel grade, unsupported length, and connection design.
How Thick Should Trailer Tongue Steel Be?
There is no universal steel thickness suitable for every trailer tongue.
The correct material must be determined from the trailer’s maximum intended load and structural design.
Important factors include:
- Trailer GVWR
- Expected tongue weight
- Distance between the coupler and frame connections
- Tongue cross-sectional shape
- Steel grade and wall thickness
- Fatigue loading during travel
- Braking and turning forces
- Frame attachment details
Avoid treating common tubing sizes found in online projects as verified specifications for a different trailer.
For road-going fabrication, use a documented design or have a qualified trailer fabricator or engineer establish the appropriate member sizes and connection requirements.
Essential Trailer Tongue Components
In addition to the structural steel, the completed tongue typically requires:
- A compatible, appropriately rated trailer coupler
- A tongue jack with sufficient lifting capacity
- Properly rated safety chains and attachment hardware
- Mounting brackets specified for the design
- Electrical wiring and a compatible trailer connector
- A breakaway system where required
- Corrosion-resistant protective finishing materials
The coupler must match the trailer tongue configuration, hitch ball diameter, and required capacity.
Tools for Measuring and Fabricating
Common fabrication tools include:
- Tape measure and steel ruler
- Framing square and straightedge
- Angle finder
- Marking tools
- Suitable metal-cutting equipment
- Clamps and stable fabrication supports
- Welding equipment appropriate for the specified steel and procedure
- Drill and suitable metal bits, if the design requires drilled holes
- Torque wrench for specified bolted connections
- Personal protective equipment
Structural welding should be performed by a suitably qualified welder using an appropriate procedure.
Safety Note: Do not weld on unidentified, painted, or galvanized material without evaluating its coating and the required exposure controls. Welding can produce hazardous fumes, and structural joints also require correctly prepared surfaces.
How to Build a Trailer Tongue Step by Step
The following process covers the main construction stages for a conventional steel trailer tongue.
The exact steel dimensions, connection details, and weld procedures must come from a design appropriate for the trailer. These steps are not a substitute for engineering specifications or qualified structural fabrication.
Step 1: Determine the Trailer’s Intended Weight Capacity
Before measuring or cutting steel, establish the trailer’s intended loaded operating weight.
For a new trailer, this includes the empty trailer structure and its planned maximum cargo.
For an existing trailer, check its manufacturer ratings and original construction details.
Determine:
- The intended trailer GVWR
- The expected maximum tongue weight
- The trailer axle configuration and ratings
- The towing vehicle’s capacity
- The selected coupler and hitch ratings
For many conventional light- and medium-duty bumper-pull trailers, a general planning range is approximately 10%–15% tongue weight relative to the loaded trailer weight.
The National Association of Trailer Manufacturers’ Trailer Components guidance discusses this typical range while emphasizing that actual loading requirements depend on the particular trailer.
For example, a 3,000-pound loaded trailer at 12% tongue weight would transfer:
3,000 × 0.12 = 360 pounds
This is an illustrative vertical load, not a complete structural design calculation.
The tongue must also withstand additional forces generated during towing.
Do not select steel or weld sizes using the static tongue weight alone.
Step 2: Measure the Trailer Frame and Tongue Length
Place the trailer on a level, stable surface and support its frame securely.
Measure:
- The width of the main trailer frame
- The location of the front crossmember
- The trailer’s longitudinal centerline
- The intended coupler position
- The distance from the frame to the hitch connection
- The planned tongue mounting locations
Determine the required tongue length based on towing clearance, chassis geometry, and an approved structural design.
A tongue that is too short can allow the tow vehicle and trailer to interfere during tight turns.
A tongue that is unnecessarily long may increase structural bending and change trailer handling.
Check clearance for the towing vehicle’s bumper, tailgate, rear doors, and any front-mounted trailer equipment.
Important: Do not choose the tongue length solely because a particular piece of steel is available.
Step 3: Mark the Tongue Layout
Establish the trailer’s centerline using accurate measurements from the main chassis.
For a straight tongue, the central member should align with the intended trailer centerline unless the approved design specifies otherwise.
For an A-frame design, mark where both diagonal members will connect to the chassis and where they will converge near the coupler.
Both sides should match the approved geometry.
Use an angle finder and straightedge to verify the intended positions.
When checking the layout, confirm:
- The coupler is centered as specified.
- The steel members meet the intended frame connection points.
- Both sides of the A-frame have matching geometry.
- The planned jack location has adequate clearance.
- The arrangement does not interfere with other trailer components.
A visibly symmetrical layout is helpful, but it cannot substitute for checking actual frame dimensions and axle alignment.
Step 4: Cut the Structural Steel to the Approved Dimensions
Once the layout has been verified, cut the structural members according to the design.
Use metal-cutting equipment appropriate for the material and section thickness.
Keep cuts consistent with the specified joint geometry.
After cutting:
- Remove burrs and sharp edges.
- Inspect the material for damage.
- Check the cut lengths against the plan.
- Confirm the required joint fit.
- Prepare the surfaces according to the welding or fastening specification.
Do not assume that every joint should be ground into the same shape.
Joint preparation depends on the steel thickness, connection design, and specified welding procedure.
Avoid cutting into or reducing the structural section beyond what the approved design allows.
Step 5: Position the Tongue Members Against the Trailer Frame
Place the cut structural members in their intended positions.
Use stable supports and appropriate clamps to hold the assembly.
For a straight tongue, confirm that the central beam connects to the intended structural members of the main chassis.
For an A-frame tongue, position both diagonal members so they transfer loads into the designated frame connections.
Check that:
- The assembly is centered.
- The planned coupling height is correct.
- The structural members fit the chassis connections properly.
- The layout has not introduced frame distortion.
- The intended jack and coupler positions remain accessible.
Temporary positioning should allow the fabricator to verify alignment before completing permanent joints.
Never depend on a lightly attached or partially assembled tongue to support a trailer in service.
Step 6: Attach the Tongue to the Main Trailer Frame
The connection between the tongue and chassis is one of the most important structural areas of the trailer.
These joints transmit towing, braking, turning, and vertical loads.
The attachment method must follow an appropriate structural design.
Some trailers use welded connections. Others may use engineered bolted assemblies or purpose-built replacement tongue components.
For welded construction, the procedure must account for:
- Steel material specifications
- Joint geometry
- Weld type and required dimensions
- Loading directions
- Accessibility of the joint
- Distortion control
- Inspection requirements
Have a qualified trailer fabricator perform the structural welding and verify the completed connections.
Avoid adding arbitrary welds to every exposed surface. More welding does not necessarily improve a joint and can introduce distortion or unfavorable stress concentrations.
Do not rely on a single front crossmember unless the trailer’s design specifically supports that attachment arrangement.
Step 7: Install Structural Bracing Where the Design Requires It
Some tongue assemblies need additional bracing, gussets, or crossmembers.
Their purpose is to control deformation and distribute forces through the intended structural load path.
For example, an A-frame tongue may incorporate a crossmember or a properly designed connection structure behind the coupler.
A straight tongue may require carefully designed support where it joins the main chassis.
The type and location of reinforcement depend on the specific trailer.
Incorrectly positioned reinforcement can create abrupt stiffness changes and concentrate stress near its ends.
Do not weld random scrap plates over a weak or cracked tongue and assume the problem has been corrected.
A properly engineered repair or replacement is the appropriate solution when structural damage is present.
Step 8: Install the Trailer Coupler
After the structural tongue assembly is completed and inspected, install a compatible coupler.
First, verify:
- The coupler’s rated gross trailer weight capacity
- Its rated tongue weight capacity
- The required hitch ball diameter
- Compatibility with the tongue profile
- Permitted mounting method
- Required hardware or welding instructions
Straight-channel couplers and A-frame couplers are not interchangeable without considering their mounting configurations.
The CURT 25474 A-frame coupler installation manual provides a useful example of manufacturer-specific requirements.
For that particular coupler, the manual specifies a 50-degree A-frame configuration for its bolt-on application and provides distinct installation instructions for welding.
These requirements apply to that model and should not be assumed to apply to every trailer coupler.
Use the instructions supplied with the actual coupler being installed.
Make sure the locking mechanism operates correctly and is not damaged during installation.
Step 9: Mount the Trailer Tongue Jack
A trailer jack supports and raises the front of the trailer during coupling and uncoupling.
Select one with a suitable rated lifting capacity, mounting arrangement, and operating range.
For an A-frame trailer, a centrally located jack is common.
Straight tongues often use side-mounted or swivel jacks.
Before installing the jack, check:
- Its rated lifting capacity
- Mounting compatibility
- Available extension and retraction
- Ground clearance when stowed
- Clearance around the coupler
- Access to the operating handle
The jack mounting structure must also be suitable for the expected loads.
Position the jack so it cannot strike the tow vehicle during turning or interfere with trailer wiring and other components.
Step 10: Install Safety Chains and Electrical Components
The tongue assembly also needs the safety equipment required for the trailer’s application.
Install appropriately rated safety chains or cables using structural attachment points designed for that purpose.
For typical bumper-pull arrangements, chains are crossed beneath the coupler to help support the tongue if the primary hitch connection separates.
They should allow the trailer to turn freely without dragging on the road.
Do not weld directly to high-strength safety chain links unless their manufacturer specifically permits that procedure.
Install:
- The trailer wiring harness
- A suitable electrical connector
- Protective wire routing where necessary
- Required lighting connections
- A properly configured brake breakaway system when applicable
Secure electrical wiring away from sharp edges, moving components, and areas exposed to excessive abrasion.
The breakaway cable should be attached independently as directed by the brake system manufacturer.
Do not treat it as a replacement for safety chains.
Step 11: Inspect, Protect, and Test the Completed Assembly
Before the trailer is used, inspect the completed tongue assembly.
Check its alignment, joints, coupler operation, jack mounting, and safety equipment.
After fabrication inspection, apply a suitable corrosion-protection system to exposed steel.
Do not apply coatings over uninspected welds in a way that prevents proper evaluation.
Check that the trailer connects to the towing vehicle at the intended height.
Verify the connection and operating clearance through the expected steering and articulation range.
Finally, confirm the loaded trailer’s tongue weight and applicable axle, tire, hitch, and vehicle weight limits.
A qualified final inspection and appropriate validation should be completed before the newly fabricated trailer tongue enters road service.
How Long Should a Trailer Tongue Be?
Trailer tongue length depends on the trailer’s intended use, frame geometry, and tow vehicle.
There is no single measurement suitable for every utility, boat, or cargo trailer.
A longer tongue can provide additional clearance during certain turns and may make backing behavior feel less abrupt.
However, increasing the distance between the coupler and main frame also changes the structural loading of the tongue.
Important considerations include:
- The towing vehicle’s rear overhang
- Trailer width
- Turning clearance
- Coupler position
- Intended hitch height
- Storage requirements
- Structural support and tongue stiffness
Measuring Trailer Tongue Length Correctly
For fabrication planning, clearly identify the two reference points being measured.
For example, a builder may measure from the trailer’s front crossmember to the center of the coupler ball socket.
Other trailer dimensions may use different reference points.
Record the intended measurement convention in the construction plan to avoid mistakes.
When extending an existing tongue, determine whether the chassis and attachment points can accommodate the new leverage.
An extension is a structural modification, not simply an additional piece of tubing.
Can a Trailer Tongue Be Too Long?
Yes. An excessively long tongue can create additional bending demands and make the overall trailer harder to maneuver in tight spaces.
It may also change weight distribution and increase the space required for parking.
Do not extend the tongue beyond the limits established by the trailer’s approved design.
If a longer tongue is necessary, the modified assembly should be evaluated for the resulting loading conditions.
How to Build a Strong Trailer Tongue Without Overloading the Frame
A strong tongue depends on the complete structure rather than one oversized component.
The steel members, joints, mounting locations, and trailer chassis must work together.
Use a Continuous Structural Load Path
The tongue must transfer forces into suitable members of the main trailer frame.
The front crossmember alone may not be designed to carry all towing and bending forces.
For an A-frame design, properly engineered side connections can help distribute loading through the chassis.
For a straight tongue, the central beam and its attachment structure must adequately support the expected forces.
The load path should be established before fabrication rather than improvised during assembly.
Avoid Weak or Poorly Positioned Joints
A joint may become a fatigue-prone area when it creates an abrupt change in stiffness or section strength.
Problems can develop from:
- Inadequate joint design
- Poor weld preparation
- Defective or incomplete welds
- Excessive heat distortion
- Corroded or damaged base metal
- Unsupported structural transitions
- Incorrectly placed reinforcement
Even a visually substantial weld cannot compensate for an unsuitable structural design.
Consider the Existing Trailer Frame Condition
Before attaching a new tongue to an older trailer, inspect the original frame.
Look for cracks, rust perforation, bent members, and previous repairs.
Check particularly around:
- Front crossmember connections
- Main frame rails
- Existing tongue mounting points
- Welded reinforcement
- Jack attachment areas
If the chassis is damaged, repairing only the tongue may leave the trailer unsafe.
Structural repairs should address the complete affected load path.
How to Attach a Trailer Tongue: Welding vs. Bolting
Trailer tongues can use welded or engineered bolted connections, depending on their construction.
Neither method is automatically suitable for every application.
| Factor | Welded Connection | Bolted Connection |
| Common application | Fabricated structural assemblies | Engineered brackets and compatible components |
| Main requirement | Correct welding design and workmanship | Correct joint design, fasteners, and installation |
| Adjustability | Generally permanent | May allow component replacement |
| Inspection | Weld condition and surrounding steel | Fastener condition, joint movement, and hardware |
| Main risk | Defective joints or fatigue cracking | Loosening, joint slip, or fastener failure |
| Suitable for DIY substitution? | No, without proper design and qualified fabrication | No, unless a compatible approved design specifies it |
Is Welding Better for a Trailer Tongue?
Welding is common in steel trailer fabrication because it allows structural members to be joined into the intended chassis arrangement.
However, weld quality and connection design determine whether the result is suitable.
An inexperienced weld can appear sound externally while containing serious defects.
Use a qualified fabricator for structural tongue connections and follow the applicable design requirements.
Can You Bolt a Trailer Tongue to the Frame?
Yes, when the trailer is designed for a bolted tongue assembly or a properly engineered replacement system.
Use the exact mounting pattern, fastener specifications, reinforcement, and tightening instructions required by that design.
Do not drill holes into existing frame members simply to attach an improvised tongue.
Holes can reduce the effective section strength and create stress concentrations.
A bolted coupler is also different from a bolted tongue-to-frame connection. Approval for one does not establish approval for the other.
How to Check Trailer Tongue Weight After Construction
After construction, the loaded trailer’s tongue weight must be checked.
Excessive tongue weight can overload the towing vehicle or hitch.
Insufficient tongue weight can contribute to unstable towing behavior.
For a conventional bumper-pull trailer, a commonly used general range is 10%–15% of the loaded trailer’s weight, subject to the trailer manufacturer’s requirements.
Calculate the percentage using:
Tongue weight percentage = (Measured tongue weight ÷ Loaded trailer weight) × 100
For example, suppose a completed utility trailer weighs 2,500 pounds when loaded.
If the measured tongue weight is 300 pounds:
300 ÷ 2,500 × 100 = 12%
This falls within the common planning range.
However, the result does not automatically establish that the trailer is safe.
The trailer must also meet its structural, axle, tire, hitch, and towing vehicle capacity limits.
How Trailer Tongue Length Affects Weight Distribution
Changing tongue length can affect the forces supported by the hitch, particularly when the coupler moves relative to the trailer’s center of gravity and axle location.
The relationship depends on the geometry of the complete trailer.
For an existing loaded trailer, moving the coupler farther forward can change the measured static tongue load even when the cargo stays in place.
Do not assume that lengthening a tongue will preserve its original tongue weight percentage.
Measure the actual loaded weight distribution after structural modifications.
Safety Checks Before Towing a Newly Built Trailer Tongue
A newly fabricated tongue should not be placed into road service based only on how it looks.
Verify the structural assembly and all installed components.
Inspect the Tongue and Coupler
Check that:
- The frame connections have been inspected and accepted.
- The coupler is correctly installed and rated.
- The hitch ball matches the coupler.
- The coupler locking mechanism operates properly.
- The trailer jack is secure and functions correctly.
- No structural member shows visible distortion or cracking.
Do not tow if a structural defect or coupler engagement problem is identified.
Verify the Safety Chains and Breakaway System
Confirm that the safety chains have suitable ratings and secure structural attachment points.
Check that the chains have enough slack for normal turning but cannot drag on the road.
If the trailer has electric brakes and a required breakaway system, inspect the switch, cable, battery, and brake operation according to the manufacturer’s procedure.
The breakaway connection must function independently of the primary hitch coupling.
Verify Trailer Alignment and Roadworthiness
Before road use, check:
- Trailer frame alignment
- Axle alignment
- Tire condition and pressure
- Wheel and hub condition
- Lighting and wiring
- Brake operation, where equipped
- Ground and turning clearance
- Actual loaded tongue weight
- Applicable vehicle and trailer ratings
Also confirm the trailer meets relevant state registration, inspection, lighting, and brake requirements.
Rules can differ depending on the trailer’s weight, intended use, and location.
Common Mistakes When Building a Trailer Tongue
Several fabrication errors can compromise a trailer’s strength or towing performance.
Using Steel Without Knowing Its Specification
Unidentified scrap metal may have an unknown grade, prior damage, or unsuitable mechanical properties.
Select steel that meets the requirements of the structural plan.
Making the Tongue Longer Without Structural Evaluation
An extension increases the distance over which towing forces act.
The existing tongue and chassis connections may not be suitable for the modified geometry.
Welding Only to a Weak Front Crossmember
A light crossmember may not be capable of transmitting all the loads generated by the tongue.
Connections must follow the intended structural load path.
Installing an Underrated Coupler
The coupler must support the intended trailer weight and vertical hitch load.
The trailer’s permitted capacity is limited by applicable structural and component ratings.
Ignoring Hitch and Turning Clearance
The tongue must provide enough clearance for normal towing, turning, backing, and articulation.
Interference between the trailer and tow vehicle can damage both.
Using Improvised Safety Chain Attachments
Safety chains must connect through suitable rated hardware and properly designed attachment points.
Simply welding a chain link directly to the tongue is not a dependable substitute for an approved attachment arrangement.
Skipping Professional Inspection
A completed tongue may appear straight and solid while still having weak connections or inadequate structural capacity.
A qualified inspection is particularly important for modified or newly fabricated road-going trailers.
When Should You Replace a Trailer Tongue Instead of Repairing It?
Repair may be appropriate for some localized problems, but extensive structural damage often requires replacement or more comprehensive frame work.
Warning signs include:
- Cracks through main tongue members
- Severe rust or metal loss
- Significant bending or twisting
- Repeated cracking near previous repairs
- Damaged coupler mounting areas
- Deformed chassis connection points
A replacement tongue must be compatible with the existing trailer’s design and intended ratings.
Avoid copying dimensions from an unrelated trailer without checking their suitability.
If the trailer manufacturer offers an approved replacement assembly, that may be preferable to fabricating an unverified substitute.
For major structural damage, obtain an evaluation from the manufacturer or a qualified trailer repair specialist.
Conclusion
Learning how to build a trailer tongue begins with selecting a suitable structural design, not simply cutting and welding steel.
A properly constructed tongue requires compatible materials, accurate geometry, secure frame connections, an appropriately rated coupler, and correctly installed safety equipment.
Straight and A-frame designs can both work when engineered for the trailer’s intended loads. The correct choice depends on chassis construction, trailer capacity, and towing requirements.
Use a documented design, have structural welding performed and inspected by qualified personnel, and verify tongue weight, component ratings, and operating clearance before road use.
The finished tongue must be strong enough for the complete towing application, not merely the trailer’s stationary weight.
FAQs About How to Build a Trailer Tongue
What Type of Steel Is Best for a Trailer Tongue?
Structural rectangular or square steel tubing is commonly used for trailer tongues because closed sections can provide useful bending and torsional resistance.
Structural channel sections are also used in certain designs.
The correct steel grade, dimensions, and wall thickness depend on the trailer’s rated capacity and engineered construction requirements.
Can You Build a Trailer Tongue Without Welding?
Yes, but only when using an appropriately engineered bolted tongue assembly or a compatible manufacturer-approved design.
A bolted coupler does not mean the entire tongue can be attached with ordinary hardware.
Structural fasteners, mounting locations, and reinforcement must be suitable for the expected loads.
How Far Should a Trailer Tongue Extend From the Frame?
The required extension depends on trailer width, tow vehicle clearance, hitch position, and the structural design.
There is no universal tongue length suitable for all trailers.
Determine the required clearance and loading conditions before selecting a length.
Is an A-Frame Trailer Tongue Stronger Than a Straight Tongue?
An A-frame tongue can distribute hitch forces through two angled members, which may be advantageous for certain trailer designs.
However, strength depends on material specifications, connections, geometry, and the complete chassis structure.
A properly engineered straight tongue may be stronger than a poorly constructed A-frame assembly.
Can You Use Square Tubing to Build a Trailer Tongue?
Yes. Square structural steel tubing can be used when its dimensions, grade, wall thickness, and connections are appropriate for the trailer’s intended loads.
Do not assume that a particular square tube size is suitable for every trailer.
The complete assembly must be evaluated rather than the tubing alone.
Can You Replace a Bent Trailer Tongue Yourself?
A damaged tongue may be replaceable, but safe replacement requires knowledge of structural fabrication and trailer design.
If the tongue is significantly bent, cracked, or corroded, have the chassis inspected for related damage.
Use an approved replacement or a properly engineered and professionally fabricated assembly.
Does a Longer Trailer Tongue Make Towing Safer?
Not automatically. A longer tongue may improve certain turning-clearance characteristics and change how the trailer responds while backing.
However, it also changes the trailer’s geometry and structural loading.
A longer tongue is appropriate only when its strength, connection design, weight distribution, and clearance have been properly evaluated.