To replace a trailer tongue, support the trailer frame securely, remove the damaged tongue assembly using the manufacturer-approved method, and install a compatible replacement with the correct alignment and structural connections. Bolt-on replacement assemblies may be suitable for some trailers, but replacing a welded structural tongue requires qualified fabrication and inspection.
The trailer tongue connects the main frame to the tow vehicle’s hitch. It carries towing forces during acceleration, braking, turning, and travel over uneven roads. A bent, cracked, or severely corroded tongue can compromise this connection and increase the risk of trailer separation.
Replacing it involves more than removing old steel and attaching new material. The replacement must match the trailer’s structural design, weight ratings, coupling geometry, and attachment requirements. Incorrect welding, unsupported drilling, or poor alignment can weaken the frame.
Some trailer manufacturers offer replacement assemblies, while others require an approved repair performed by a qualified shop.
In this article, I explain how to inspect a damaged tongue, identify compatible replacement parts, prepare the trailer, and understand the installation process. I also cover welded versus bolt-on assemblies, alignment checks, safety chains, electrical connections, repair costs, and the inspections needed before towing.
When Does a Trailer Tongue Need to Be Replaced?
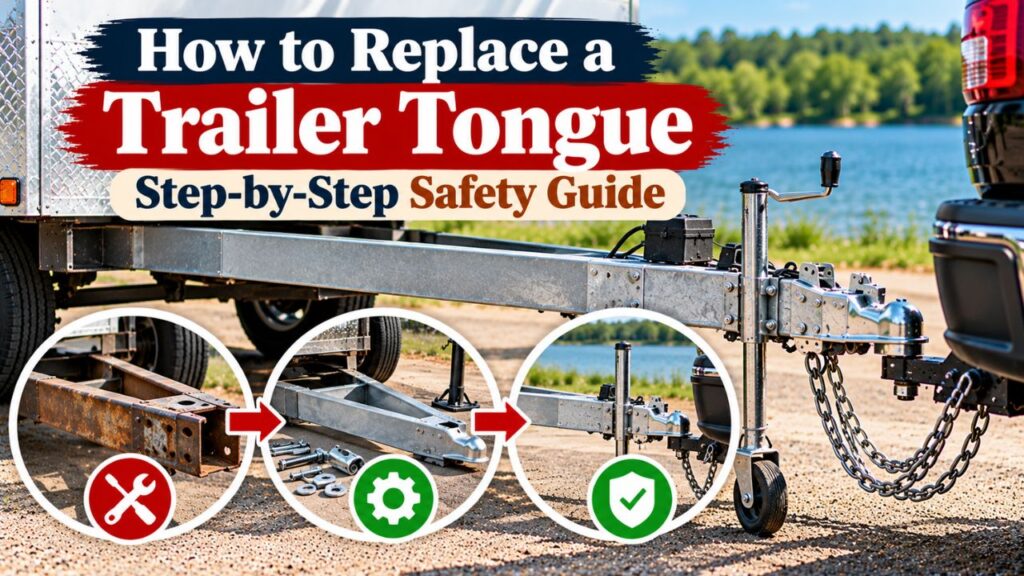
A trailer tongue should be evaluated for replacement when structural damage affects its ability to transfer towing loads safely.
Minor surface corrosion does not always require replacement, but cracking, permanent deformation, or significant material loss needs professional attention.
Bent or Twisted Trailer Tongue
A trailer tongue can bend after:
- Striking an obstacle
- Jackknifing during reversing
- Overloading the trailer
- Incorrect loading or hitching
- Collision damage
- Using an unsuitable jack or support point
- Repeated exposure to excessive towing forces
A bent tongue may cause the coupler to sit off-center or at an unusual angle.
Check whether the tongue aligns with the trailer’s longitudinal centerline.
Visible bends, sharp creases, or twisted structural members are signs that the trailer should not be towed until it has been inspected.
Do not try to straighten a damaged structural tongue by heating it or pulling it with another vehicle. Such methods can introduce additional damage without restoring the original strength.
Cracks Near the Tongue Connection
Cracks may appear near welded joints, mounting holes, brackets, or transitions between structural members.
These areas experience repeated loading as the trailer moves.
Cracking can indicate fatigue, overloading, poor attachment design, or previous damage.
The National Association of Trailer Manufacturers’ trailer maintenance guidance identifies tongue-to-frame connections as important areas to inspect for structural stress and fatigue. It also warns against simply welding over an existing crack without properly addressing the damage.
If a crack is found, stop using the trailer until the appropriate repair or replacement has been determined.
Severe Rust or Structural Corrosion
Surface rust is common on steel trailers and does not automatically mean the tongue needs replacing.
However, extensive corrosion can reduce the effective thickness of a structural member.
Warning signs include:
- Deep rust pits
- Flaking or delaminating steel
- Holes in the tongue material
- Heavy corrosion around fasteners
- Rust damage at welded joints
- Weakening around safety-chain mounts
A severely corroded tongue may no longer provide its original load capacity.
An inspection should determine whether the damage is limited to the tongue or extends into the main trailer frame.
Damaged Coupler Without Tongue Damage
A damaged coupler does not always mean the entire tongue must be replaced.
The coupler is the component that attaches to the tow vehicle’s hitch ball.
The tongue is the structural assembly connecting that coupler to the trailer frame.
If the coupler is worn or damaged but the tongue remains sound, replacing only the coupler may be appropriate.
However, if the coupler and tongue are welded together or the surrounding steel is damaged, a larger repair may be necessary.
What Type of Replacement Trailer Tongue Do You Need?
Trailer tongues are not interchangeable simply because they look similar.
The correct replacement depends on the trailer’s construction, weight rating, dimensions, and attachment method.
Straight Trailer Tongue
A straight tongue typically uses a central structural member extending from the trailer frame toward the coupler.
This arrangement is common on certain utility trailers, small cargo trailers, and boat trailers.
Depending on the original design, the tongue may be constructed from:
- Square steel tubing
- Rectangular steel tubing
- Structural channel
- An engineered fabricated assembly
Some straight tongues are designed to be removable or replaced using manufacturer-specified bolted connections.
Others are welded directly into the trailer frame.
The distinction determines whether replacement can follow a straightforward parts procedure or requires structural fabrication.
A-Frame Trailer Tongue
An A-frame tongue uses two angled structural members that extend from the trailer frame toward the coupling point.
This design is common on travel trailers, equipment trailers, and larger utility trailers.
The two members distribute towing forces through their connections to the main frame.
Replacing an A-frame assembly may involve removing and installing the complete structure rather than changing a single beam.
The replacement must match the original attachment geometry and structural requirements.
A generic A-frame coupler is not the same as a complete A-frame tongue assembly.
Bolt-On Trailer Tongue
A bolt-on tongue is designed to attach to the trailer using specified mounting hardware.
Some manufacturers provide complete replacement assemblies or removable tongue components.
A compatible bolt-on design may allow replacement without welding.
However, the mounting pattern, fastener specifications, reinforcement, and structural ratings must match the manufacturer’s requirements.
Do not assume that drilling holes in an existing welded frame creates a safe bolt-on conversion.
Welded Trailer Tongue
A welded tongue is permanently attached to the trailer frame through structural welds.
Replacement involves removing the damaged assembly and creating new structural connections.
The welding procedure depends on:
- Base metal specifications
- Structural member dimensions
- Material condition
- Frame construction
- Joint design
- Required weld locations
- Manufacturer-approved procedures
Because the tongue is a primary structural component, this work should be performed by a qualified trailer fabrication or repair professional using an approved design.
How to Choose a Compatible Replacement Trailer Tongue
The replacement must be suitable for the complete trailer, not just the original coupler.
Before buying components, identify the trailer and collect its specifications.
Identify the Trailer Manufacturer and Model
Look for the trailer’s identification plate or certification label.
Record the available information, including:
- Manufacturer
- Model
- Vehicle identification number (VIN)
- Gross vehicle weight rating (GVWR)
- Gross axle weight ratings (GAWR)
- Year of manufacture
- Original tongue configuration
The trailer manufacturer or an authorized dealer may be able to identify a suitable replacement assembly.
Provide the VIN when requesting parts information.
If the manufacturer is no longer operating, a qualified trailer repair facility may need to evaluate the frame and determine whether an approved replacement design is available.
Measure the Original Tongue
Before removing the damaged assembly, record the original geometry.
Important measurements include:
| Measurement | Why It Matters |
| Coupler center to trailer body | Establishes tongue projection |
| Tongue member width and depth | Helps identify the structural configuration |
| Attachment locations | Determines how the tongue connects to the frame |
| Distance between A-frame members | Helps identify the original geometry |
| Coupler height | Supports correct hitch alignment |
| Jack mounting position | Determines accessory compatibility |
| Safety-chain attachment locations | Identifies required mounting provisions |
Measure from consistent reference points.
For tongue length, a common reference is the center of the hitch ball socket to the front of the trailer body or the manufacturer-specified structural location.
If the tongue is already bent or twisted, its present dimensions may not represent the original geometry.
In that situation, obtain the manufacturer’s design measurements rather than copying the damaged configuration.
Verify Weight Ratings and Structural Compatibility
The replacement tongue must be approved for the trailer’s intended gross weight and tongue load.
Check the applicable manufacturer specifications for the complete assembly.
Material thickness alone does not establish structural capacity.
Two steel tubes with similar outside dimensions may differ in wall thickness, material properties, manufacturing tolerances, and strength.
A stronger-looking replacement is not necessarily suitable if its connections or geometry differ from the original design.
Never assume that installing heavier steel automatically increases the trailer’s GVWR. Weight ratings depend on the complete engineered trailer assembly.
Tools and Materials for Trailer Tongue Replacement
The equipment required depends on whether the tongue uses approved bolted connections or structural welds.
A manufacturer-approved bolt-on assembly may require ordinary mechanical tools.
A welded structural replacement requires specialized equipment and professional fabrication knowledge.
Tools for a Bolt-On Replacement
Depending on the trailer and replacement kit, tools may include:
- Measuring tape
- Carpenter’s square
- Suitable straightedge
- Torque wrench
- Socket and wrench set
- Properly rated lifting equipment
- Rated jack stands
- Wheel chocks
- Clamps
- Work lights
- Safety glasses and gloves
- Rust-cleaning tools where permitted
Use the replacement manufacturer’s specified fasteners and torque values.
Do not substitute common hardware-store bolts for required structural fasteners without manufacturer approval.
Materials and Replacement Components
A complete repair may involve:
- Manufacturer-approved replacement tongue assembly
- Specified mounting bolts and nuts
- Suitable coupler
- Tongue jack or mounting hardware
- Rated safety chains and attachments
- Breakaway switch and cable, where equipped
- Electrical wiring and protective routing components
- Approved corrosion-protection materials
Some original components may be reusable if their condition and compatibility are verified.
Others may need replacement because they were damaged or cannot be safely transferred.
Equipment for a Welded Replacement
A professional repair facility may use welding equipment, cutting tools, alignment fixtures, clamps, and other fabrication equipment.
The required welding process and joint preparation are determined by the approved repair procedure.
This is not an appropriate situation for selecting weld size, steel thickness, or reinforcement based on a generic online example.
How to Replace a Trailer Tongue: Step-by-Step
The following process explains the main stages of trailer tongue replacement.
It applies as a general planning and inspection guide. Actual removal, mounting, welding, fastener specifications, and structural verification must follow the instructions for the specific trailer.
Step 1: Unload and Secure the Trailer
Begin by removing cargo when practical.
Reducing the load makes the trailer easier to support and decreases unnecessary stress on the damaged tongue.
Park on firm, level ground.
Chock the trailer wheels securely.
Disconnect the trailer from the tow vehicle only after appropriate support has been established.
Do not rely on a damaged tongue or tongue jack to hold the trailer while the structural assembly is being removed.
Safety Note: The trailer must be supported at approved structural points independently of the tongue being replaced. Never work underneath a trailer supported only by a hydraulic jack.
Step 2: Support the Main Trailer Frame
Use properly rated supports positioned according to the trailer manufacturer’s instructions.
The trailer must remain stable when the existing tongue assembly is disconnected.
Support locations depend on the frame configuration, trailer weight, and remaining structural components.
Do not place supports beneath thin floor panels, unsupported crossmembers, or other components not designed to carry the load.
Check that the frame remains level and stable in both directions.
If the manufacturer does not specify suitable support points, have the repair facility determine the proper arrangement.
Step 3: Document the Existing Tongue Installation
Before removing anything, take clear photographs of the original assembly.
Record:
- Tongue length and geometry
- Coupler position
- Mounting locations
- Jack position
- Safety-chain attachment points
- Electrical cable routing
- Breakaway switch location
- Welded or bolted connections
- Accessories mounted to the tongue
These records help identify the original configuration.
However, the replacement must follow approved measurements rather than relying only on photographs of damaged components.
A useful example appears in a 2023 trailer tongue replacement service bulletin filed with NHTSA.
The bulletin describes a replacement procedure for a specific EBB trailer model. It includes frame support, documentation of original mounting points, wiring protection, accurate positioning, qualified welding, and reinspection.
The bulletin’s dimensions and welding instructions apply to that specific trailer, not to other models.
Step 4: Protect and Remove Tongue-Mounted Components
Depending on the design, several components may need to be disconnected or removed before the structural tongue is replaced.
These can include:
- Hitch coupler
- Tongue jack
- Safety chains
- Trailer electrical connector
- Wiring junction box
- Breakaway switch and battery
- Spare tire mount
- Battery tray
- Propane equipment
- Hydraulic surge-brake actuator
The removal process must follow the relevant component instructions.
Electrical power should be isolated appropriately before wiring is disconnected.
Wiring and brake lines must be protected from cutting, grinding, and welding operations.
Important: Trailers containing propane systems, hydraulic brake components, or complex electrical equipment require additional precautions. Have qualified personnel handle these systems when their removal is necessary.
Step 5: Remove the Damaged Tongue Assembly
The removal method depends on the tongue’s original attachment.
For a manufacturer-designed bolt-on assembly, replacement may involve removing specified fasteners after the trailer and tongue are independently supported.
Follow the exact removal sequence provided for the trailer.
For a welded assembly, structural connections must be removed using an approved repair procedure.
This work should be performed by a qualified trailer fabrication professional.
Incorrect cutting can damage the main frame, remove necessary material, or create new stress concentrations.
Do not cut through structural members based only on their appearance.
The repair technician must preserve the integrity of the main trailer structure.
Step 6: Inspect the Main Frame Before Installation
Once the damaged tongue has been removed, inspect the exposed attachment area.
Look for:
- Cracks around previous mounting points
- Elongated bolt holes
- Bent frame rails
- Significant corrosion
- Previous improper repairs
- Damaged brackets
- Distortion around welded joints
- Weak or missing reinforcement
The surrounding frame must be suitable for the replacement.
Installing a new tongue onto a damaged frame does not correct the underlying problem.
If cracks or distortion extend into the main structure, the manufacturer or a qualified professional must determine whether additional repair is permitted.
In some cases, replacing the trailer frame or the complete trailer may be more appropriate.
Step 7: Position the Replacement Tongue
Place the approved replacement assembly in its intended position.
The tongue must align with the trailer’s longitudinal centerline and approved attachment geometry.
For a straight tongue, the coupler should be centered according to the design.
For an A-frame assembly, both sides must connect at their required mounting locations.
Check the manufacturer’s specified dimensions, including any required projection beyond the trailer body.
The coupler must also reach the intended height when the trailer is level.
Temporary clamps or positioning fixtures may be used by the installer to hold the assembly while alignment is verified.
Do not permanently fasten the tongue until its position has been confirmed.
Step 8: Secure the Replacement With the Approved Method
The attachment procedure is different for bolt-on and welded assemblies.
Installing a Manufacturer-Approved Bolt-On Tongue
Where a replacement tongue is specifically designed for bolted attachment:
- Confirm that the replacement is approved for the trailer model.
- Align the supplied mounting points.
- Use the specified bolts, nuts, washers, and reinforcement.
- Follow the manufacturer’s tightening sequence.
- Tighten fasteners to the specified torque.
- Verify that all required locking features are correctly installed.
Do not enlarge mounting holes, add unapproved holes, or substitute lower-grade hardware to make the assembly fit.
If the holes or mounting geometry do not match, stop and verify compatibility.
Installing a Welded Tongue Assembly
A welded replacement requires an approved structural procedure.
The qualified installer must establish the correct joint preparation, positioning, welding process, and inspection requirements.
The work may involve removing old weld material, preparing the approved connection surfaces, securing the assembly in alignment, and completing the required welds.
These details are specific to the trailer’s frame and replacement design.
Do not apply welding instructions from a different model.
A weld that looks smooth or substantial is not proof that the tongue has regained its required structural capacity.
Step 9: Reinstall the Coupler, Jack, and Safety Chains
Once the replacement tongue has been structurally installed and approved, reinstall compatible components.
Check each item individually.
Coupler: Confirm that the coupler matches the intended hitch ball, fits the replacement tongue, and meets the required rating.
Tongue jack: Install the jack using its approved mounting arrangement and confirm that it operates without interfering with other components.
Safety chains: Use correctly rated chains and approved structural attachment points.
Do not attach safety chains to thin sheet metal, unsupported brackets, or improvised mounting holes.
If the original chain mounts were part of the removed tongue, the replacement must provide suitable new attachment points.
Avoid welding directly to safety-chain links unless an approved procedure specifically permits the construction.
Step 10: Restore Electrical and Brake Connections
Reconnect the trailer’s lighting and braking systems according to their manufacturer instructions.
Route wiring away from sharp edges, moving parts, and hot components.
Use suitable protective materials and weather-resistant connections where required.
If the trailer has electric brakes, inspect the wiring and test brake operation.
If it has a breakaway braking system, verify that the battery, switch, cable, and wiring are functional.
For surge-brake trailers, inspect the actuator, brake lines, and hydraulic connections.
Brake system work should be performed and tested by a qualified technician when the repair involves hydraulic components or other specialized systems.
Step 11: Protect Exposed Metal From Corrosion
After structural work and inspection are complete, exposed steel may require corrosion protection.
Use a coating compatible with the frame material and the manufacturer’s specifications.
Clean and prepare the surface as directed for the chosen product.
Avoid covering areas that still require inspection before the technician has completed the structural evaluation.
For galvanized components, welding or cutting can affect the protective coating and introduce additional occupational hazards. Any restoration must follow the applicable material and coating requirements.
Step 12: Complete Final Inspection Before Towing
The replacement is not finished when the new tongue is physically attached.
The trailer must be inspected for structural integrity, correct geometry, compatible towing components, and proper operation.
Depending on the trailer, the manufacturer or repair facility may require a documented post-repair inspection.
Do not tow the trailer on public roads until the repair is approved and all required safety checks are complete.
Bolt-On vs. Welded Trailer Tongue Replacement
The attachment method determines how much of the work can reasonably be completed by a capable owner.
| Feature | Bolt-On Replacement | Welded Replacement |
| Connection | Specified fasteners | Engineered structural welds |
| Replacement availability | Only for compatible designs | Depends on manufacturer-approved repair |
| Main equipment | Mechanical tools and torque wrench | Professional fabrication equipment |
| Structural modification | Generally unnecessary with an exact-fit assembly | Often involves structural removal and joining |
| DIY suitability | Possible with approved instructions | Professional installation recommended |
| Main concern | Incorrect hardware or connection | Welding quality, frame integrity, and alignment |
| Final inspection | Required | Required, often more extensive |
Can You Replace a Trailer Tongue Without Welding?
Yes, if the trailer was designed to accept a removable or bolt-on tongue and a compatible replacement assembly is available.
Follow the manufacturer’s installation instructions.
However, a welded tongue cannot automatically be converted into a bolt-on design.
Creating new mounting holes, adding plates, or changing the attachment method can alter how towing forces travel through the frame.
Such modifications require engineering approval.
Can You Weld a New Tongue Onto an Existing Trailer?
Yes, when the trailer manufacturer authorizes the replacement design and qualified personnel carry out the work.
The main frame must be suitable for the repair, and the new assembly must have the correct structural properties.
Do not select welding methods or material thickness solely from generic DIY instructions.
A qualified trailer-frame shop should evaluate the necessary connection and complete the work to the approved requirements.
How to Check Trailer Tongue Alignment After Replacement
A new tongue must place the coupling point in the intended position relative to the trailer frame and running gear.
Poor alignment can affect towing geometry and indicate an incorrectly installed structural assembly.
Check the Tongue Centerline
Determine the trailer’s true longitudinal centerline using appropriate structural reference points.
The coupler should align with the approved design position.
Simply measuring equal distances from the coupler to the outer corners of the trailer body may not be reliable if the body is asymmetrical or has been damaged.
A professional repair facility may use frame measurements or alignment equipment.
Check Tongue Length
Compare the replacement tongue projection with the manufacturer’s specifications.
The correct dimension depends on the trailer’s design and intended towing configuration.
Changing tongue length can affect turning clearance, coupler position, and structural loading.
Do not extend or shorten the replacement to match an arbitrary preferred length.
Check Coupler Height
Level the trailer according to its intended towing attitude.
Measure the coupler height at the reference point specified for the hitch setup.
Compare it with the tow vehicle’s hitch ball height.
If the trailer sits excessively nose-high or nose-low when coupled, the hitch configuration may need adjustment.
Use approved ball mounts or hitch equipment rather than altering the replacement tongue to correct an ordinary hitch-height mismatch.
Check Structural Connections
Inspect the completed connections for:
- Correct fastener installation
- Missing hardware
- Improperly seated components
- Visible frame distortion
- Cracked or damaged material
- Required weld inspection results
- Loose accessories
- Damaged protective coatings
Any suspected structural defect should be resolved before the trailer is returned to service.
How to Check Tongue Weight After Replacement
Replacing a tongue can change the trailer’s empty weight, geometry, or location of attached equipment.
These changes may affect tongue weight.
Even an approved replacement should be followed by a loaded-weight check when the trailer’s loading characteristics may have changed.
Measure the Loaded Trailer Weight
Use a suitable vehicle scale to establish the trailer’s actual loaded weight.
Include the cargo and equipment normally carried during towing.
Do not assume the trailer’s GVWR is its actual operating weight.
The two values describe different things.
Measure the Actual Tongue Weight
Use a properly rated tongue-weight scale or an approved weighing method.
For many conventional bumper-pull trailers, tongue weight is commonly around 10–15% of total loaded trailer weight, unless the manufacturer specifies otherwise.
For example:
- Loaded trailer weight: 3,000 pounds
- Measured tongue weight: 360 pounds
Calculate the percentage:
360 ÷ 3,000 × 100 = 12%
This example falls within the common range for many conventional trailers.
However, the acceptable value depends on the particular trailer and towing equipment.
Verify All Relevant Weight Ratings
Check that the completed towing combination remains within its applicable limits.
These include:
- Trailer GVWR
- Trailer GAWR
- Tire load ratings
- Coupler rating
- Hitch rating
- Tow vehicle towing capacity
- Tow vehicle payload and axle ratings
A new tongue does not automatically increase the capacity of the trailer.
If the replacement changes the original engineered configuration, the manufacturer or qualified engineering authority must determine whether the existing ratings remain valid.
Can You Replace a Bent Trailer Tongue Instead of Straightening It?
Replacement is often preferable when the tongue has severe permanent deformation.
However, the correct decision depends on the original design and extent of damage.
Why Straightening May Be Unsafe
A bent steel member may have experienced plastic deformation, meaning it has changed shape beyond its elastic range.
Attempting to bend it back does not necessarily restore its original properties.
The damaged area may contain stress concentrations or other weaknesses.
Heating the steel can also change its material characteristics.
For this reason, straightening should not be attempted without a manufacturer-approved engineering procedure.
When Replacement Is the Better Option
Replacement should be evaluated when:
- The tongue has a severe bend or kink.
- Cracks are present.
- Structural corrosion is extensive.
- Mounting locations are distorted.
- The coupler no longer aligns correctly.
- Previous repairs have weakened the assembly.
- The manufacturer specifies replacement rather than repair.
If the adjacent trailer frame is damaged, changing only the tongue may not be sufficient.
When the Entire Trailer Frame May Need Attention
Some trailer tongues are integrated into the main frame rather than attached as separate replaceable assemblies.
In these designs, damaged tongue members may extend beneath the trailer body or connect to important crossmembers.
The repair may require extensive frame reconstruction or replacement.
A professional assessment should establish whether the trailer can be restored to its approved structural condition.
How Much Does It Cost to Replace a Trailer Tongue?
Trailer tongue replacement costs vary significantly.
A removable bolt-on tongue for a small trailer may involve a relatively straightforward component replacement.
A welded A-frame assembly can require extensive fabrication, alignment, and inspection.
No single price accurately represents every trailer.
Main Factors Affecting Replacement Cost
| Cost Factor | How It Affects the Repair |
| Trailer type | Larger or more complex frames may require additional work |
| Tongue design | Straight, A-frame, and integrated designs differ |
| Replacement availability | Exact manufacturer parts may reduce fabrication requirements |
| Structural damage | Damage beyond the tongue increases repair work |
| Welding requirements | Qualified structural fabrication adds labor |
| Coupler and jack condition | Damaged components may need replacement |
| Electrical and brake systems | Additional systems require removal and reinstallation |
| Corrosion protection | Exposed steel may need surface preparation and coating |
| Inspection requirements | Some repairs require additional verification |
Bolt-On Replacement Cost
When an exact-fit replacement assembly exists, expenses may include:
- Replacement tongue
- Manufacturer-specified hardware
- Shipping
- Labor
- Inspection
If the owner has the appropriate equipment and the manufacturer permits owner installation, some labor expenses may be avoided.
However, the trailer must still be supported and inspected correctly.
Welded Replacement Cost
A welded structural replacement may require professional labor for:
- Trailer setup and support
- Component removal
- Damaged assembly removal
- Frame inspection
- Replacement positioning
- Structural welding
- Reinstallation of accessories
- Corrosion protection
- Final inspection
The cost can increase substantially when the main frame also requires repair.
Before authorizing the work, obtain a written estimate describing the approved replacement method and what is included.
If the repair approaches the value of the trailer, compare it with the cost of a suitable replacement trailer.
Trailer Tongue Replacement Mistakes to Avoid
A tongue replacement can look complete while containing defects that affect towing safety.
Several mistakes deserve particular attention.
Installing Unrated Steel Tubing
Using steel tubing because its outside dimensions look similar to the original member is not sufficient.
Material grade, wall thickness, connection design, and loading requirements all affect structural capacity.
Use an approved replacement assembly or an engineered repair design.
Cutting the Original Tongue Without Supporting the Frame
The tongue may contribute to supporting and stabilizing the trailer during service.
Removing it without independent frame support can allow unexpected movement.
Use manufacturer-approved supports and verify stability before any connection is released.
Welding Directly Over Cracked Material
Covering an existing crack with weld metal does not necessarily restore structural integrity.
The crack’s cause and full extent must be identified.
Damaged material may require removal or replacement according to an approved repair procedure.
Drilling New Holes Without Approval
Drilling new holes can reduce the effective cross section of a structural member and create stress concentrations.
An improvised bolt pattern may not distribute towing forces correctly.
Use only approved mounting locations and hardware.
Reusing Damaged Safety Chains or Couplers
The tongue, coupler, and safety chains work together as part of the trailer’s towing connection.
Reusing bent, cracked, heavily worn, or inadequately rated components can undermine the repair.
Replace damaged components with compatible, properly rated parts.
Ignoring Electrical and Breakaway Equipment
Wiring may pass through or attach directly to the tongue.
Incorrect routing can expose cables to abrasion, heat, or sharp edges.
Restore and test the trailer’s electrical and braking systems before towing.
Skipping the Final Inspection
A completed assembly does not prove that the trailer is ready for the road.
Structural alignment, fastener installation, coupling function, and braking components must be checked.
Where an approved repair procedure requires professional reinspection, complete it before returning the trailer to service.
What to Inspect Before Towing After Tongue Replacement
The following checklist helps organize the final review.
- Replacement tongue is approved for the trailer.
- Main frame has been inspected for damage.
- Structural connections have been completed and accepted.
- Tongue alignment matches the approved geometry.
- All specified mounting fasteners are installed and tightened correctly.
- Coupler matches the hitch ball and operates properly.
- Safety chains are correctly rated and attached.
- Tongue jack operates and secures properly.
- Electrical wiring is protected and connected.
- Trailer lights operate correctly.
- Trailer brakes operate correctly, where fitted.
- Breakaway braking system functions, where required and equipped.
- Tires and suspension have been inspected.
- Trailer attitude and tongue weight are appropriate.
- All applicable towing and weight ratings are satisfied.
- Any required post-repair inspection is complete.
A low-speed functional check in a suitable controlled environment may be part of the approved return-to-service procedure.
However, it should only occur after the structural repair and all required safety systems have passed inspection.
If the trailer pulls unevenly, the coupler moves unexpectedly, or unusual noise or instability appears, stop and have the assembly inspected.
Do not use a road test as a substitute for structural verification.
Conclusion
Understanding how to replace a trailer tongue begins with identifying the damage, determining whether the tongue is a replaceable assembly, and obtaining a compatible replacement.
A manufacturer-approved bolt-on tongue may be suitable for installation using the specified fasteners and procedures. Welded tongues require qualified structural fabrication and an approved repair method.
Before removing the old assembly, support the trailer securely, document the original configuration, and protect nearby electrical and brake components.
After installation, verify tongue alignment, coupler compatibility, safety-chain attachments, structural connections, and trailer weight distribution.
The safest repair is one that restores the manufacturer’s intended structural performance, not simply the appearance of the original tongue.
If the replacement cannot be completed using verified specifications and suitable equipment, have a qualified trailer repair facility perform the work before the trailer is returned to service.
FAQs About How to Replace a Trailer Tongue
Can I Replace a Trailer Tongue Myself?
Yes, in some cases. If the manufacturer provides an approved bolt-on replacement assembly with complete installation instructions, a capable owner with suitable tools may be able to perform the work. Welded structural tongue replacement should be handled by a qualified trailer fabrication professional.
Can You Replace a Welded Trailer Tongue Without Welding?
Not automatically. A welded tongue cannot simply be converted to a bolted connection using improvised brackets or drilled holes. A bolt-on conversion requires a manufacturer-approved or properly engineered design that provides the necessary structural strength.
Is It Safe to Tow a Trailer With a Bent Tongue?
No. A trailer with a visibly bent, cracked, or twisted structural tongue should not be towed until it has been inspected and the necessary repair or replacement has been completed. Even if the coupler still connects to the vehicle, hidden structural damage may remain.
Can I Use Square Tubing to Replace a Trailer Tongue?
Square steel tubing is used in some straight-tongue trailer designs. However, the correct material, dimensions, wall thickness, grade, and attachment details must come from the manufacturer or an engineered repair specification. Generic square tubing should not be substituted based only on appearance.
Does Replacing a Trailer Tongue Change Tongue Weight?
It can. A replacement may change the trailer’s empty weight, coupling position, or accessory placement. These changes can affect tongue weight and towing geometry. Measure the loaded trailer after replacement when the configuration has changed and verify that the combination meets its required ratings.
Do I Need New Safety Chains After Replacing the Tongue?
Not always, but the chains and their mounting points must be inspected for damage and compatibility. Some replacement tongue assemblies include new safety chains. Reuse existing chains only when their condition, ratings, and attachment method satisfy the applicable requirements.
Does Trailer Tongue Replacement Require a New VIN?
Not necessarily. Replacing a damaged tongue with an approved equivalent assembly does not automatically mean the trailer needs a new VIN. However, structural alterations, reconstruction, and homemade trailer modifications may create registration or inspection requirements that vary by state. Check with the relevant state motor vehicle authority before making substantial changes.