Learning how to use automatic jump starter can save you from being stranded with a dead or weak car battery. An automatic jump starter, often called a smart jump starter, is designed to make the jump-starting process easier by detecting the battery connection and controlling the flow of starting power.
Unlike traditional jumper cables that require another vehicle, a portable automatic jump starter has its own rechargeable battery. Many models include smart jumper cables, reverse-polarity protection, short-circuit protection, and automatic detection features.
The basic process is simple: charge the jump starter, connect the clamps to the correct terminals, allow the device to detect the battery, start the vehicle, and then safely remove the clamps.
However, automatic does not mean completely risk-free. You still need to identify the correct terminals, use the appropriate voltage, and follow the instructions provided with your particular jump starter and vehicle.
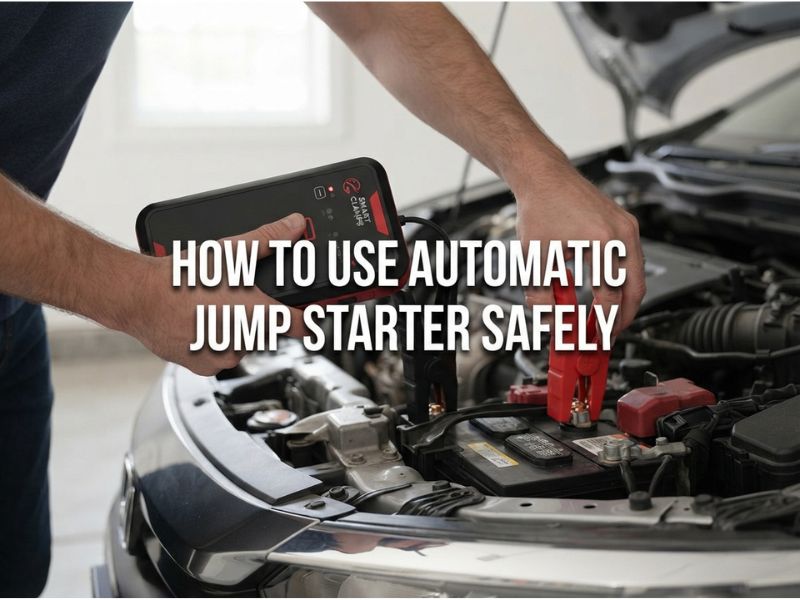
What Is an Automatic Jump Starter?
An automatic jump starter is a portable battery device designed to provide temporary starting power to a vehicle when its battery does not have enough energy to crank the engine.
The word “automatic” usually refers to the device’s smart detection and protection system. Depending on the model, the jump starter may automatically detect whether the clamps are connected correctly and determine when it is safe to deliver power.
Many automatic jump starters can detect:
- Correct battery polarity
- Reverse polarity
- Poor clamp connection
- Short circuits
- Low battery voltage
- Overcurrent conditions
Some models automatically activate when they detect a suitable battery connection, while others require you to press a power or boost button.
Because designs vary, the manufacturer’s instructions should always take priority over a general procedure.
How Does an Automatic Jump Starter Work?
A traditional jump-start setup typically requires another vehicle and a set of jumper cables. An automatic jump starter eliminates the need for the second vehicle by using its own internal battery.
When you connect the positive and negative clamps to the vehicle’s battery or approved jump-start terminals, the jump starter’s electronics monitor the connection.
If the polarity is correct and the device detects a suitable connection, it can provide high-current electrical power to the vehicle’s starting system.
That additional current helps the vehicle’s starter motor turn the engine.
Once the engine starts, the vehicle’s alternator normally takes over the job of supplying electrical power and charging the battery.
The jump starter does not normally repair a damaged battery or fully recharge it like a dedicated battery charger.
What You Need Before Using an Automatic Jump Starter
Before attempting to start the vehicle, gather the necessary equipment and prepare the vehicle.
You need:
- A charged automatic jump starter
- The supplied smart jumper cables or clamps
- Access to the vehicle battery or designated jump-start terminals
- The vehicle owner’s manual if the battery location or connection points are unclear
Before starting, make sure the vehicle is parked safely.
Put an automatic transmission in Park and a manual transmission in neutral, as appropriate. Apply the parking brake.
Turn off the ignition and electrical accessories such as headlights, radio, air conditioning, and interior lights.
Check the Jump Starter’s Battery Level
Before connecting the device, check its battery level.
An automatic jump starter needs enough stored energy to provide starting current. If the internal battery is nearly empty, it may not be capable of starting the vehicle.
Many modern jump starters have an LED indicator, digital display, or battery-percentage indicator.
Ideally, keep your jump starter adequately charged at all times, especially before a long trip.
Do not assume that a jump starter will remain fully charged indefinitely. Recharge it according to the manufacturer’s recommendations.
Inspect the Jump Starter and Cables
Before using the device, inspect the jumper cables and clamps.
Look for:
- Damaged insulation
- Loose wires
- Cracked clamps
- Burn marks
- Corrosion
- Damaged connectors
Do not use a jump starter with visibly damaged cables or connectors.
Also inspect the vehicle battery.
If the battery is cracked, swollen, leaking, frozen, or otherwise physically damaged, do not attempt a normal jump start. A damaged battery can present a serious safety hazard.
How to Use Automatic Jump Starter Step by Step
The following procedure applies to many automatic portable jump starters. Your device may use slightly different controls or connection instructions, so always check the manufacturer’s manual.
Step 1: Turn Off the Vehicle
Make sure the ignition is switched off.
Turn off the headlights, radio, climate-control system, seat heaters, and other unnecessary electrical accessories.
If possible, close the doors or disable features that could activate additional electrical loads while you are working.
Apply the parking brake.
Step 2: Locate the Battery
Open the hood and locate the vehicle’s 12-volt battery.
The battery may not always be located under the hood. Some vehicles place the battery in the trunk or another compartment.
Modern vehicles may also provide dedicated positive and negative jump-start terminals under the hood.
If you cannot clearly identify the correct connection points, consult the owner’s manual.
Do not randomly attach the clamps to exposed metal components.
Step 3: Identify Positive and Negative Terminals
Look for the positive (+) and negative (-) markings.
The positive terminal commonly has a red protective cover or red marking.
The negative terminal normally has a minus (-) marking and may be connected to the vehicle’s chassis.
Correct polarity is extremely important.
Connecting the positive and negative clamps incorrectly can create a short circuit and potentially damage electrical components.
Step 4: Connect the Smart Clamps
Connect the red positive clamp to the positive (+) terminal or the vehicle manufacturer’s designated positive jump point.
Then connect the black negative clamp to the negative (-) terminal or the approved grounding point specified by the vehicle manufacturer.
Some vehicles specifically recommend using a chassis or engine ground instead of connecting directly to the negative battery terminal.
Follow the vehicle owner’s manual when it provides a specific procedure.
Step 5: Allow the Automatic System to Detect the Battery
This is where an automatic jump starter differs from a basic jump box.
Once the clamps are connected, the smart cable may display an indicator or make an audible signal.
The device may tell you whether the connection is correct.
A green indicator may mean the system is ready, while a red warning may indicate reverse polarity, poor contact, or another connection problem.
Do not proceed if the device indicates an incorrect connection.
Step 6: Turn On the Jump Starter if Required
Some automatic jump starters activate automatically after detecting the battery.
Others require you to press a power button.
Some models also have a dedicated Boost or Override button for batteries with extremely low voltage.
Do not activate a manual boost function unless you understand why it is needed and the manufacturer’s instructions specifically permit its use.
Step 7: Start the Vehicle
Once the automatic jump starter indicates that the connection is ready, start the vehicle.
Turn the ignition or press the start button as you normally would.
Do not continuously crank the engine for a long period.
If the engine does not start, stop and allow the system to rest briefly before trying again, following the jump starter’s instructions.
Repeatedly cranking the engine can drain the jump starter and place unnecessary stress on the vehicle’s starter motor.
Step 8: Confirm That the Engine Has Started
Once the engine starts and runs normally, leave it running.
Do not immediately turn the vehicle off.
The alternator should begin supplying electrical power to the vehicle and charging the battery.
However, the alternator may not fully recharge a severely discharged battery in a short period.
If the vehicle starts but immediately stalls, there may be another problem beyond the battery.
Step 9: Turn Off the Automatic Jump Starter
Once the vehicle is running, turn off the jump starter if the manufacturer instructs you to do so.
Some automatic systems stop delivering starting power automatically once the engine starts.
Check the indicator before disconnecting the clamps.
Step 10: Remove the Clamps
Remove the clamps carefully.
In many setups, the negative clamp is removed first, followed by the positive clamp.
If the negative clamp was attached to a chassis or engine ground, disconnect it from that ground point first.
Then remove the red positive clamp.
Do not allow the clamps to touch each other or another metal component while connected.
Step 11: Store the Jump Starter
After disconnecting the clamps, put the cables and jump starter away safely.
Check the battery-level indicator before storing the device.
If the unit has lost significant charge, recharge it according to the manufacturer’s instructions.
A jump starter that is fully discharged may not be useful during your next emergency.
What Does the Automatic Function Do?
The automatic function is primarily intended to simplify the connection and improve safety.
A smart clamp system can monitor the electrical connection and alert you when something is wrong.
For example, if the red clamp is connected to the negative terminal and the black clamp is connected to the positive terminal, the device may recognize the reverse polarity condition.
The jump starter may then prevent current from being delivered.
Some devices can also detect whether the clamps have a sufficiently good connection.
These features are valuable, but they do not eliminate the need for proper setup.
You should still verify the terminals yourself before connecting the equipment.
What If the Automatic Jump Starter Does Not Detect the Battery?
Sometimes a smart jump starter will not recognize a severely discharged battery.
This can happen when the battery voltage is extremely low.
A smart jump starter may require a minimum voltage before it automatically activates.
If this happens, check:
- Whether the clamps are connected correctly.
- Whether the clamps have clean, firm contact.
- Whether the jump starter has sufficient charge.
- Whether the vehicle uses a 12-volt system.
- Whether the battery is physically damaged.
Some models include a manual override or boost mode that allows the device to provide starting power even when automatic detection does not work.
However, this feature can disable some automatic safety protections.
Only use manual boost mode exactly as described by the manufacturer.
How to Use the Boost Mode on an Automatic Jump Starter
Some automatic jump starters include a Boost or Override button.
This feature is primarily intended for situations where the vehicle battery is so deeply discharged that the smart system cannot detect it normally.
The procedure varies significantly between manufacturers.
In general, the clamps are connected correctly first. The user then activates the Boost function according to the device instructions.
Because manual override modes may bypass some automatic detection functions, polarity becomes especially important.
Never use Boost mode as a shortcut for an uncertain connection.
If you are not certain which terminal is positive or negative, stop and consult the vehicle owner’s manual.
Can You Use an Automatic Jump Starter on Any Car?
No.
An automatic jump starter must be compatible with the vehicle’s electrical system.
Most portable jump starters designed for cars are intended for 12-volt vehicles.
Before using one, check:
- Vehicle voltage
- Gasoline or diesel engine
- Engine displacement
- Jump starter current rating
- Recommended engine size
- Manufacturer compatibility requirements
Some jump starters are designed for cars and motorcycles, while larger models may also support SUVs, trucks, and diesel engines.
Do not assume that every portable jump starter can safely start every vehicle.
Can You Use an Automatic Jump Starter on a Diesel?
Many automatic jump starters can be used on diesel vehicles, but the unit must have sufficient starting capability.
Diesel engines can require more starting current than comparable gasoline engines.
A small diesel car may have different requirements from a large diesel pickup or commercial truck.
Check the manufacturer’s stated diesel engine compatibility before attempting a jump start.
If you operate a large diesel truck, choose a jump starter specifically rated for that engine size and application.
Can You Use an Automatic Jump Starter on a Motorcycle?
Some automatic jump starters can also start motorcycles.
However, motorcycles typically use smaller batteries and may have different battery-access procedures.
Check the jump starter’s specifications to confirm that it supports your motorcycle’s electrical system.
If the jump starter includes selectable voltage modes, make sure the correct mode is selected before connecting it.
Never assume that a device designed for a 12-volt car is automatically suitable for every motorcycle.
Can an Automatic Jump Starter Charge a Car Battery?
An automatic jump starter is primarily designed to provide starting power, not to replace a dedicated battery charger.
After the engine starts, the vehicle’s alternator normally begins charging the battery.
However, a deeply discharged battery may require a proper battery charger to restore it fully.
If your battery repeatedly goes flat, investigate the underlying cause.
Possible causes include:
- Old or failing battery
- Faulty alternator
- Parasitic electrical drain
- Loose battery connection
- Corroded terminals
- Electrical-system problem
A jump starter can solve the immediate starting problem without solving the reason the battery became discharged.
How Long Should You Leave an Automatic Jump Starter Connected?
You generally do not need to leave a jump starter connected for an extended period after the vehicle starts.
The device is intended to provide high-current starting assistance, not necessarily to act as a battery charger.
Once the engine has started, follow the manufacturer’s instructions for shutting down and disconnecting the jump starter.
If you want to recharge the vehicle battery, use an appropriate automotive battery charger or allow the vehicle’s charging system to operate as recommended.
What Happens If You Connect the Clamps Backward?
Connecting the clamps backward creates a reverse-polarity condition.
Modern automatic jump starters often have reverse-polarity protection and may display a warning instead of supplying current.
However, you should never deliberately rely on this protection.
Incorrect polarity can potentially damage the vehicle’s electronic systems or the jump starter.
If the automatic jump starter indicates a polarity error, turn the device off if necessary and disconnect the clamps.
Then identify the correct positive and negative terminals before trying again.
Is It Safe to Use an Automatic Jump Starter?
An automatic jump starter can be used safely when the manufacturer’s instructions and basic battery-safety practices are followed.
The most important precautions include:
- Use the correct voltage.
- Confirm positive and negative terminals.
- Do not connect damaged batteries.
- Keep clamps from touching each other.
- Do not smoke near the battery.
- Keep the jump starter away from moving engine components.
- Do not use damaged cables.
- Follow the manufacturer’s instructions.
- Stop if the battery is leaking, swollen, cracked, or frozen.
If you are unsure about the vehicle’s battery connection points, consult the owner’s manual or a qualified technician.
Can an Automatic Jump Starter Damage the Car?
Incorrect use can potentially damage a vehicle’s electrical system.
The most common risk is reverse polarity.
Other risks include using the wrong voltage, creating a short circuit, or using equipment that is not designed for the vehicle.
Automatic safety features reduce these risks, but they do not make incorrect use harmless.
Always verify compatibility before connecting the device.
Common Mistakes When Using an Automatic Jump Starter
Choosing the Wrong Voltage
Most passenger vehicles use 12-volt systems, but some heavy-duty vehicles use 24 volts.
Using an incompatible device can cause serious problems.
Connecting the Wrong Terminal
Always identify the positive (+) and negative (-) terminals before attaching the clamps.
Ignoring Warning Lights
If the smart clamp shows a warning, do not simply press buttons until it disappears.
Find out what the warning means.
Using a Nearly Empty Jump Starter
A jump starter with insufficient charge may not have enough energy to crank the engine.
Repeatedly Cranking the Engine
Long or repeated starting attempts can drain the jump starter and place additional stress on the starter motor.
Ignoring a Damaged Battery
A jump starter is not a solution for a cracked, swollen, leaking, or otherwise physically damaged battery.
Forgetting to Recharge the Jump Starter
After an emergency, many people put the device back in the vehicle without recharging it.
That can leave you without sufficient starting power the next time you need it.
How to Maintain an Automatic Jump Starter
Proper maintenance helps ensure that your jump starter works when you need it.
Keep the unit adequately charged and follow the manufacturer’s recommended charging schedule.
Store it in a dry location and protect it from prolonged exposure to extreme temperatures.
Periodically inspect the clamps and cables for damage.
Check the battery-level indicator before long journeys.
If your jump starter has additional functions such as USB charging or an LED flashlight, test those features periodically as well.
Most importantly, do not wait until you have a dead car battery to discover that your jump starter itself is completely discharged.
How to Choose the Right Automatic Jump Starter
If you are buying an automatic jump starter, look beyond the word “automatic.”
Consider the following specifications.
Peak Amps
Peak amps describe the maximum current the jump starter can provide under specified conditions.
A higher number can indicate greater starting capability, but peak amps should not be the only factor you consider.
Cranking Amps
Cranking amps can provide useful information about sustained starting performance.
When comparing products, examine both peak and cranking-current specifications where available.
Engine Compatibility
Check the manufacturer’s recommended gasoline and diesel engine sizes.
Battery Capacity
Battery capacity determines how much energy the jump starter can store and can affect how many starting attempts it can provide.
Safety Features
Look for features such as:
- Reverse-polarity protection
- Short-circuit protection
- Overcurrent protection
- Over-temperature protection
- Smart battery detection
Cable Quality
Good-quality clamps should make firm contact with the battery terminals.
Portability
A jump starter is an emergency device, so size and weight matter.
A model that fits conveniently in your vehicle is more likely to be available when you actually need it.
Automatic Jump Starter vs. Traditional Jump Starter
An automatic jump starter is essentially a more electronically controlled version of a portable jump-starting device.
A basic jump box may require the user to manually control the process.
A smart or automatic model can provide additional feedback and protection.
For example, it may tell you whether the clamps are connected correctly or whether the battery connection is adequate.
This can make the device easier to use, particularly for drivers who are unfamiliar with traditional jumper cables.
However, automatic features do not replace basic knowledge of battery polarity and safe jump-start procedures.
Automatic Jump Starter vs. Jumper Cables
A portable automatic jump starter contains its own battery.
Traditional jumper cables require another suitable vehicle or external power source.
This is one of the biggest practical differences.
With a jump starter, you can potentially start a vehicle without waiting for another driver to arrive.
Jumper cables are generally simpler and inexpensive, but they depend on having another appropriate vehicle available.
For emergency preparedness, many drivers choose to carry both jumper cables and a portable jump starter.
What If the Car Still Will Not Start?
If the vehicle does not start after using the automatic jump starter correctly, the battery may not be the only problem.
Possible causes include a faulty starter motor, alternator problem, damaged battery cable, poor ground connection, fuel-system issue, ignition problem, or another electrical fault.
If the engine cranks normally but does not actually start, adding more battery power may not solve the problem.
If the engine does not crank despite having a suitable jump starter and good connections, the battery, starter, cables, or electrical system may require professional testing.
Frequently Asked Questions
What is the easiest way to use an automatic jump starter?
Charge the jump starter, turn off the vehicle, connect the red positive clamp and black negative clamp to the appropriate terminals, allow the smart system to detect the connection, start the vehicle, and then disconnect the clamps according to the manufacturer’s instructions.
Do automatic jump starters connect themselves?
Not usually. “Automatic” generally means the device automatically detects the electrical connection and provides safety monitoring. You still need to physically attach the clamps.
Which clamp goes on first?
For many standard jump-start procedures, connect the positive clamp first, followed by the negative clamp or approved ground point. Always follow the specific instructions for your vehicle and jump starter.
Which clamp do I remove first?
In many setups, the negative clamp is removed first, followed by the positive clamp. Follow your manufacturer’s instructions if they specify another sequence.
Why is my automatic jump starter beeping?
A beep or warning indicator can mean different things depending on the model. It may indicate reverse polarity, poor contact, low battery voltage, or another condition. Check the device’s manual rather than assuming what the signal means.
Why won’t my automatic jump starter detect my battery?
The vehicle battery may be extremely discharged, the clamps may have poor contact, or the device may not be compatible with the vehicle. Some models have a manual Boost mode for very low-voltage batteries.
Can I use Boost mode on a completely dead battery?
Some jump starters provide a Boost or Override mode specifically for very low-voltage batteries. However, it may bypass some automatic safety functions. Use it only according to the manufacturer’s instructions.
How long should I run my car after using a jump starter?
There is no universal amount of time that guarantees a full recharge. The battery’s condition, alternator, driving conditions, and electrical load all matter. If the battery was deeply discharged, use a proper battery charger if a full recharge is required.
Can an automatic jump starter recharge itself from the car?
Some jump starters can be recharged through a vehicle’s USB port or 12V accessory outlet, depending on the model. Check the manufacturer’s charging specifications.
Can I leave the jump starter connected while driving?
Do not drive with the jump starter connected unless the manufacturer specifically states that the device is designed for that purpose. Once the vehicle starts, disconnect and store the jump starter according to its instructions.
Can I use an automatic jump starter in the rain?
Electrical equipment and vehicle batteries require caution around water. Follow the manufacturer’s stated weather and water-resistance rating. Never assume a jump starter is waterproof simply because it is portable.
Does a jump starter fully charge a dead battery?
Generally, no. A jump starter provides temporary starting assistance. A dedicated battery charger is designed to recharge the vehicle battery.
Final Thoughts
Knowing how to use automatic jump starter can make a dead-battery emergency much easier to handle. The basic procedure is to ensure the jump starter has enough charge, turn off the vehicle, locate the correct battery or jump-start terminals, connect the positive and negative clamps correctly, allow the automatic system to check the connection, and start the engine.
The smart features found in many modern jump starters—including reverse-polarity protection, short-circuit protection, smart clamps, and automatic battery detection—can make the process easier and safer. However, these features should be treated as additional protection rather than a substitute for correct battery connections.
Before using any automatic jump starter, confirm that it is compatible with your vehicle’s voltage, engine size, and fuel type. If the battery is cracked, swollen, leaking, frozen, or otherwise damaged, do not attempt to jump-start it.
Finally, remember that a jump starter solves a starting problem, not necessarily the underlying battery problem. If your vehicle repeatedly needs a jump, have the battery, alternator, starter, and charging system inspected. A properly maintained automatic jump starter is an excellent emergency tool, but understanding why your battery keeps dying is the better long-term solution.